 This post is a starting point for anyone who wants to use 802.1X authentication with Aerohive APs and Microsoft NPS. I will provide configuration screen shots for both of Aerohive’s management platforms and for NPS running on Microsoft Windows 2008 Server. It is not intended to be an exhaustive guide, but should be a decent starting point. Every implementation will be different in some respect, and some of these steps may not be the exact manner in which you configure Microsoft NPS. The steps for Aerohive may also be different depending on what you are trying to accomplish. I’ll make sure to note my particular scenario when appropriate.
Versions Used:
HiveManager Classic/HM6/HMOL – 6.8r7a
HiveManager NG – 11.19.99.0 (March 2017)
Microsoft Windows 2008 Server
Assumptions:
- Basic understanding of navigation within the HiveManager Classic and/or NG interface.
- No RADIUS objects or user profiles for 802.1X authentication have been configured within HiveManager Classic or NG. If you have already configured some of them, just skip the steps that cover the creation of those objects.
- Microsoft NPS is installed and a server certificate for the NPS machine has been issued and installed.
Scenario
Company XYZ wants to authenticate Active Directory users on a single 802.1X enabled SSID. They want to be able to treat corporate users and contractors with different security policies, QoS, time of day restrictions, etc. This will involve placing the two different types of users in separate user profiles to control access and end user experience. If a corporate user connects, that user will be placed into VLAN 202 after membership in the corporate users group in Active Directory has been verified. If a contractor user connects, that user will be placed into VLAN 203 after membership in the contractor user group in Active Directory has been verified.
Note: To skip down to the HiveManger NG configuration section, click here.
HiveManager Classic Configuration
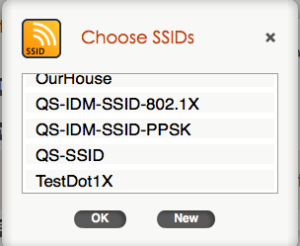
- From within the Network Policy Guided Configuration, the first step is to add an 802.1X SSID. If you have not already created one, click on “Choose” and then click on “New”:
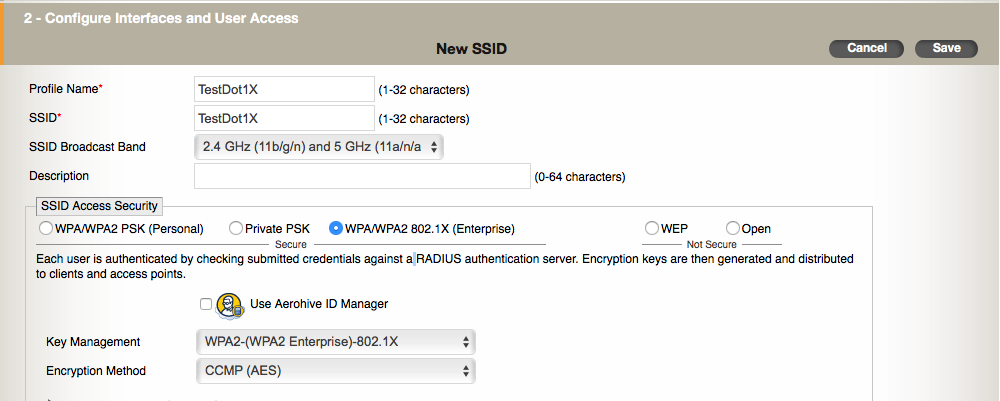
 2. Another screen will open up to configure this new SSID. Name it whatever you want and select which bands it will be broadcast on. Next, ensure the “WPA/WPA2 802.1X (Enterprise)” button is selected and then click on “Save”.
3. You will be returned to the main configuration screen for the network policy and it will look something like this:
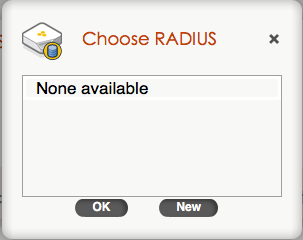
4. Now that the SSID is shown, you will need to select the RADIUS server to use. This will be the “AAA Client Settings” object that is found under the Configuration/Advanced Configuration/Authentication section within HiveManager. Since no RADIUS server is defined, you need to click on the “<RADIUS Settings>” segment and choose “New”.
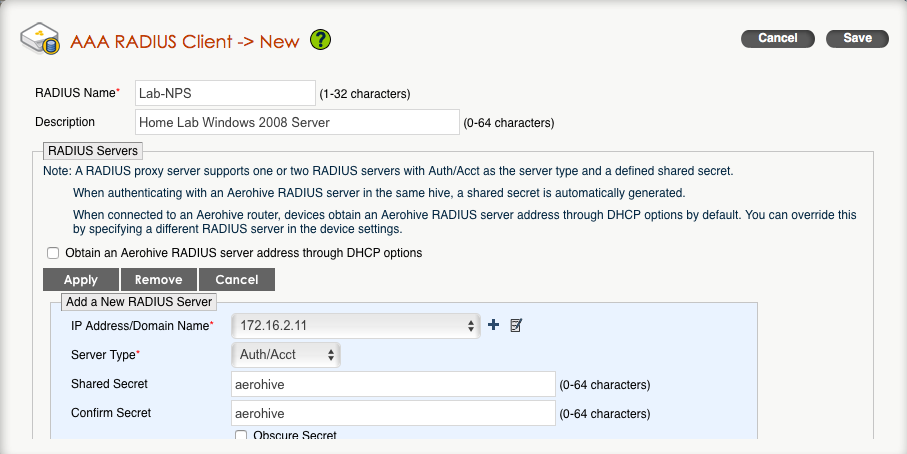
5. Type in the name of this RADIUS object and give it a description if you want. You will need to create an IP address or domain name object and assign it to the “IP Address/Domain Name” field. I tend to favor using IP addresses over host names, but do whatever you prefer. You will also need to enter a shared secret that will need to match what is configured on the NPS side.
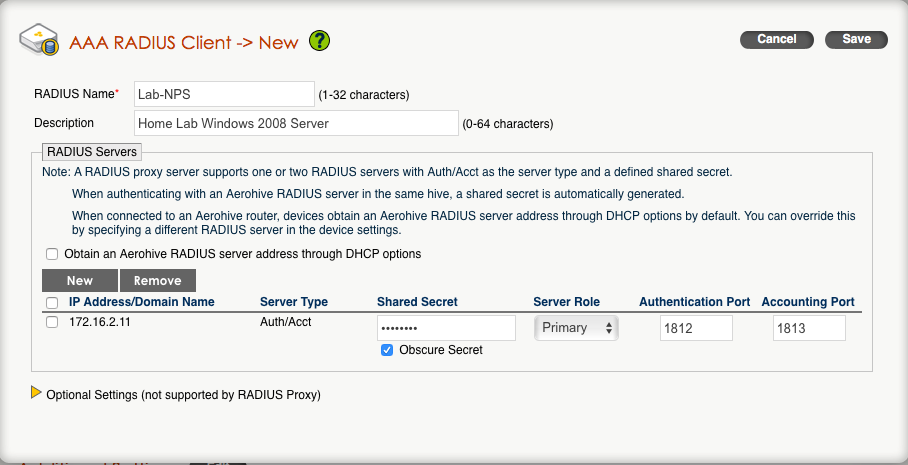
6. Click on “Apply” and it should look like this:
7. Click “Save” and it will return you the main configuration screen for the network policy. It probably looks like this:
8. Since we want to place corporate users in VLAN 202 and contractor users in VLAN 203, we need to add some user profiles for each of those VLANs and ensure the RADIUS attributes configured in NPS match the correct user profile. We’ll need to select a default user profile, and then select the user profiles for our corporate and contractor users. The default profile isn’t going to be used, but I created a restricted profile that has no access and goes into a dummy VLAN. Click on “Add/Remove” under the “User Profile” section. Next, choose your default user profile and then select the “Authentication” tab on the left and select the user profiles you want to assign authenticated users into. If those profiles do not exist, you can create them by clicking on the “New” button. I like to match the attribute value to the VLAN in user profiles. If you don’t do this, just make sure you use the attribute value in the NPS configuration and not the VLAN id. There is a way to use the actual VLAN id instead of the attribute value, but it involves using a different RADIUS attribute. In NG, this issue does not exist from a configuration perspective. Once the profiles have been selected, click on “Save” and you should see something like this:
9. Basic 802.1X setup is now complete for HiveManager Classic. Push the configuration changes to the appropriate APs. Next, we will need to configure Microsoft NPS. Click here to move to that section.
HiveManager NG Configuration
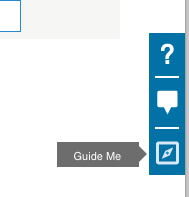
NG has an option that HiveManager Classic does not. You can step through the entire process of configuring an external RADIUS server by using the “Guided Configuration” method. On the far right side of every screen within the NG interface, there is a button that looks like this:
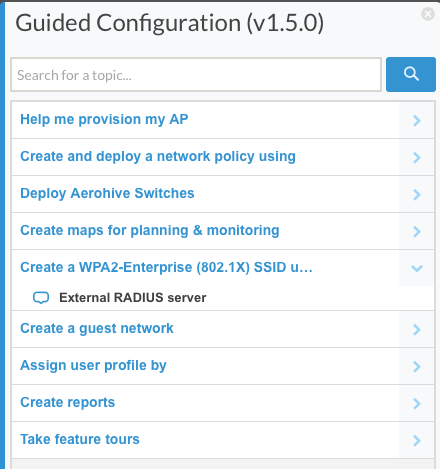
When you click on it, another screen appears with a list of all the guided configuration tasks available, and one of them is to create an external RADIUS server.
Here is how you do it without the guided configuration:
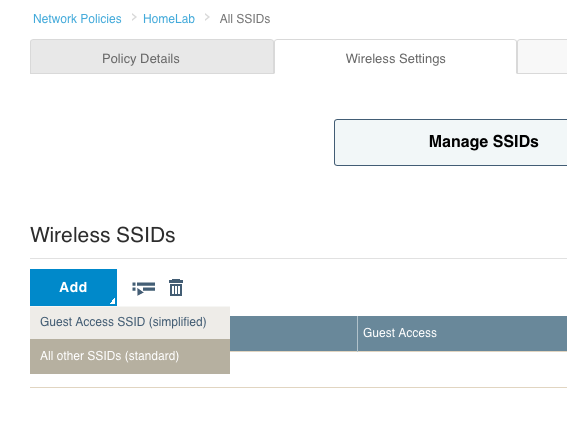
- Within the “Network Policy” configuration, after you have named the policy and selected whether it will be wireless, wired, or both, click “Next”. At the “Wireless Settings” tab, click the “Add” button and choose “All other SSIDs (standard)”.
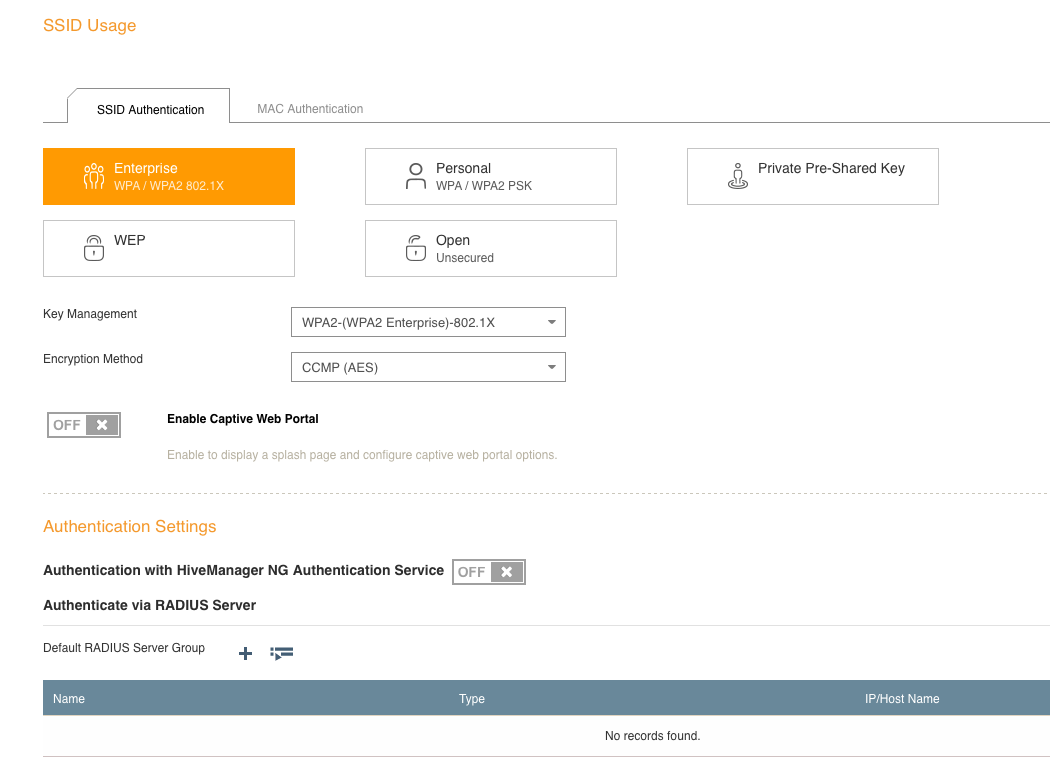
2. Select “Enterprise” for authentication type after naming the SSID.
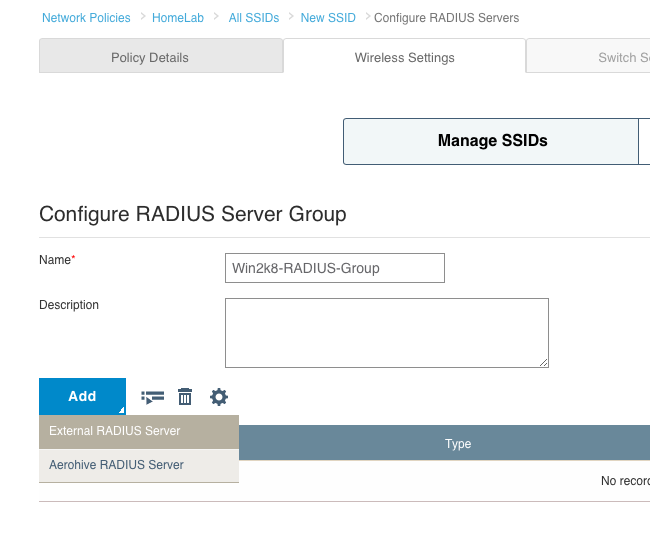
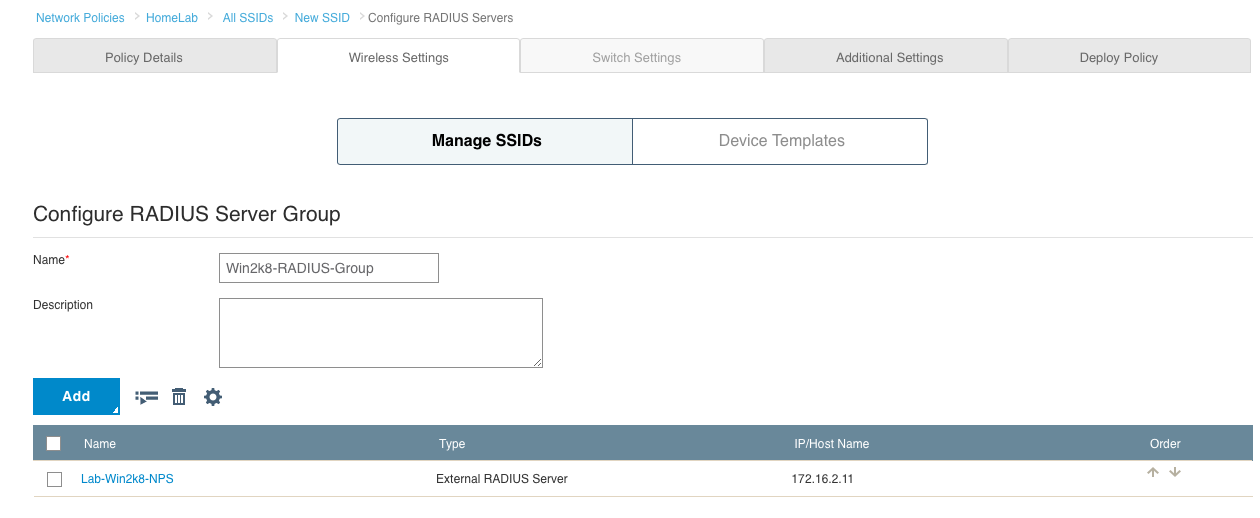
3. Next, you will need to define the RADIUS server, but before that, you will need to define a RADIUS server group. Click on the plus sign next to “Default RADIUS Server Group”. Name the group and then select “Add” and “External RADIUS Server”.
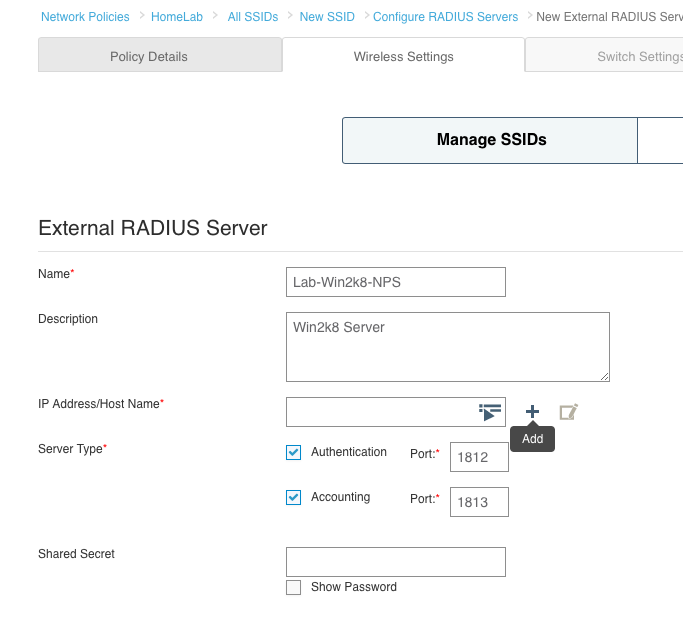
4. Give the RADIUS server a name and description(optional) and then click the plus sign next to the “IP Address/Host Name” field.
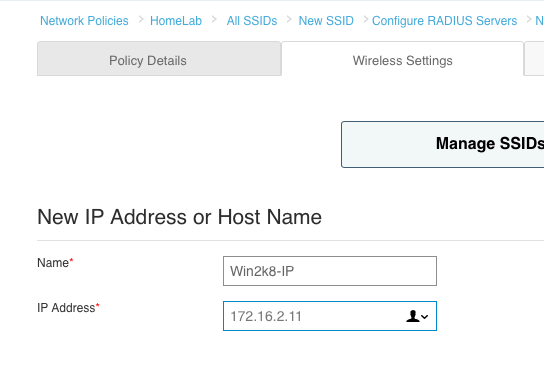
5. Give the object a name and type in the IP address of the RADIUS server. Click “Save”.
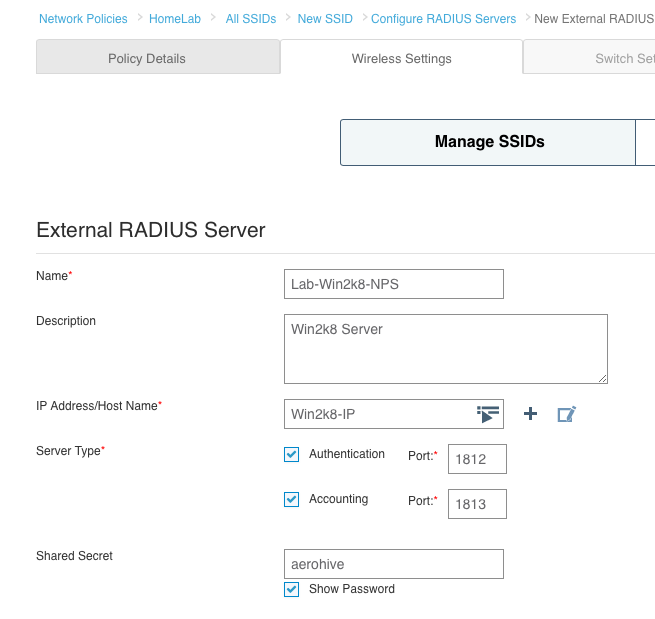
6. With the RADIUS server IP defined, the last thing you need to do is type in the shared secret that will match what we will configure shortly in NPS. Once that is entered, click “Save”.
7. Now that the RADIUS server is configured, you should see a screen similar to this one:
8. Click on “Save” and it should take you back to the main SSID configuration screen.
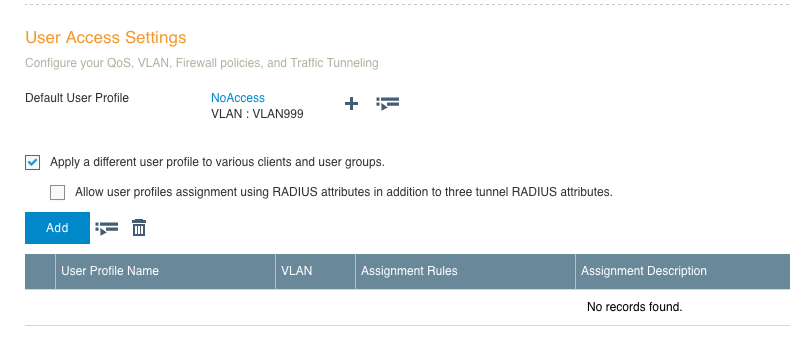
9. Scroll down the screen a bit and you will see the “User Access Settings” section, which is where you will add various user profiles that will get applied based on RADIUS attributes that are returned. You will need to check the box that says: “Apply a different user profile to various clients and user groups.” This will allow you to put a user into the correct profile based on what is returned by the RADIUS server.
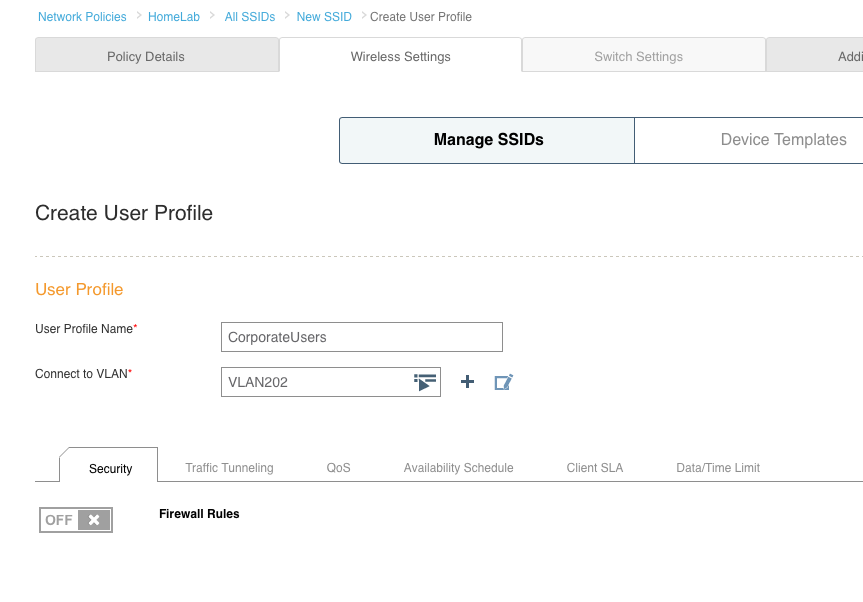
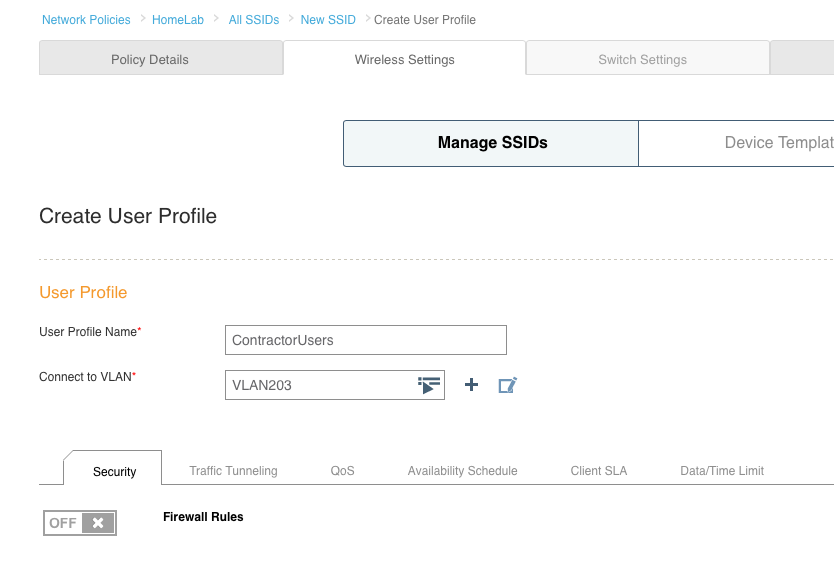
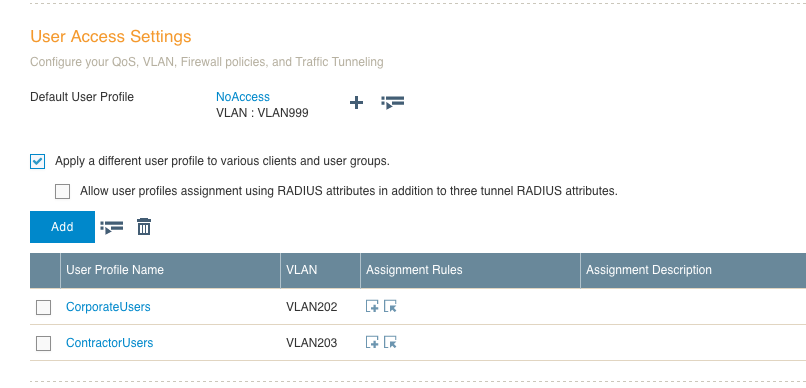
10. I already had a user profile with no real access defined, so I chose that as the default. I still need to create a user profile for the corporate and contractor users, and that is done by simply clicking the “Add” button and setting a profile name and VLAN. If the VLAN each user profile will be assigned to does not exist, you will need to create the VLAN object by clicking on the plus sign next to the “Connect to VLAN” field. Here are the profiles for the corporate user and the contractor user. There are plenty of things you can set within the user profile, but those specific items will not be covered in this post.
11. Once those profiles have been created, the screen should display something like this:
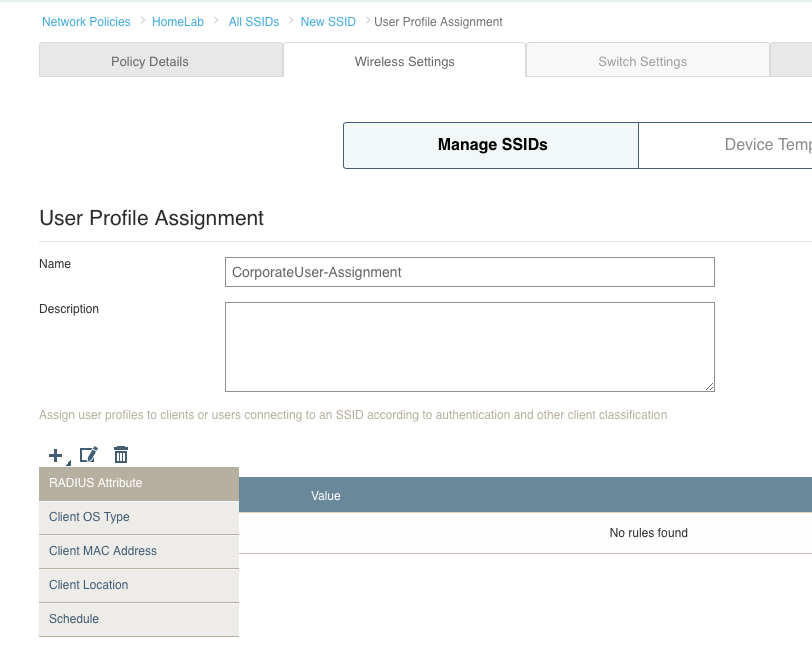
12. The next step is to add assignment rules so that the RADIUS attributes are used to put the user into the appropriate user profile. Click the plus sign under “Assignment Rules” for the first user profile(CorporateUsers in my case), and then click the plus sign on the following screen that will look like this:
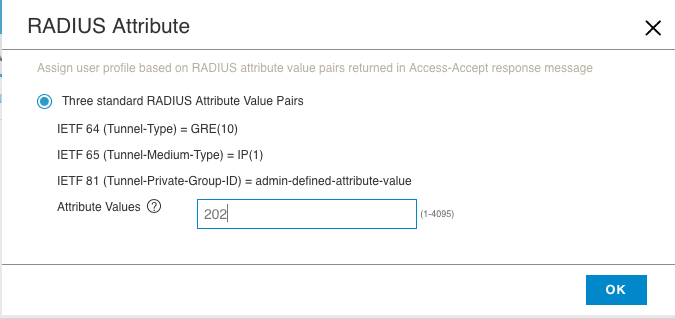
13. Select “RADIUS Attribute” and then put the VLAN number in the “Attribute Values” section.
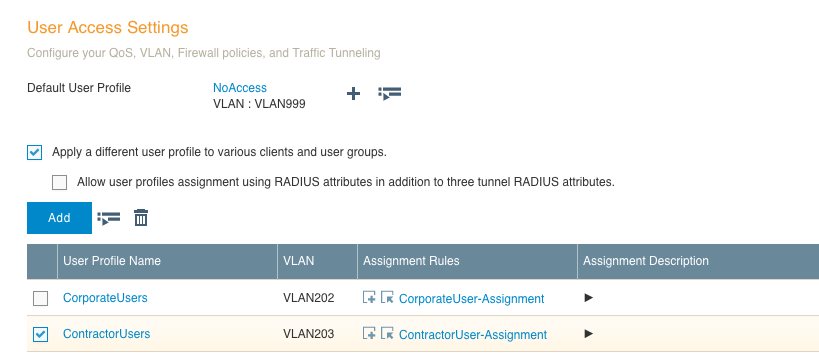
14. Click “OK” and then do the same for any other user profiles you want to match up with the RADIUS response. It should look similar to this when you are done:
15. Click “Save”. Basic 802.1X setup is now complete for HiveManager NG. Push the configuration changes to the appropriate APs by stepping through the other screens in the network policy or via the Monitor tab. Next, we will need to configure Microsoft NPS. Click here to move to that section.
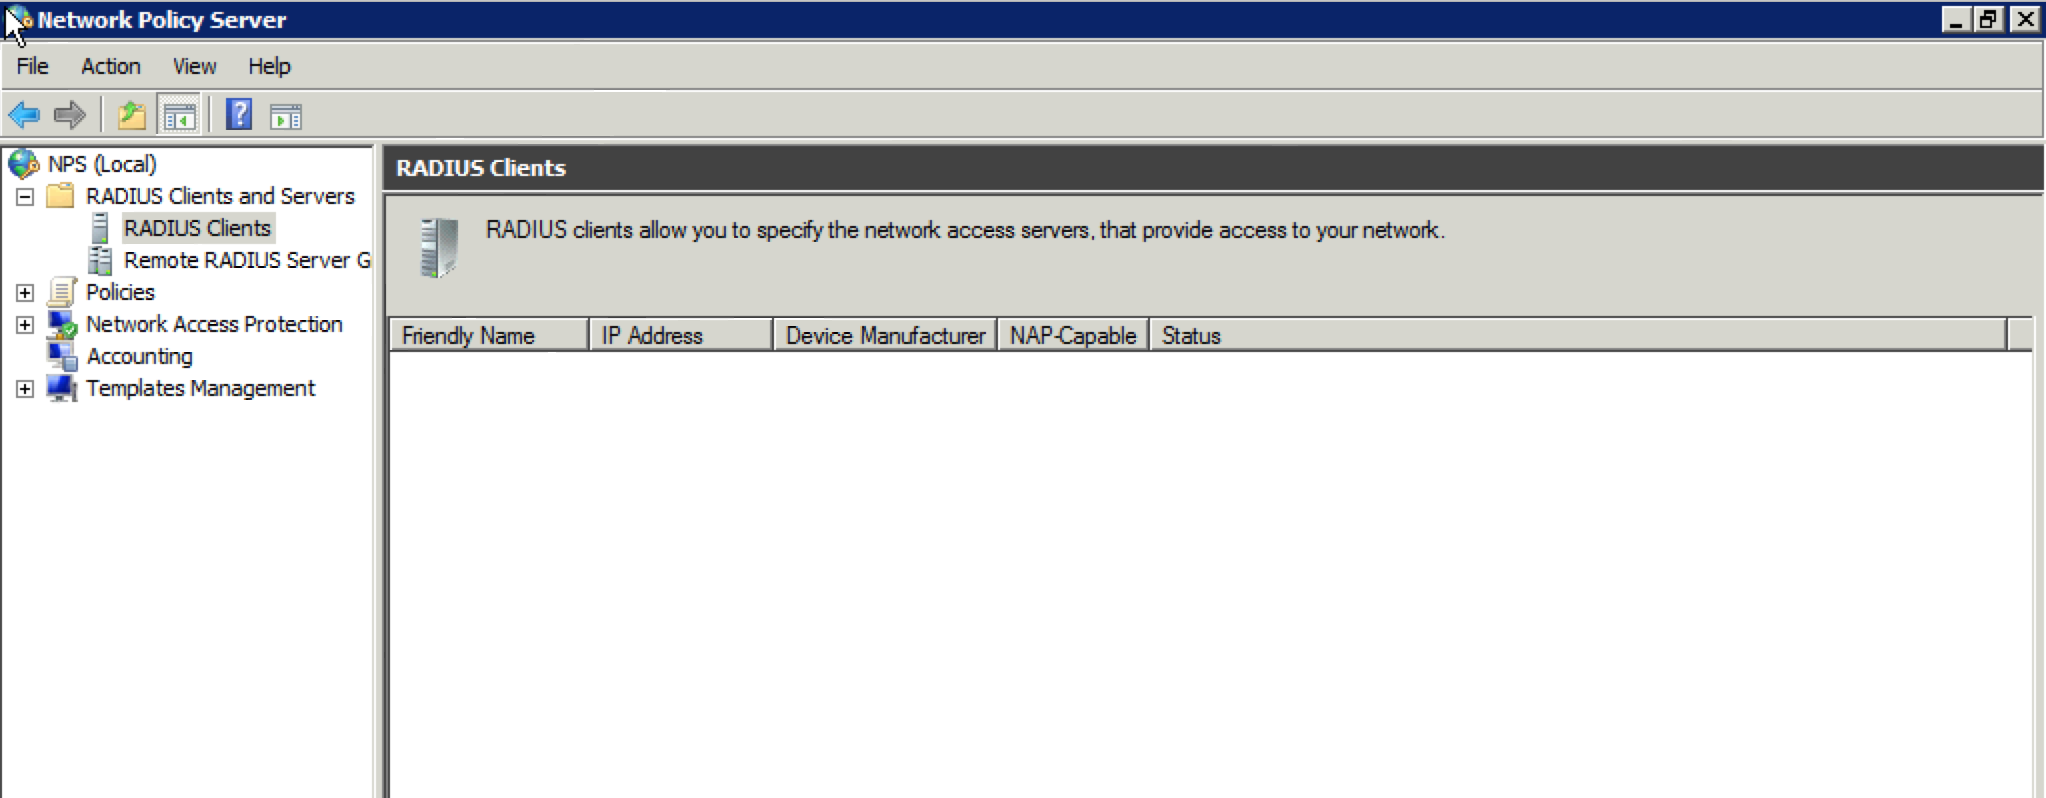
- Open up the NPS console and expand the “RADIUS Clients and Servers” folder.
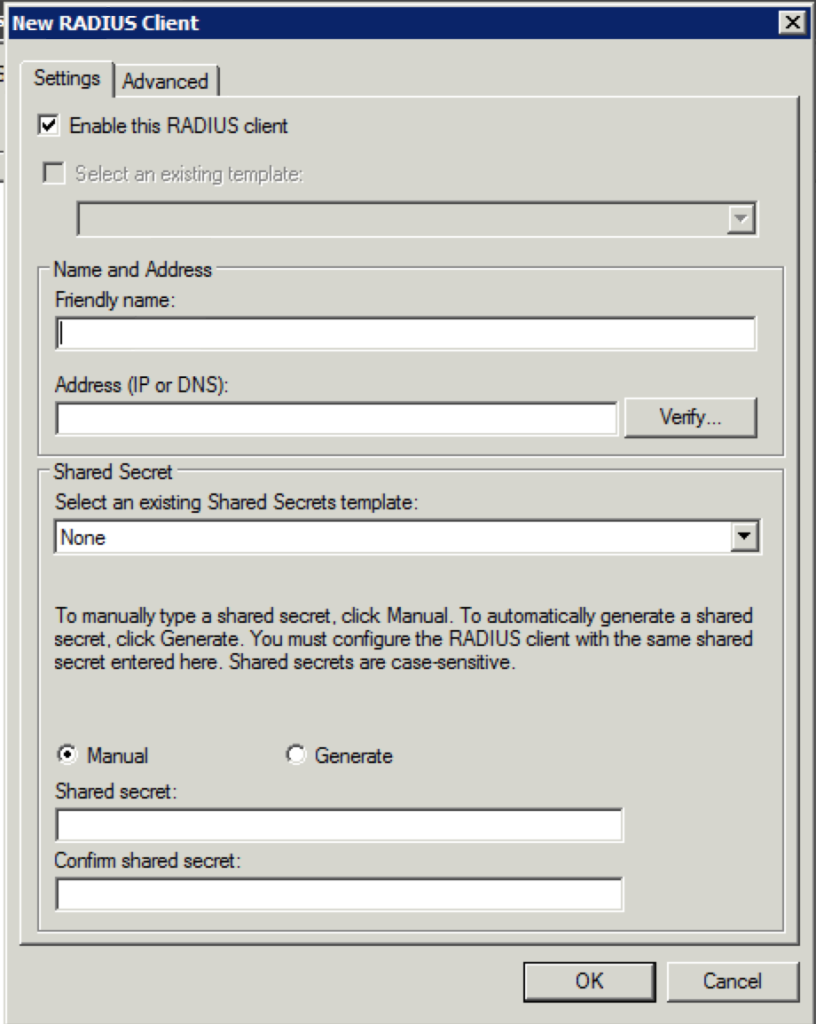
2. Right click on “RADIUS Clients” and select “New”. The following window should appear:
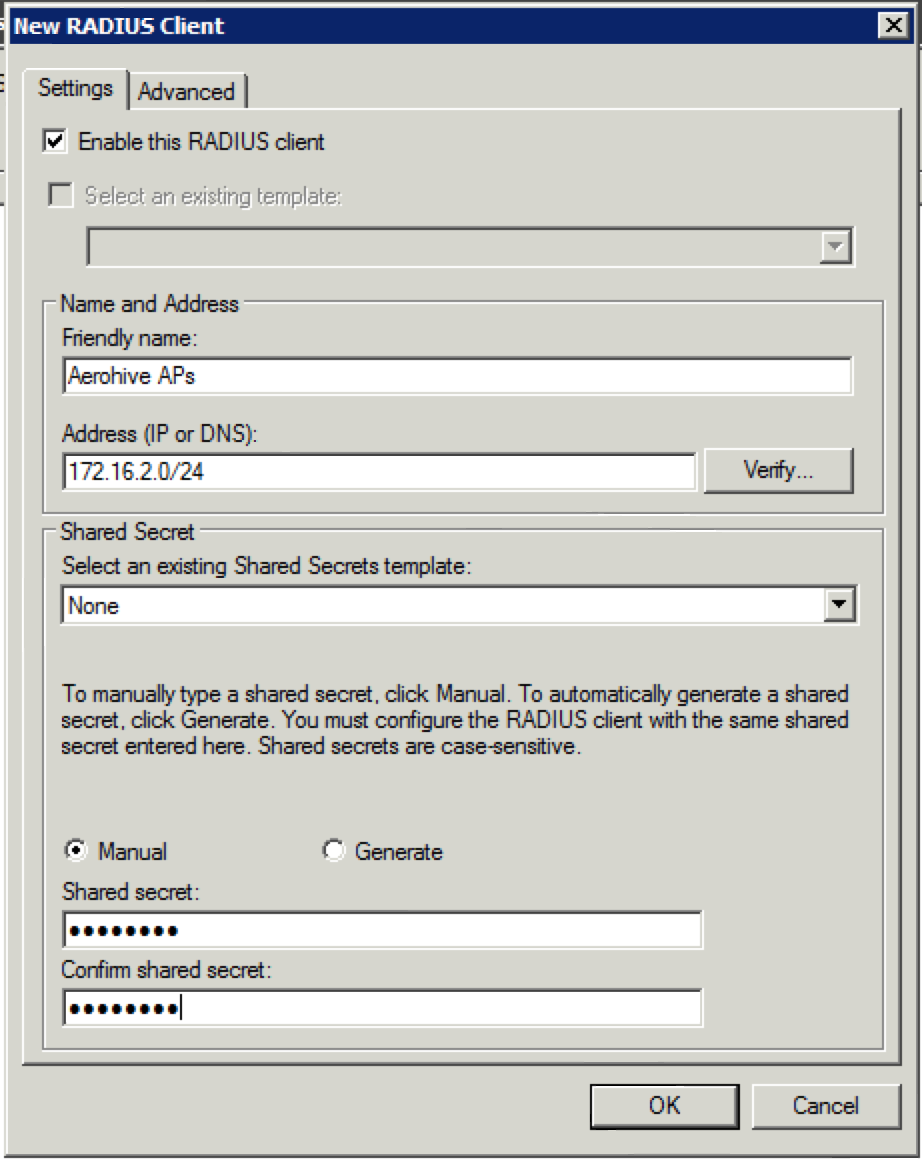
3. Fill in the fields as shown below with a “Friendly name” and the IP address(es) of the AP(s) that will be functioning as the authenticator for wireless clients. You can use an entire range as shown below, or you can use individual IP addresses and create multiple “RADIUS Client” objects. Make sure the shared secret matches what was configured in HiveManager. Once that is done, click on “OK”.
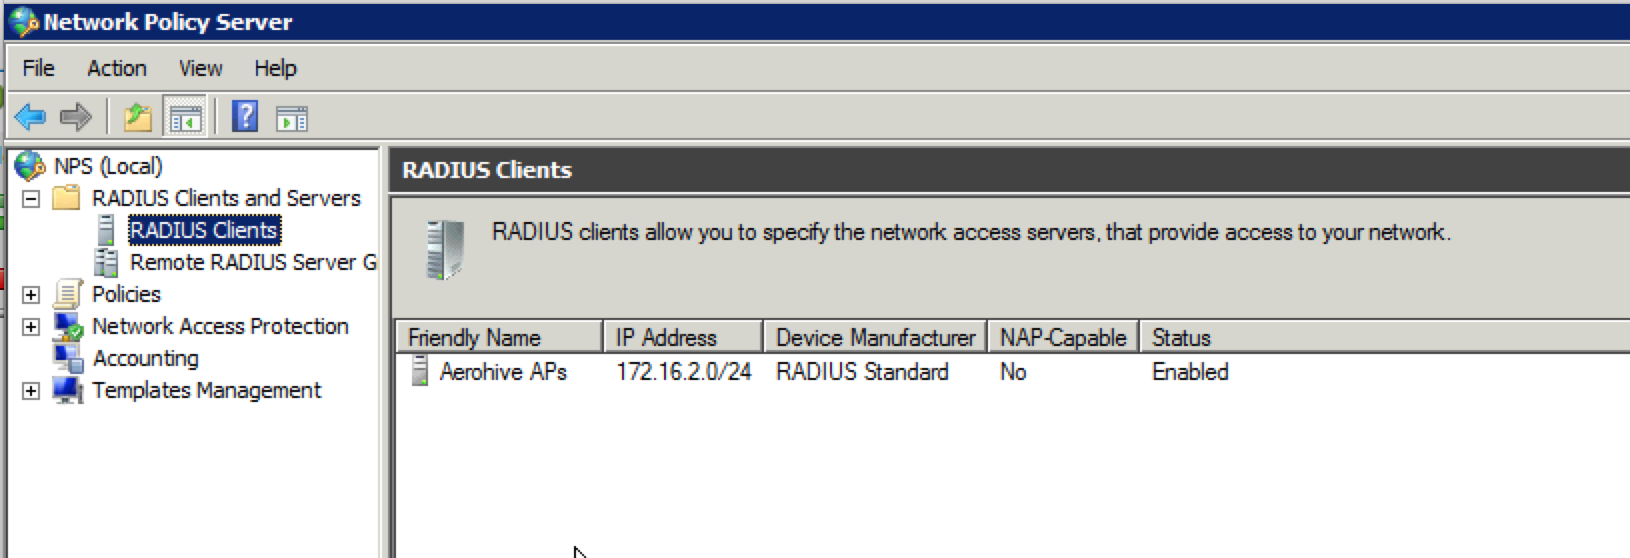
4. Now it should look something like this:
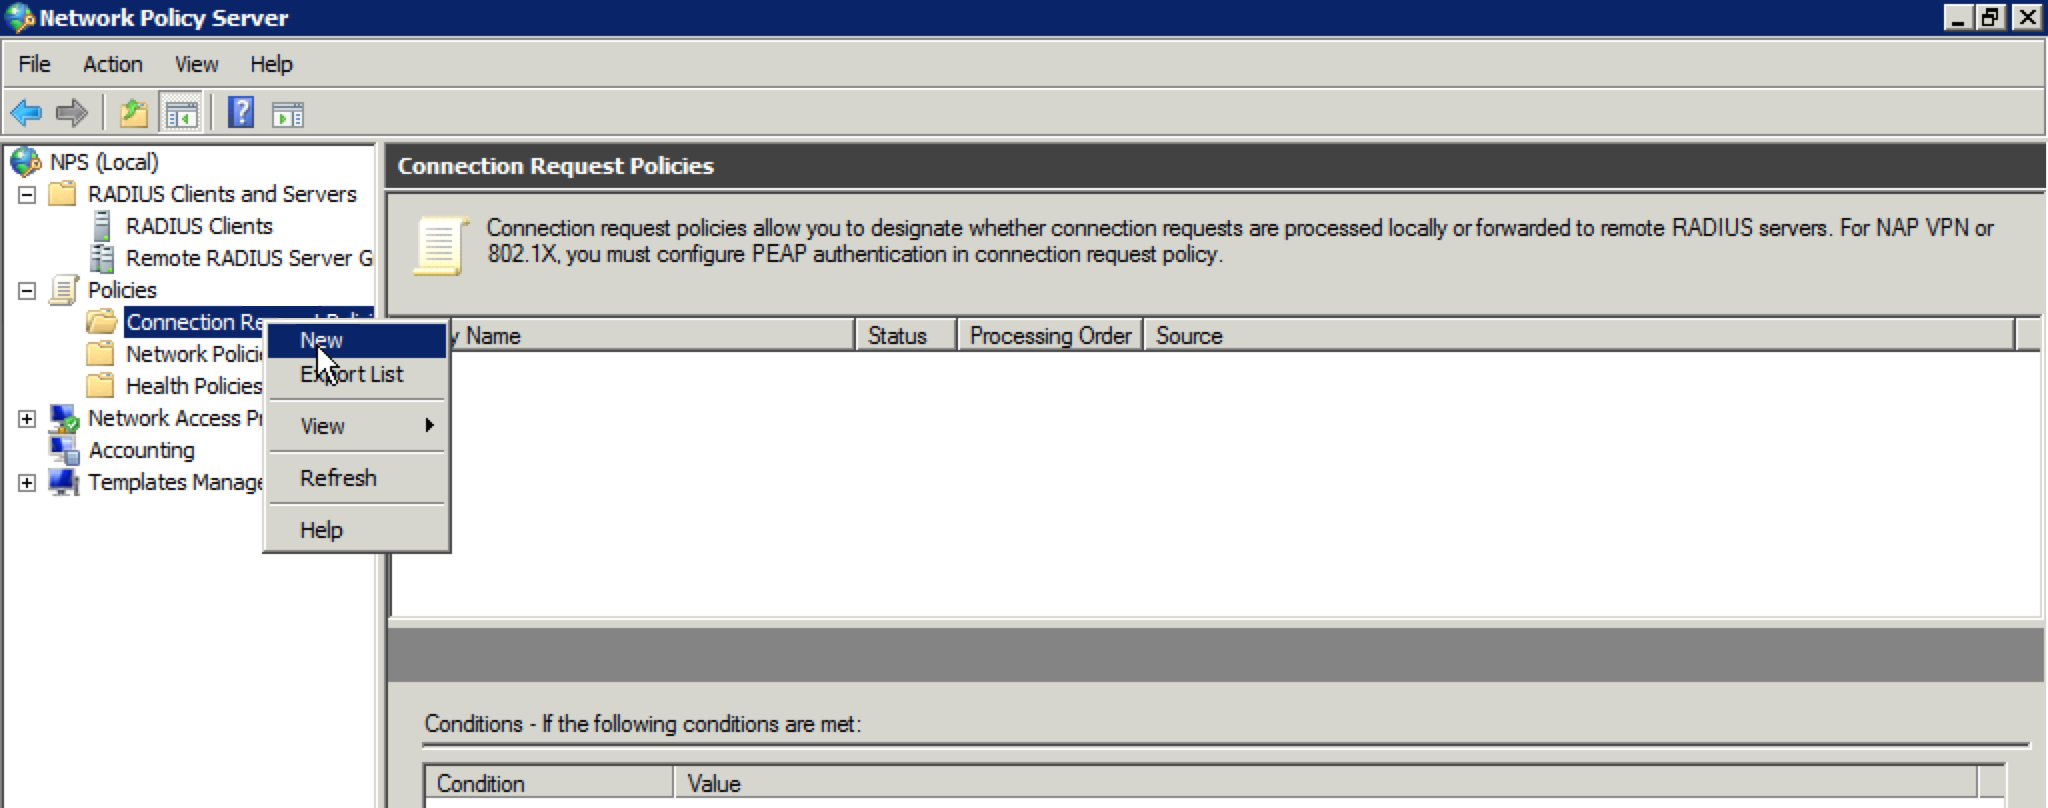
5. Next, expand the “Policies” section on the far left side, right click on “Connection Request Policies” and select “New”. We don’t need to get too specific in this section. We just want to ensure that our 802.1X authentication requests get processed locally.
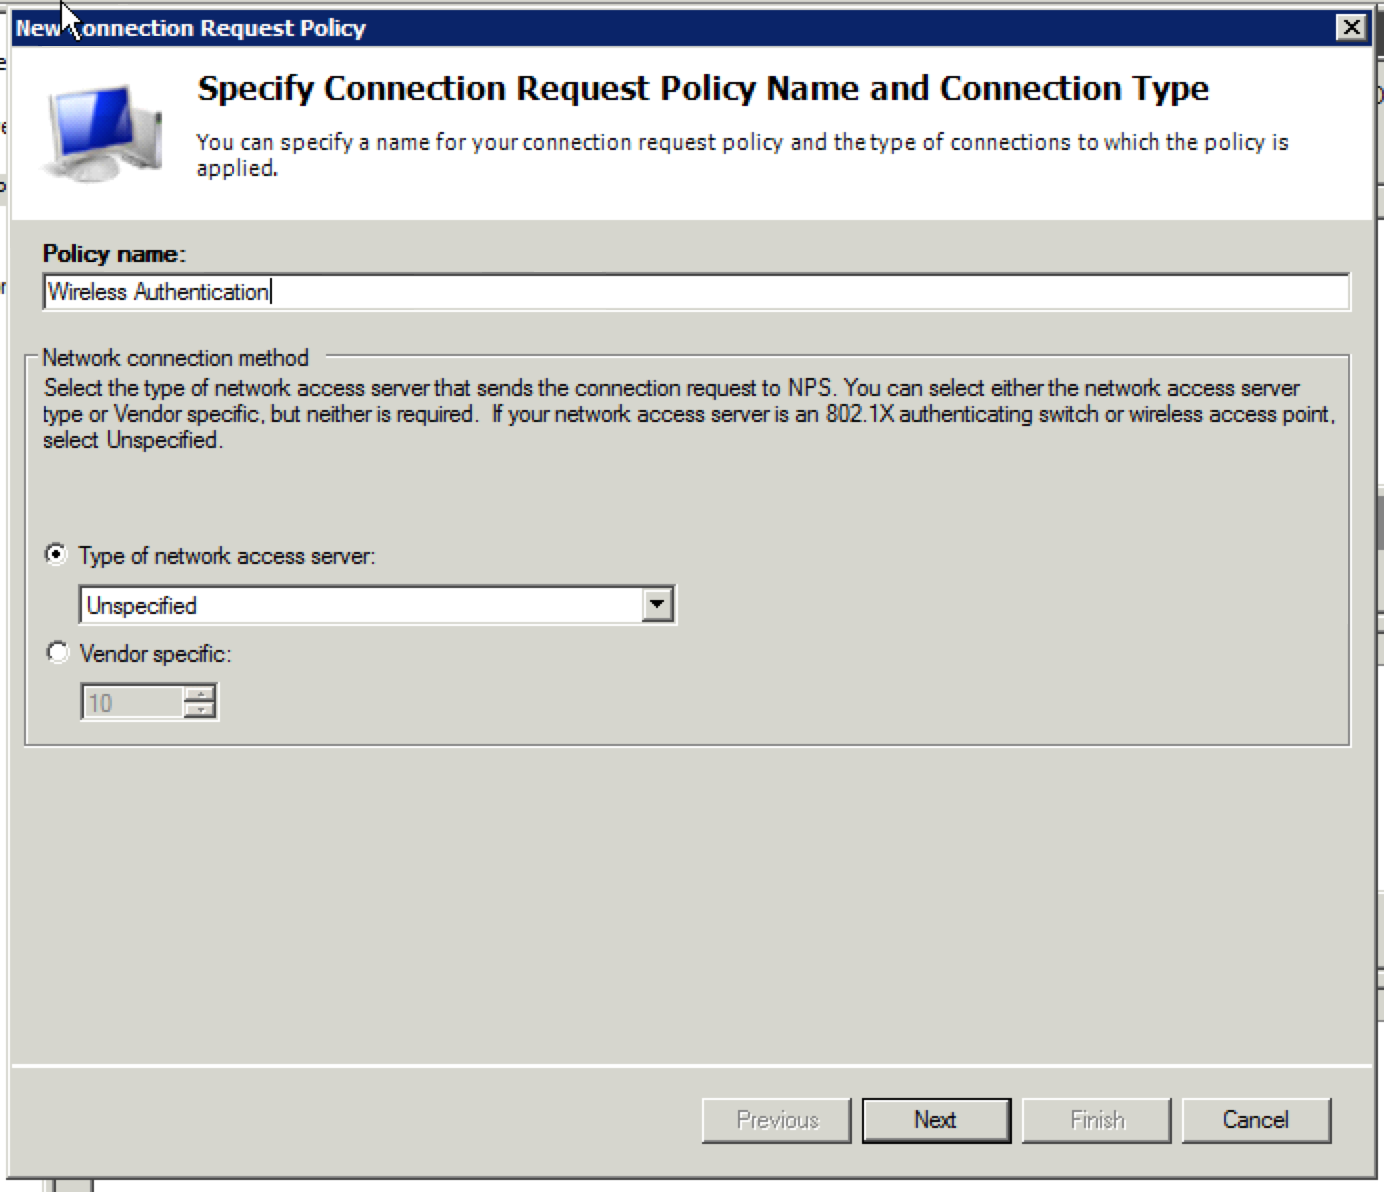
6. Name the policy whatever you want and click “Next”.
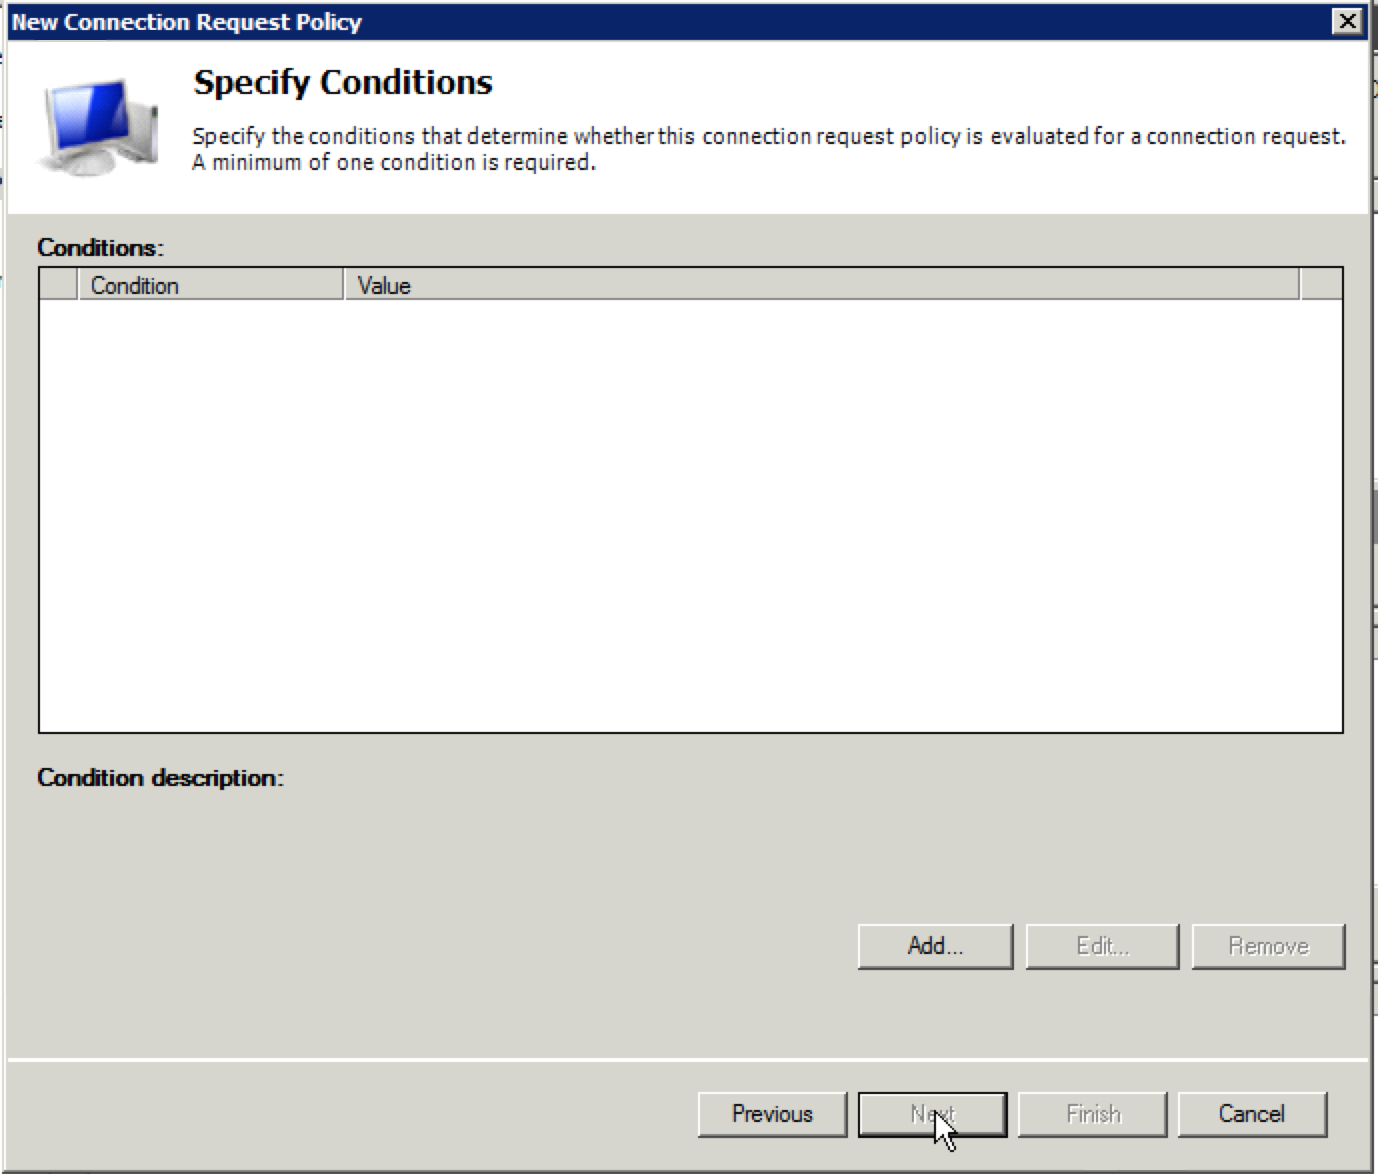
7. The next screen is where you will need to specify a condition. Click “Add”.
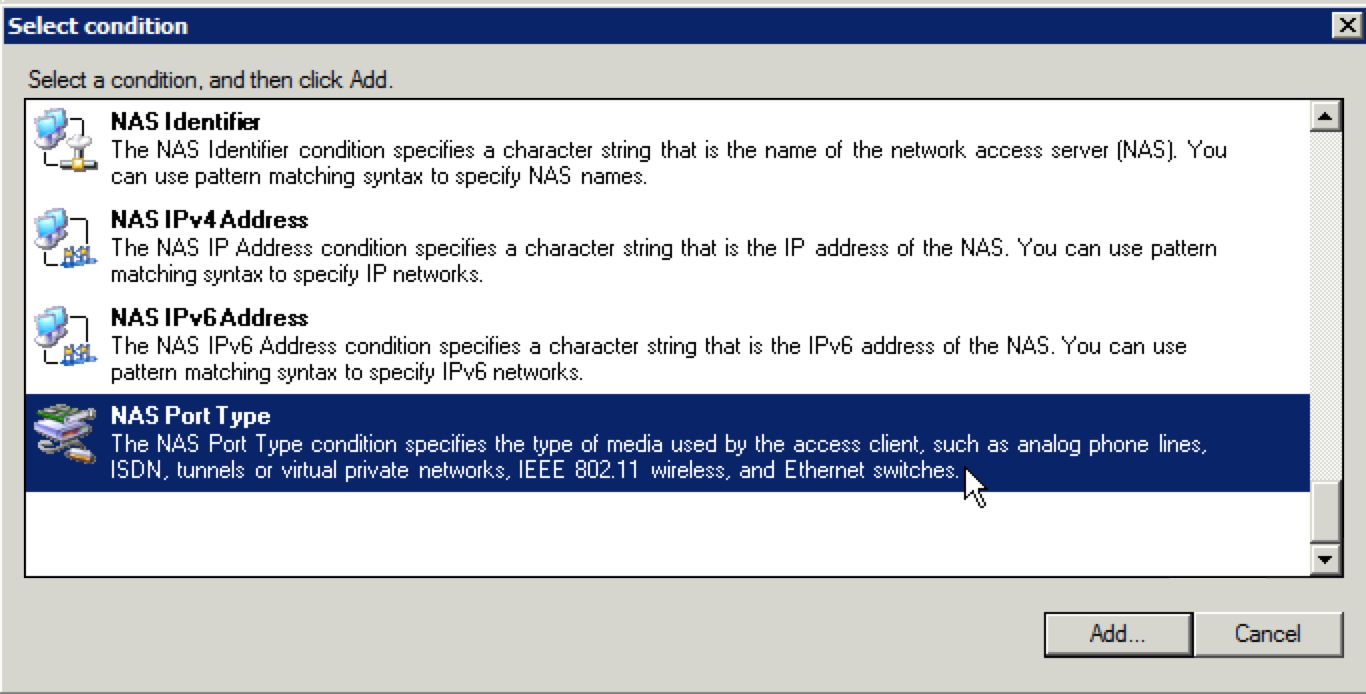
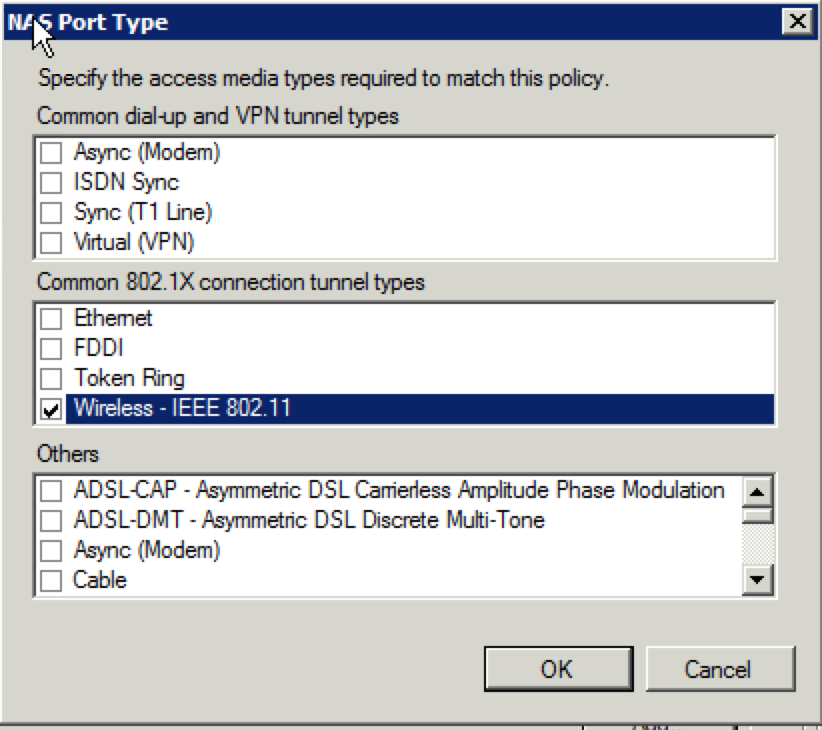
8. When the next screen appears, you have several options to choose from. I just selected “NAS Port Type”, but you can choose whatever method you want. More complex environments might go a different route than this. Select the method you want to use and click “Add”.
9. For the method I chose(NAS Port Type), I just selected “Wireless – IEEE 802.11”. Make your choice and click “OK”.
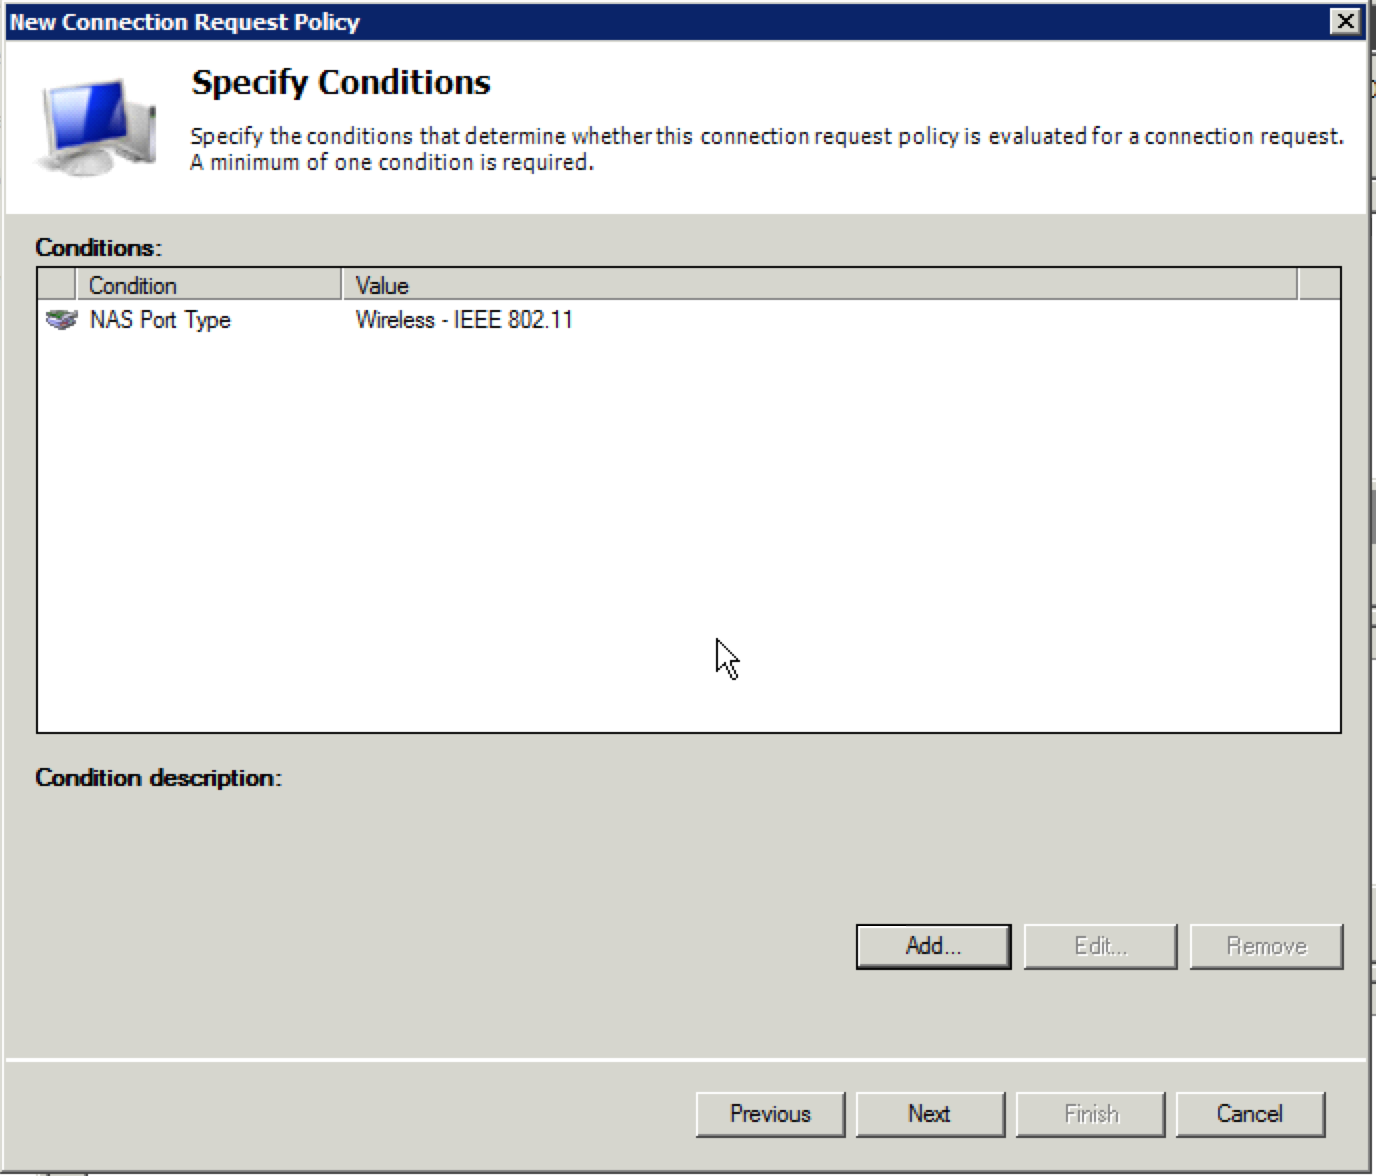
10. You should see your condition in the “Specify Conditions” screen. Click “Next”.
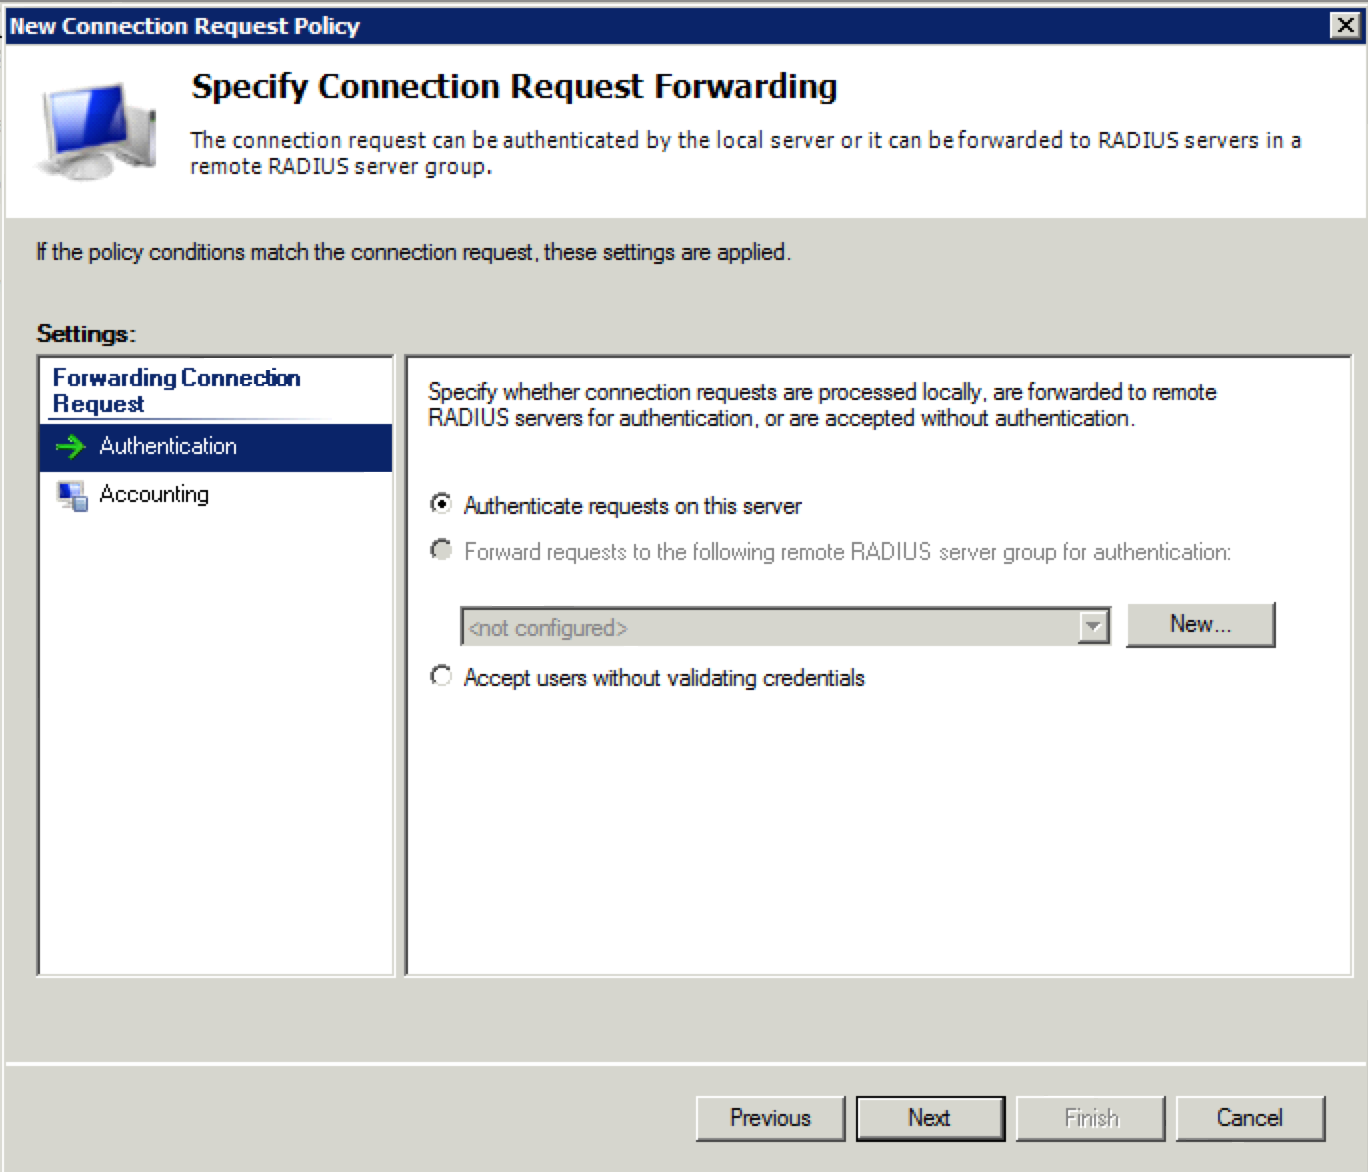
11. Click “Next” at this screen. Just accept the defaults.
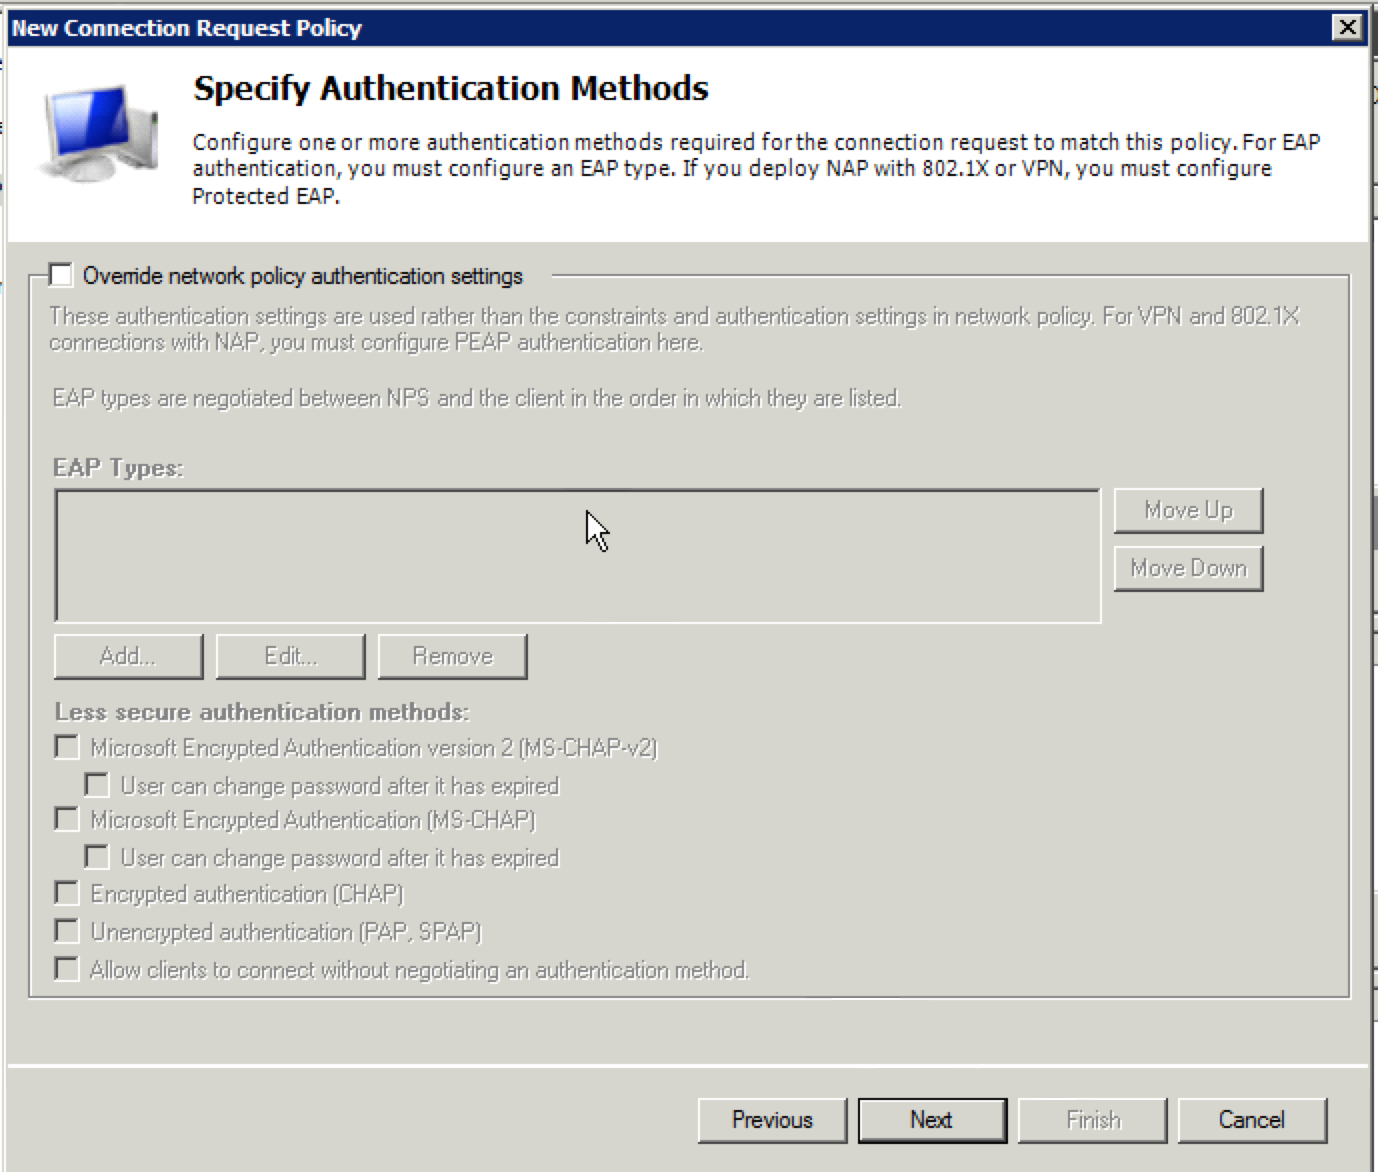
12. Click “Next” at this screen as well. The defaults are fine. We’ll handle the EAP type in the next section dealing with network policy. However, note that you can override the network policy settings and choose a different EAP type if you were fairly granular in terms of how you setup this connection request policy.
13. Click “Next” at this screen as well. The defaults are fine, but again, you can use this to get far more granular in how you respond to authentication requests.
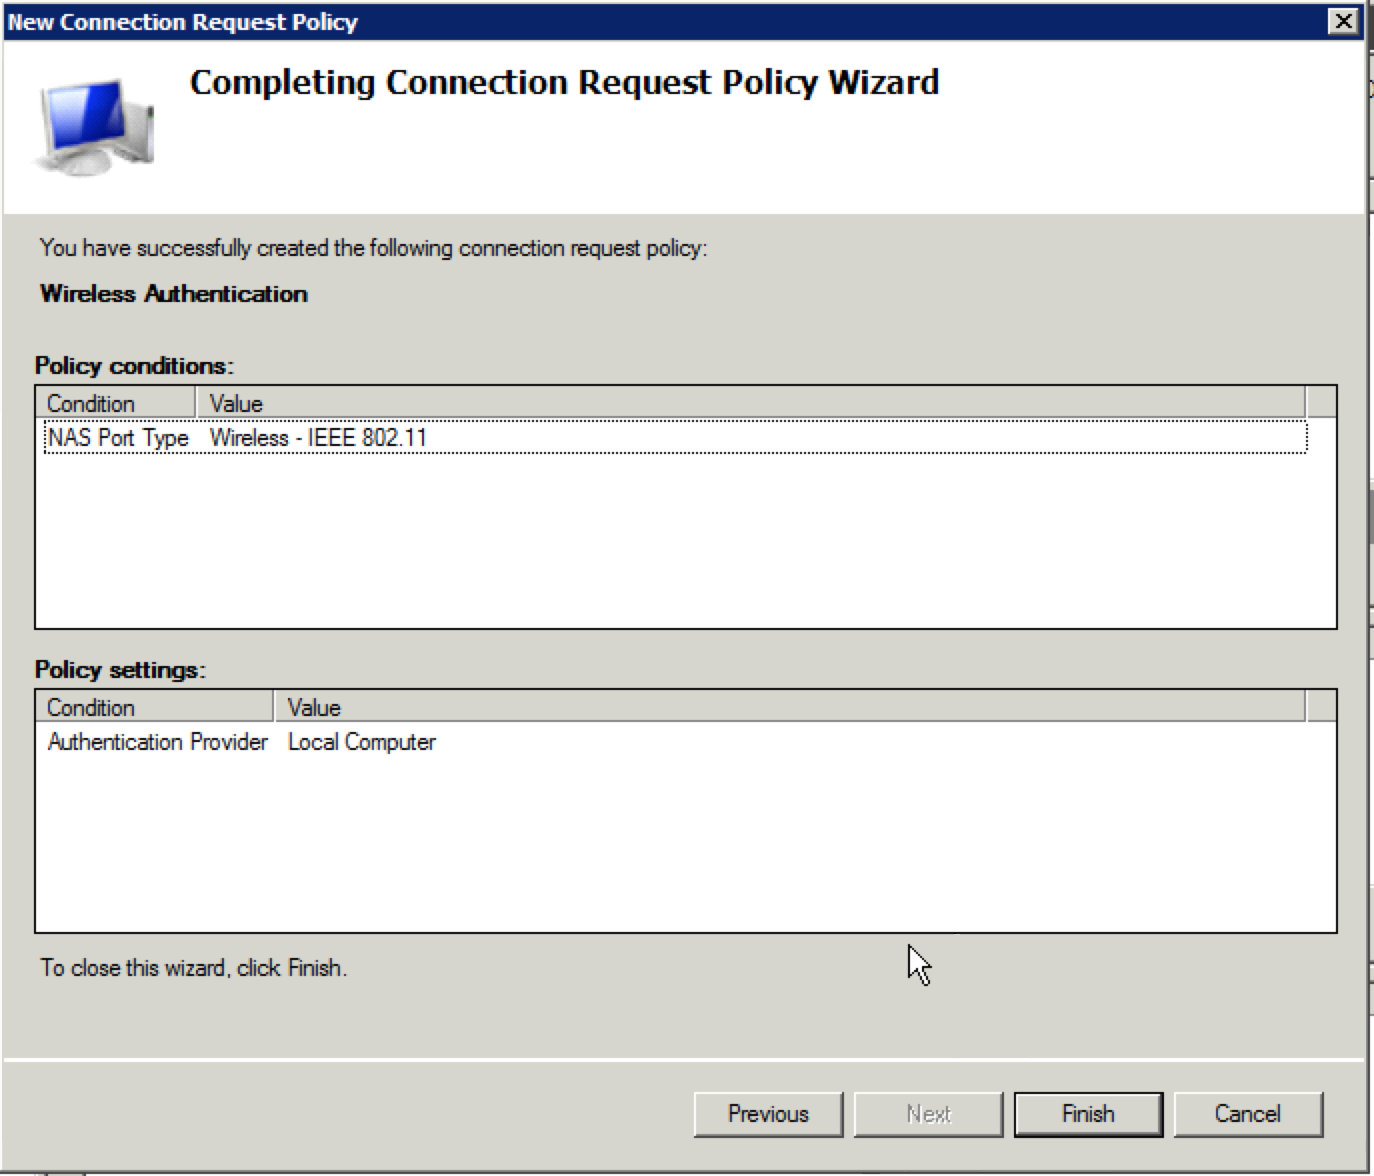
14. At this final screen, just click “Finish”.
Now you should see your Connection Request Policy that was just created.
The last portion of the NPS configuration is the creation of the network policy. For this example, I will be creating two of them. One for the corporate users and one for the contractor users. Your environment may be completely different. For example, in educational organizations, I normally see this broken up into students and staff/faculty.
15. Select the “Network Policies” folder on the far left side of the screen. You should see a screen similar to this:
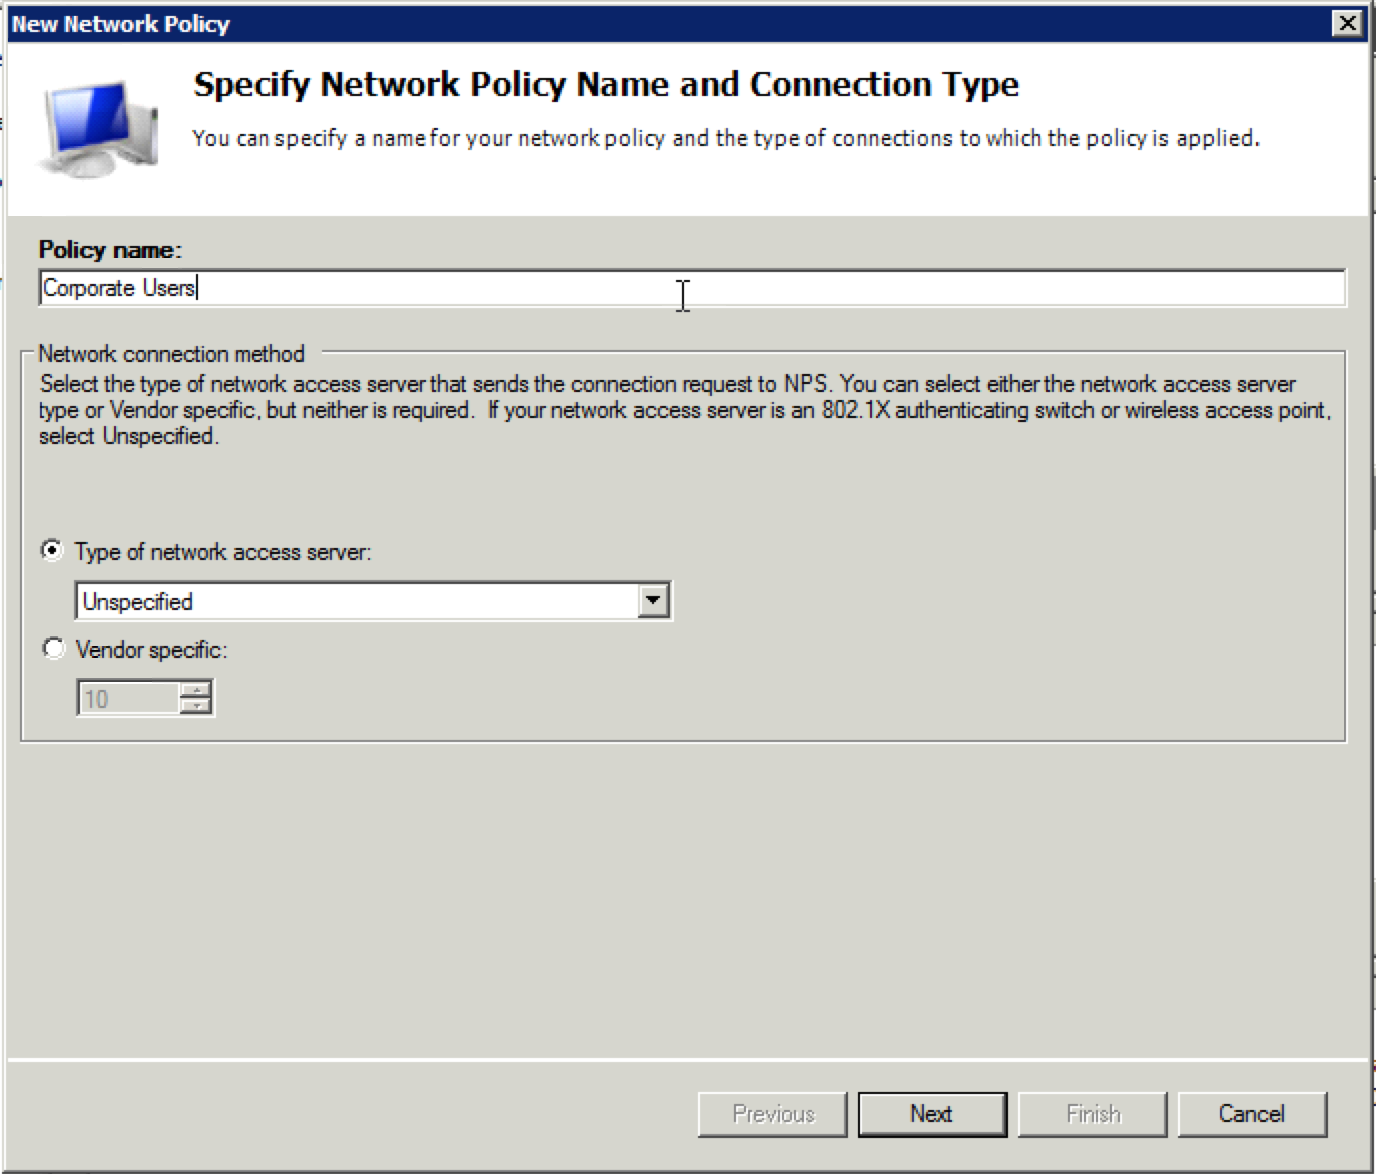
16. Right click on the “Network Policies” folder and select “New”. When the new window opens up, give the policy a name and click “Next”. Remember that you will be making multiple policies, so the name should reflect the group of users it will apply to, unless you are just using one user profile on the Aerohive side.
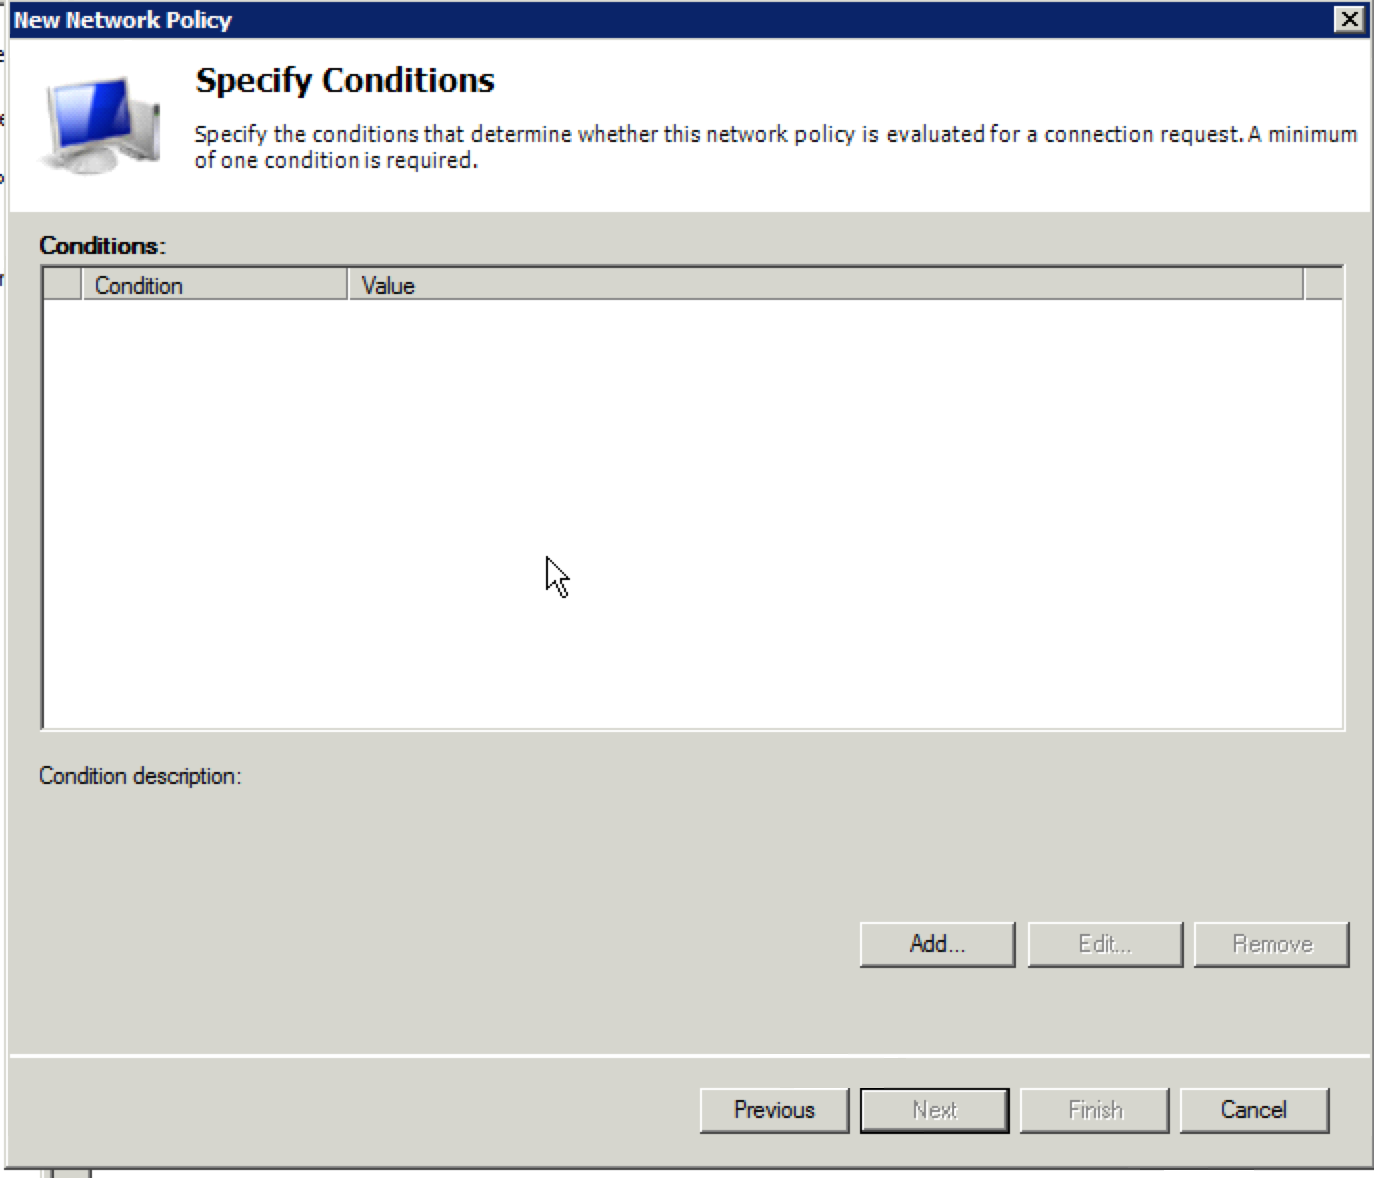
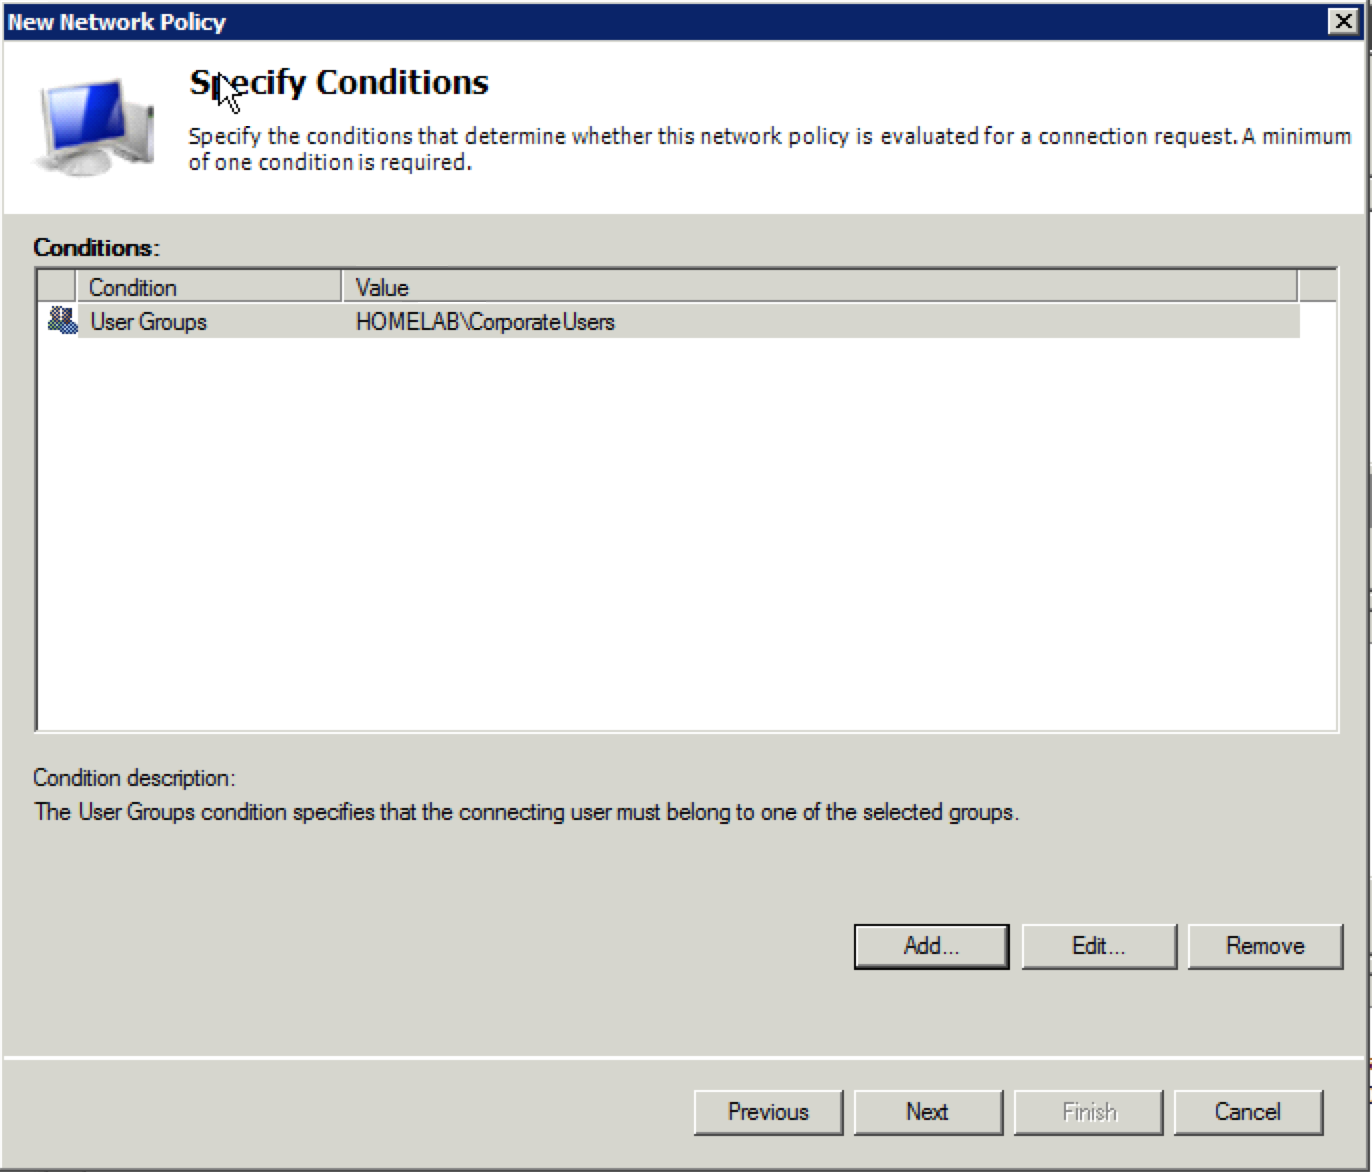
17. The next screen is going to be the “Specify Conditions” screen. This is where we will define which Active Directory group a user needs to be a member of for this policy to apply. Click the “Add” button.
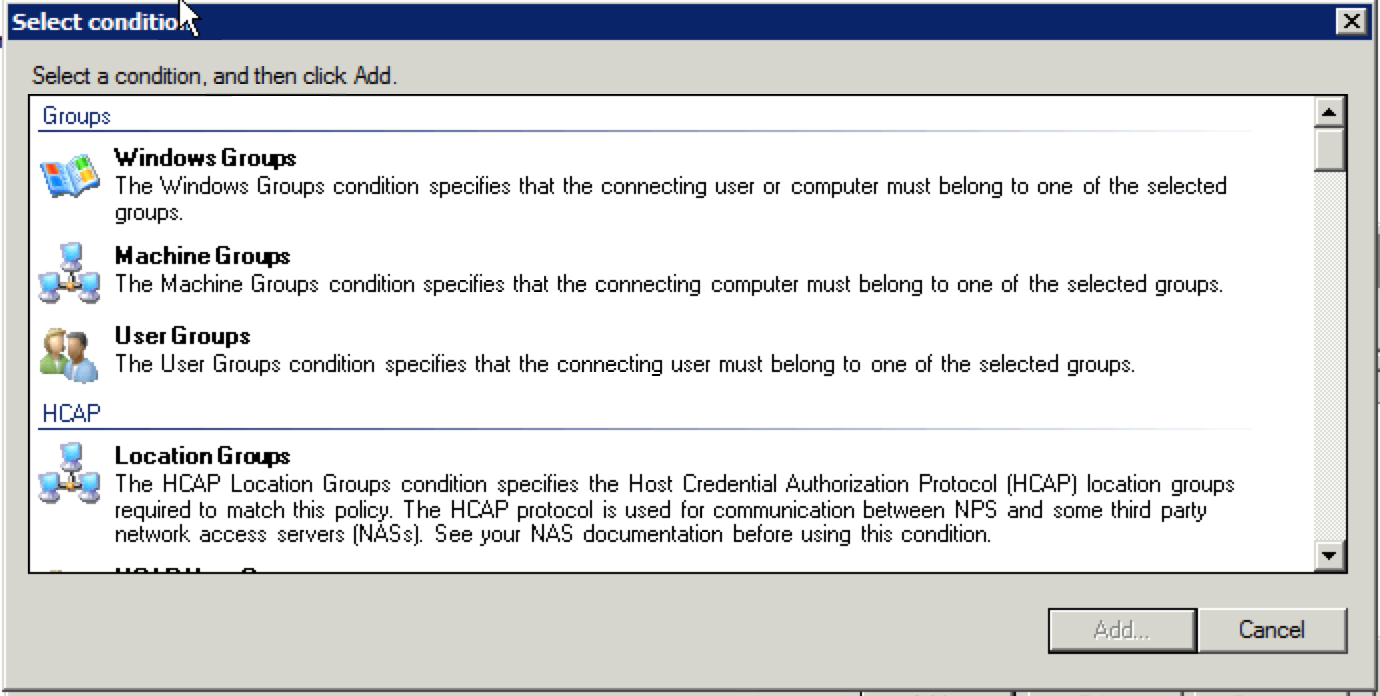
18. In the “Select condition” window, choose “User Groups” and click “Add”.
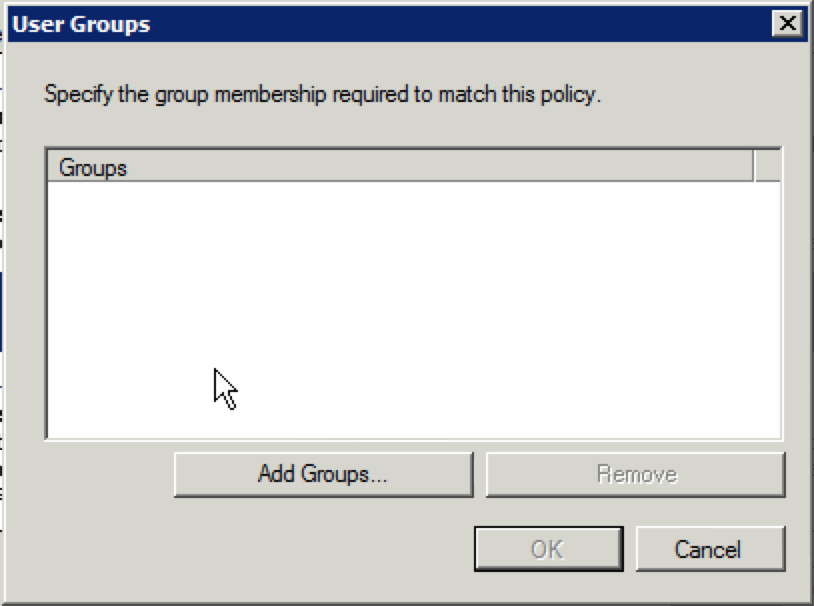
19. When the “User Groups” window appears, click “Add Groups”.
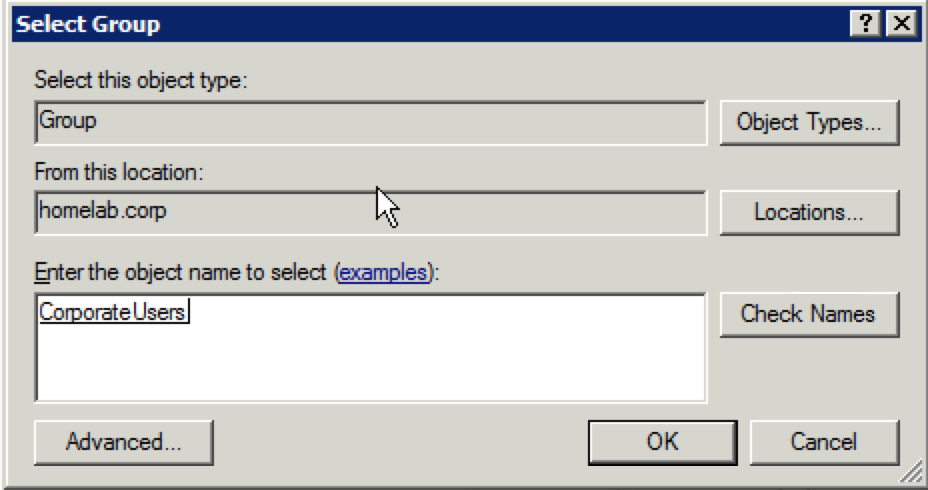
20. Type in the name of the group you need to authenticate the given group. In my example, I typed in “corporate” and hit the “Check Names” button. It automatically chose the “CorporateUsers” group I had created on a previous occasion. Once the proper group is displayed, click “OK”.
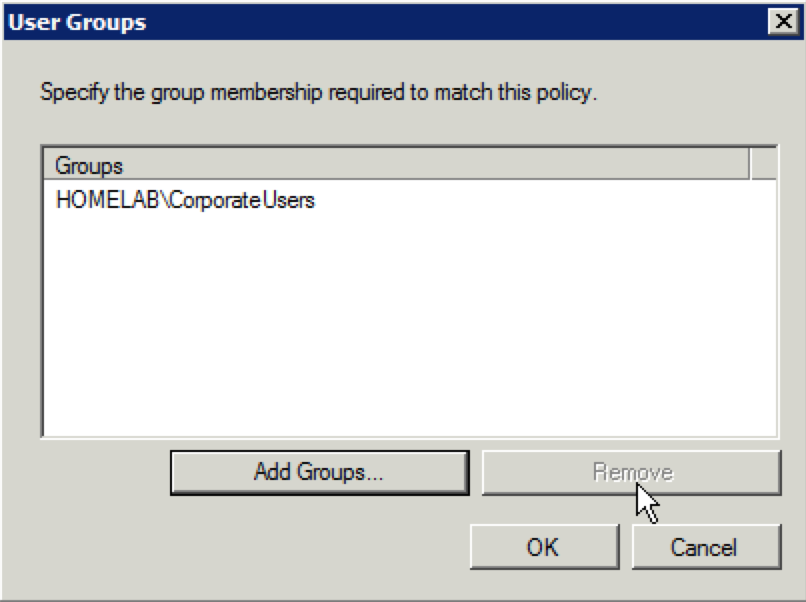
21. It will take you back to the “User Groups” window, but the correct group should be shown. Click “OK”.
22. Now you should be looking at the “Specify Conditions” portion of the “New Network Policy” configuration with your Active Directory group shown. Click “Next”.
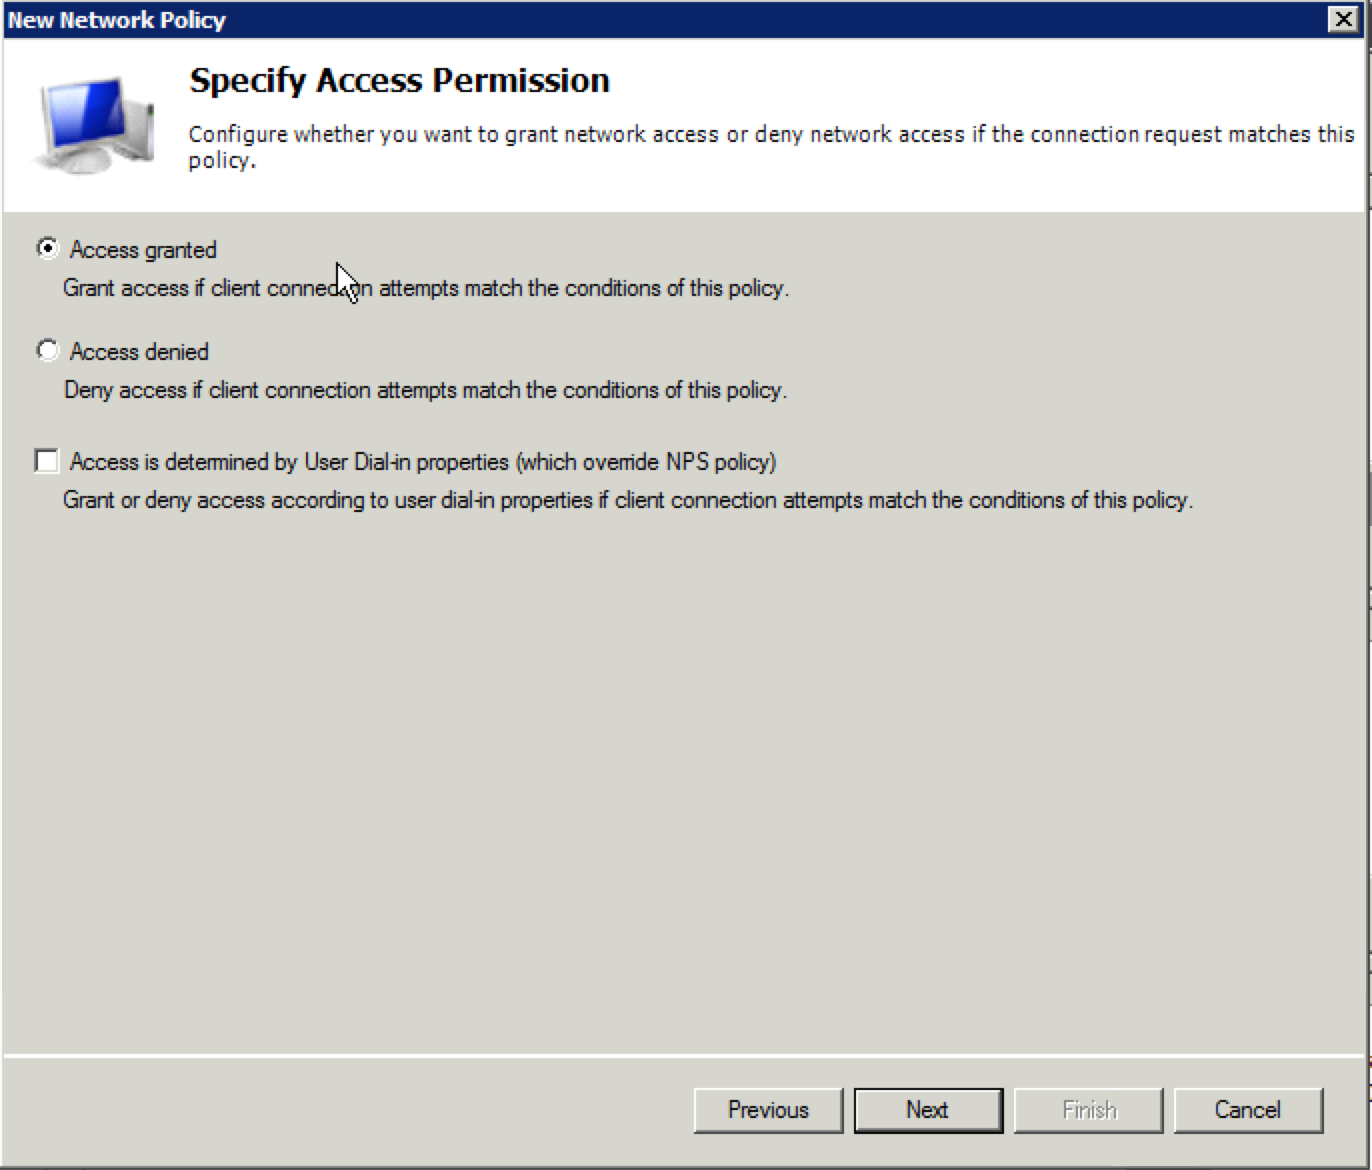
23. When the “Specify Access Permission” window appears, you can take the default “Access granted” and click “Next”. Note that you can permit or deny access, so with a wide range of Active Directory groups, you could allow a larger group of users with one network policy, but deny a smaller subset using a different group and network policy and placing the deny entry above the permit entry.
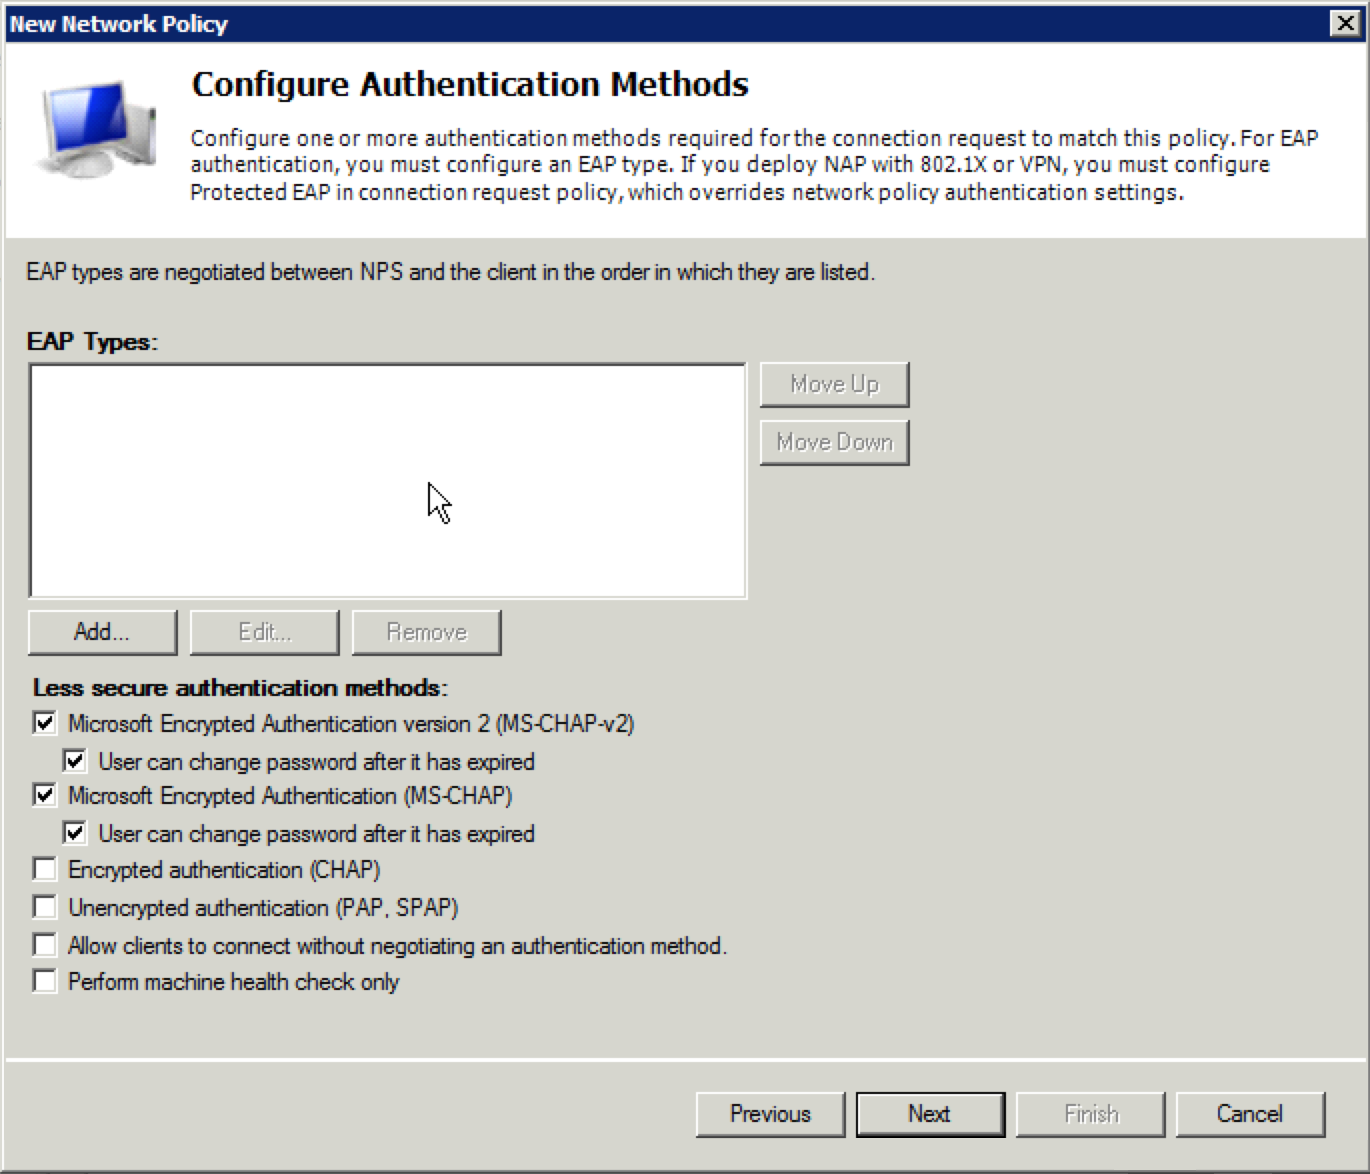
Here is where it might get a little confusing if you are unfamiliar with EAP types. If you don’t know much about EAP, here is a starting point. Basically, with NPS, you are going to configure PEAP using MSCHAP v2 or use the EAP-TLS method which involves client side certificates. This example is going to use the easier PEAP with MSCHAP v2 method. Other than generating client side certificates, there is not much difference in configuring NPS to work with EAP-TLS from the method I will illustrate below.
The following window should appear:
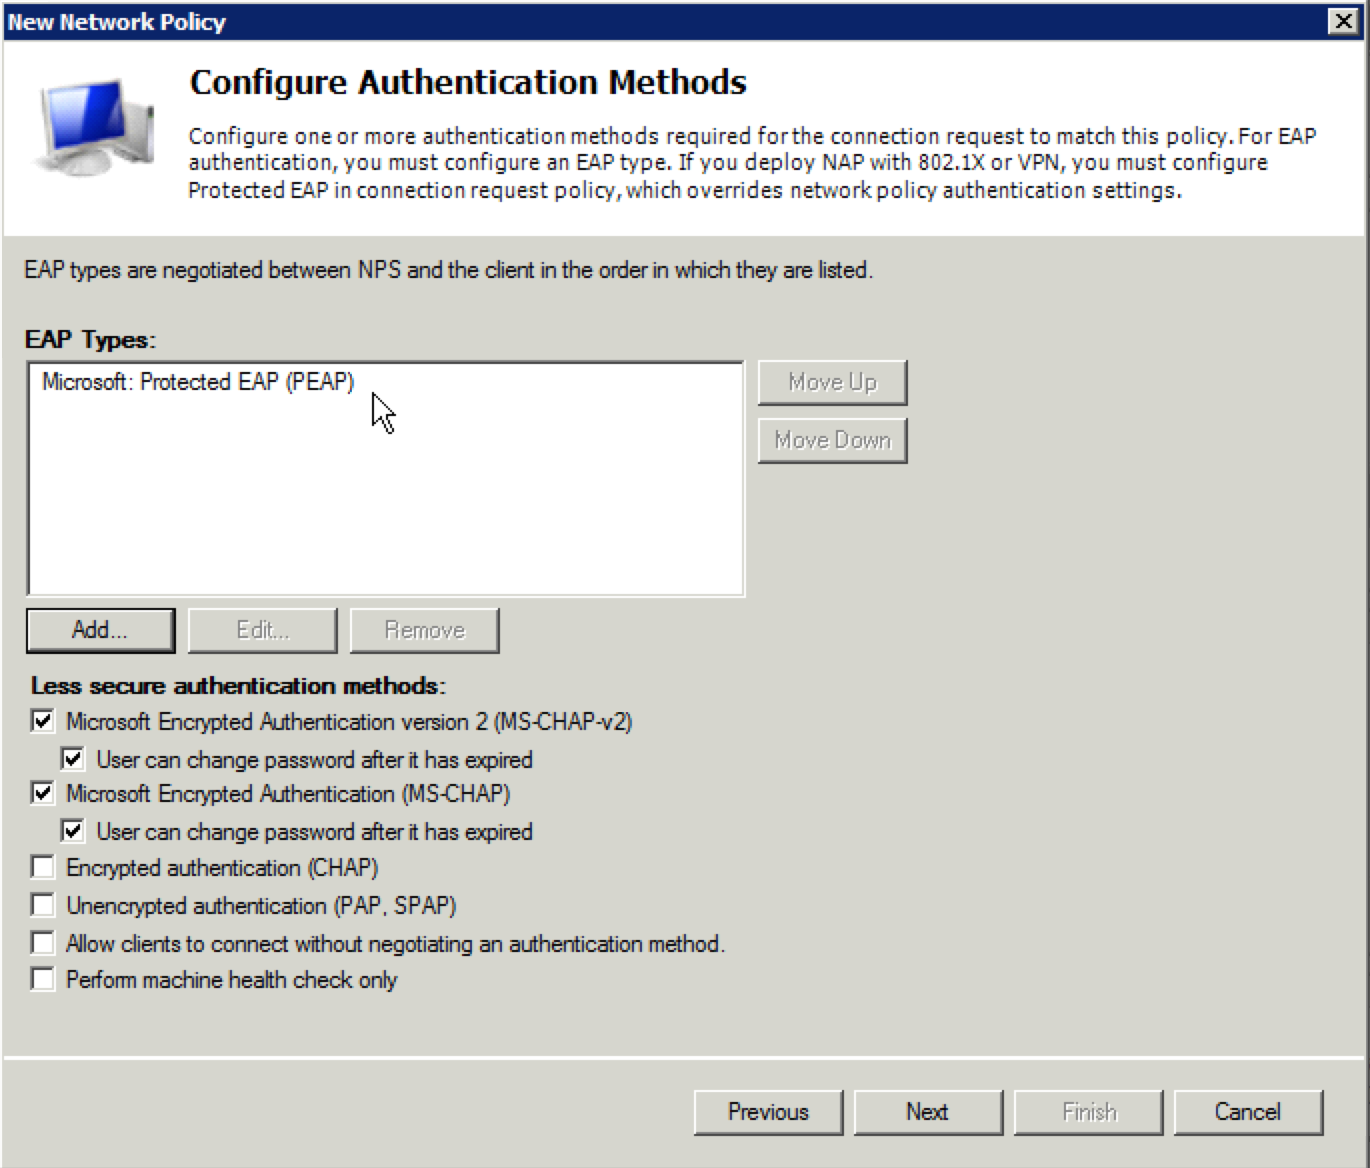
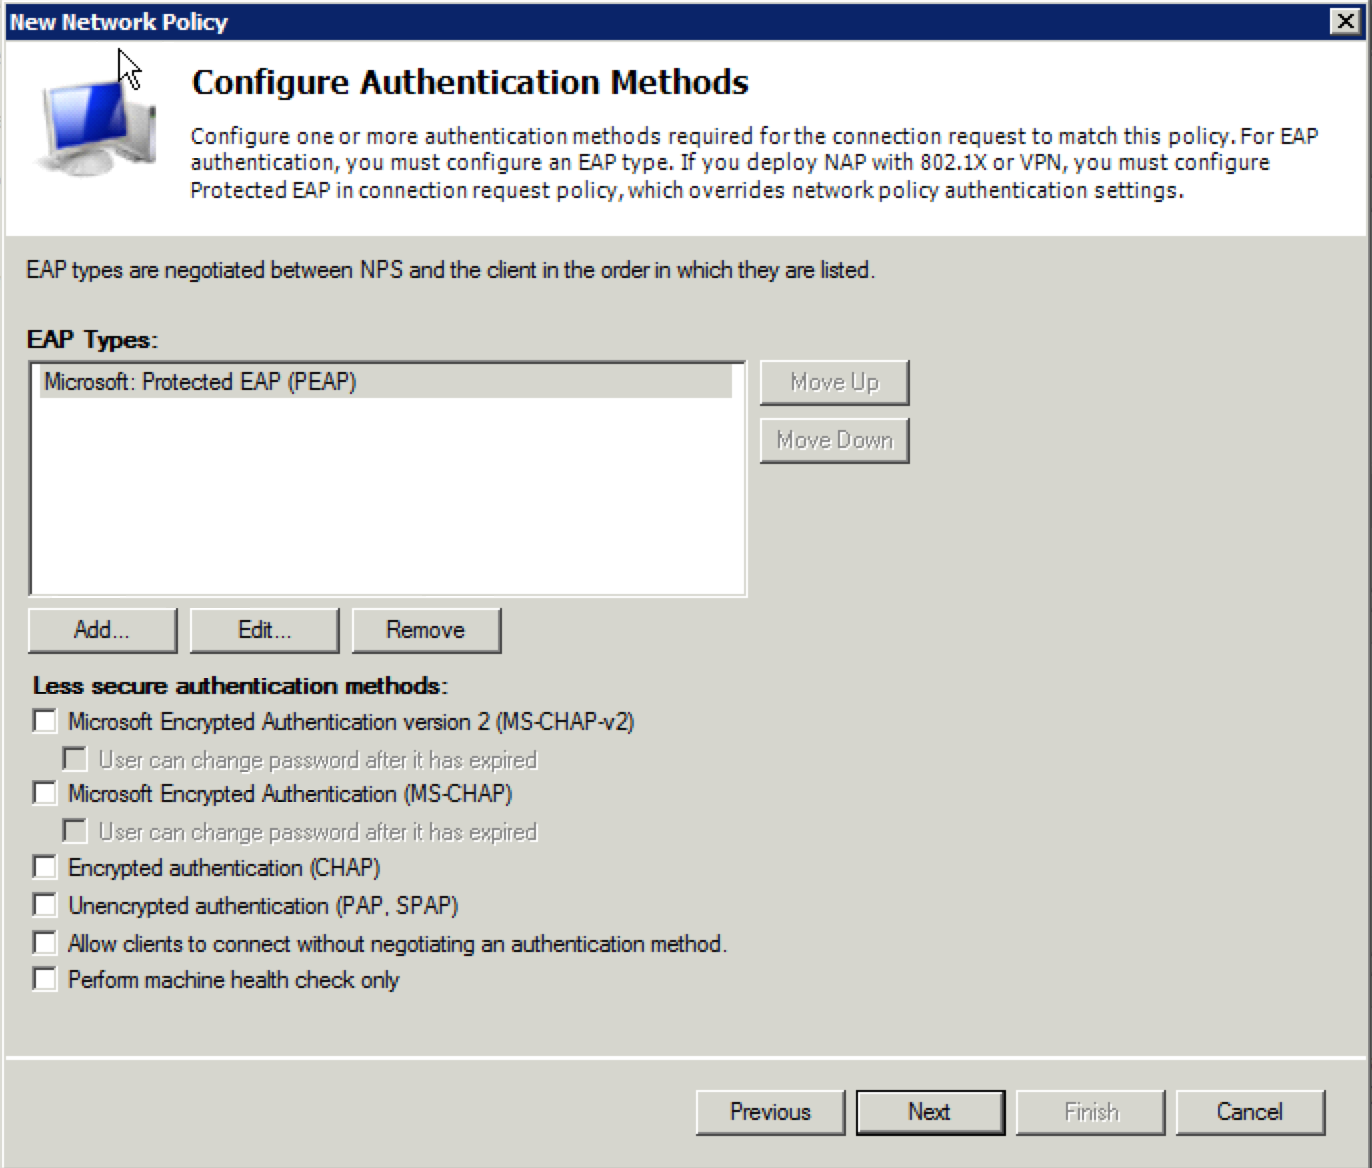
24. Click the “Add” button and select “Microsoft: Protected EAP (PEAP)” as the EAP type to use. Click “OK”. The screen should look like this:
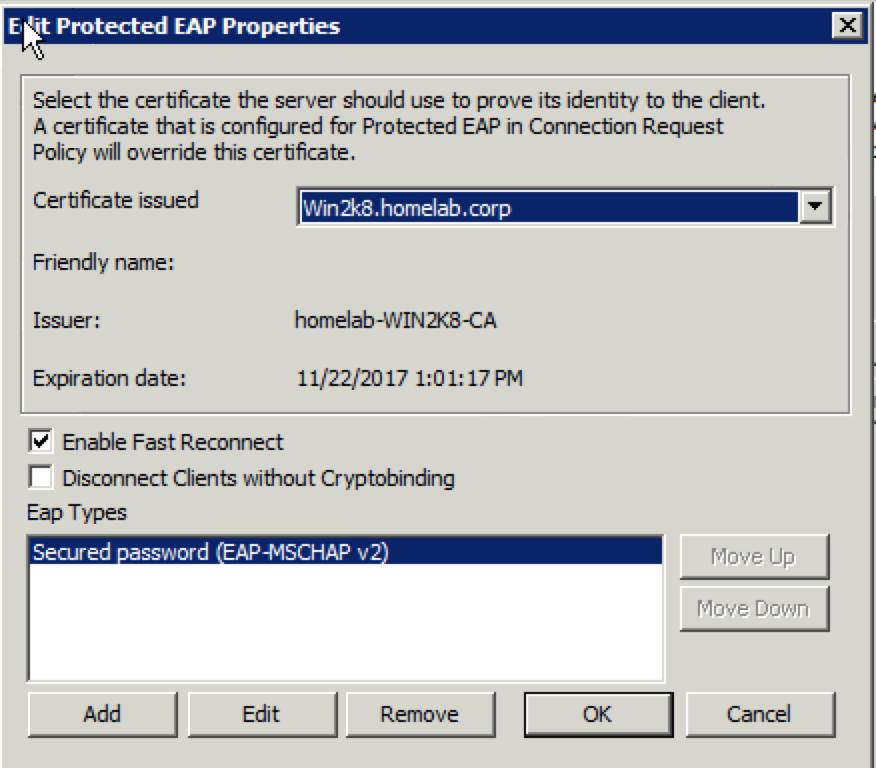
25. Select “Microsoft: Protected EAP (PEAP)” in the “EAP Types” window and click on “Edit”. Ensure that the only entry in the “Eap Types” window is “Secured password (EAP-MSCHAP v2). You may have to click the “Add” button and select it. You may also have to select other entries and click “Remove” to get down to the single option. You should also see the certificate with your NPS server name selected in the “Certificate issued” field at the top of the window. If there is not one, you will need to generate one and start the “Network Policy” configuration over from the start. Click on “OK”.
26. When the “Configure Authentication Methods” window appears, uncheck everything in the “Less secure authentication methods:” section at the bottom of the window and then click “Next”.
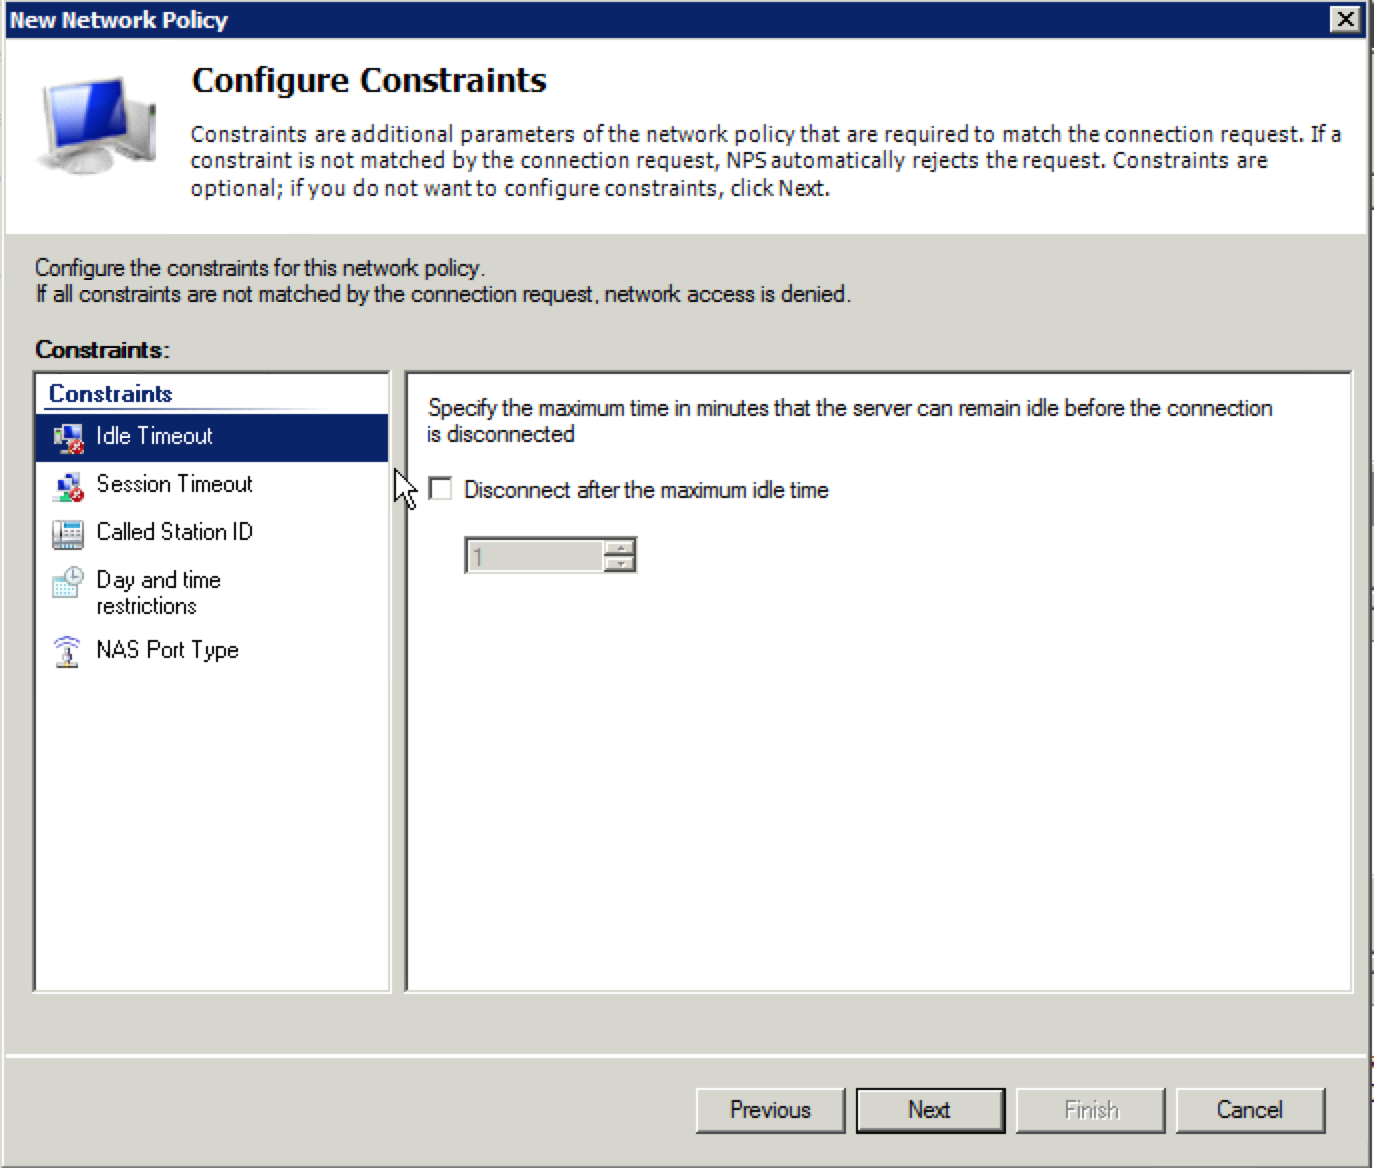
27. At the next screen titled “Configure Constraints”, you can keep the defaults and click on “Next”. If you want to get more granular with how the client sessions are treated, there are some options here to do that.
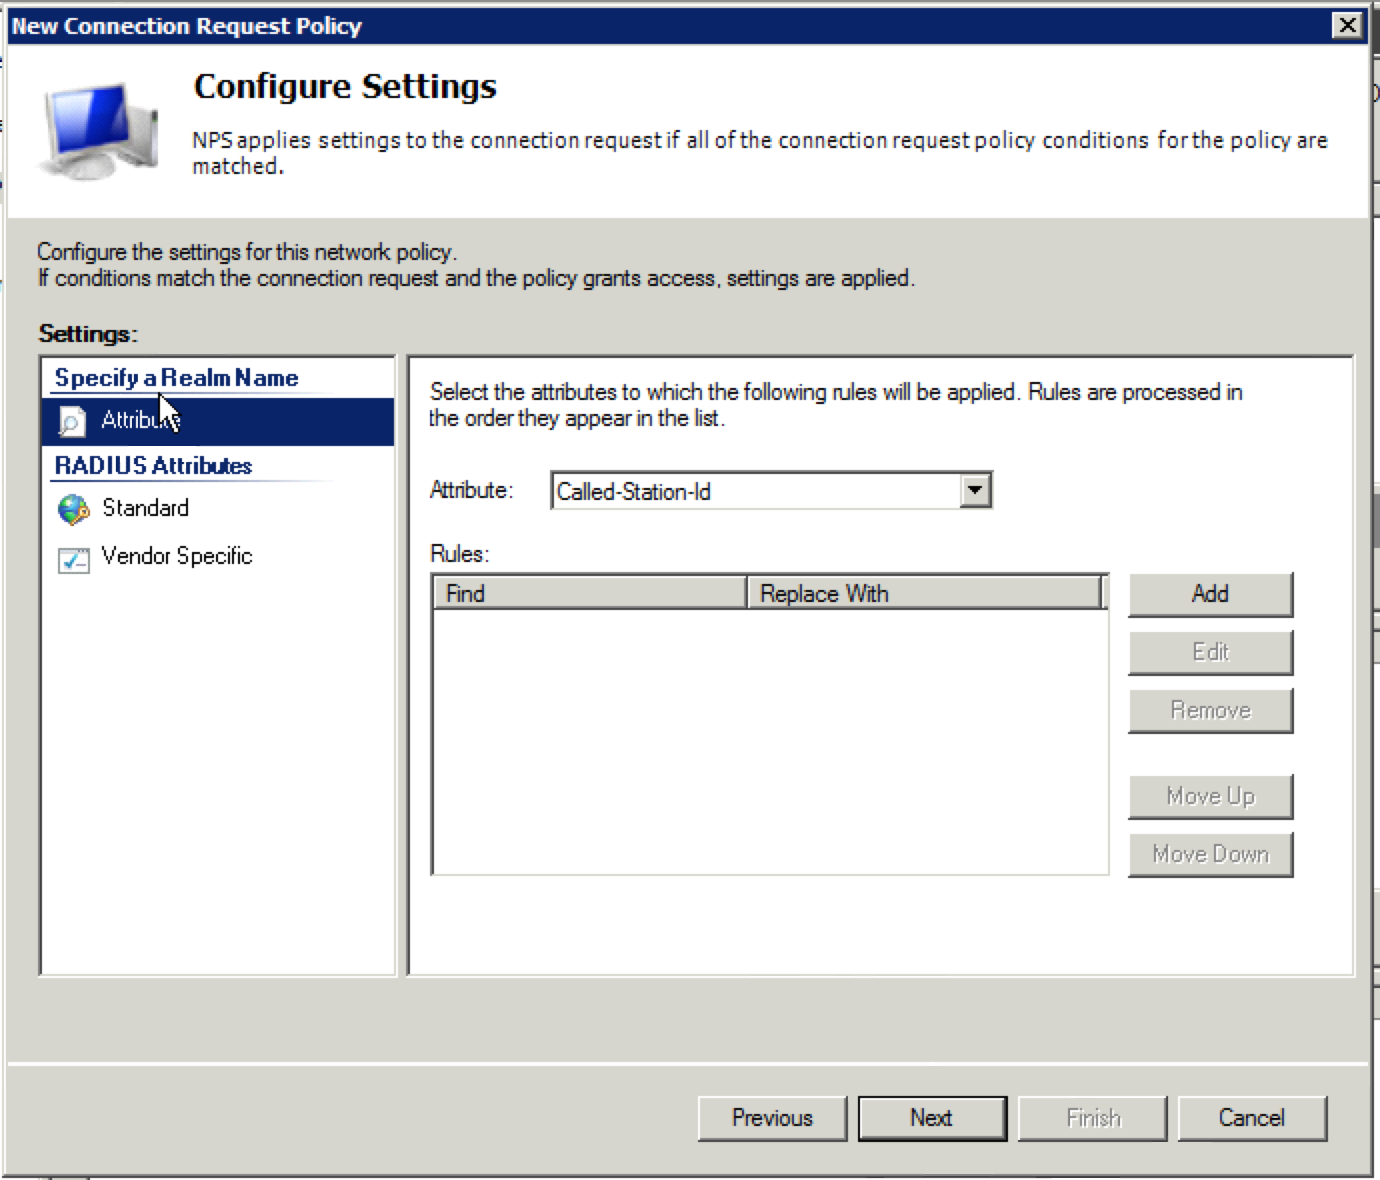
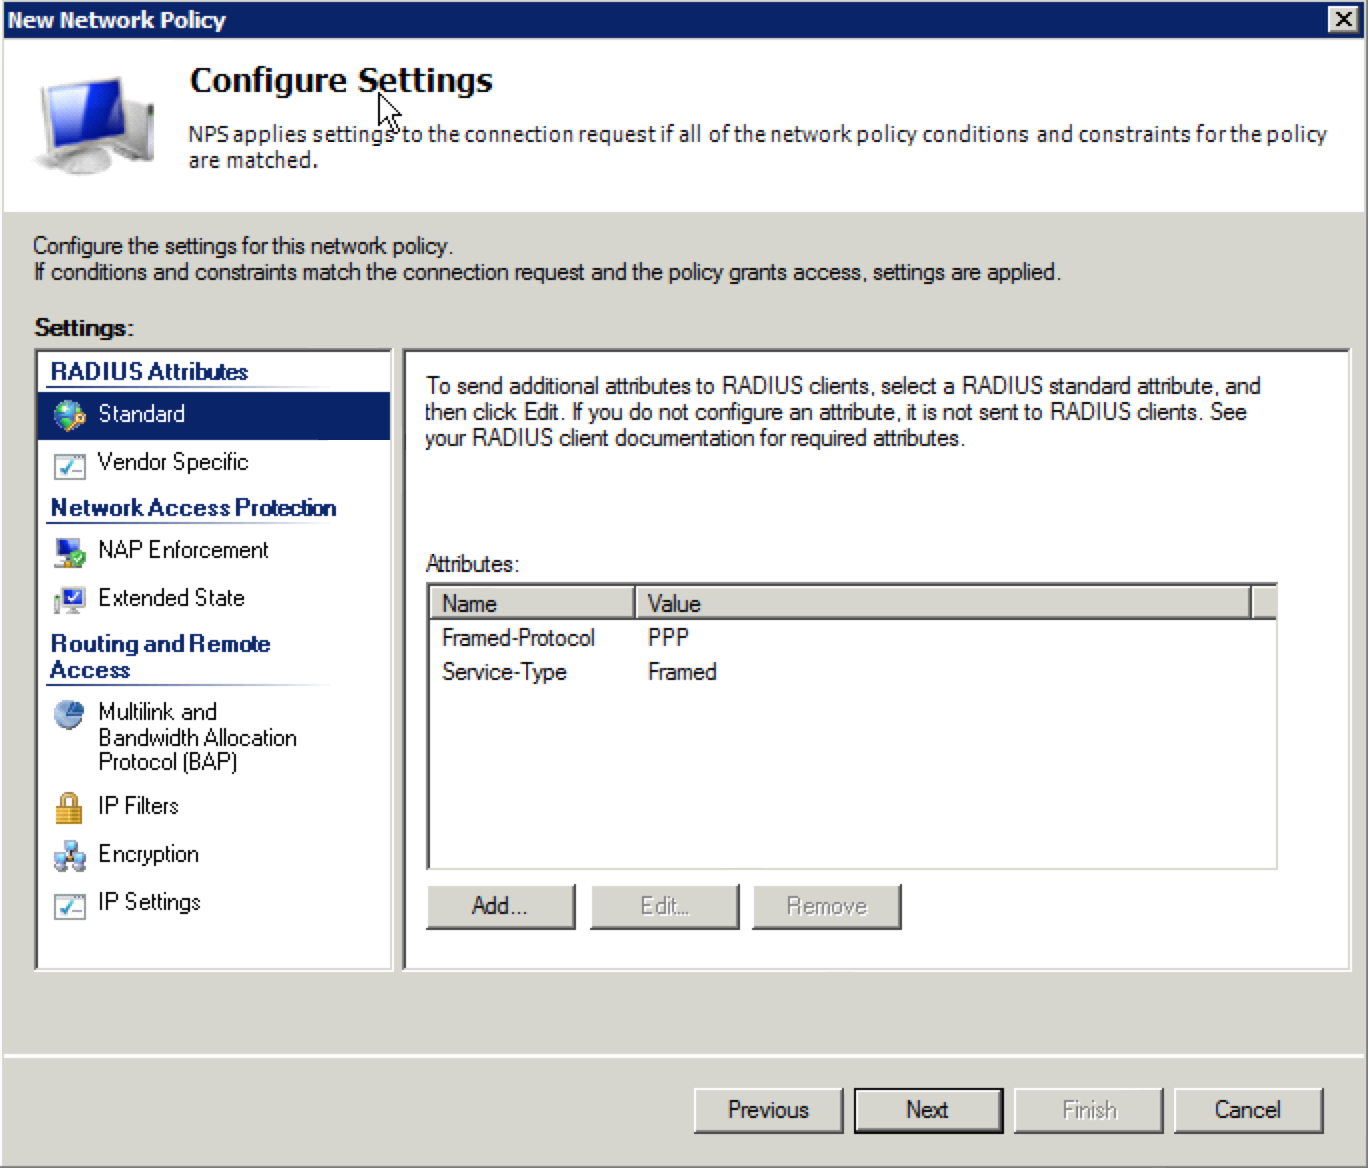
28. The “Configure Settings” window will appear next. This is where we are going to finally define which user profile to put the corporate(in this example) users into. Two attributes should already be present for “Framed-Protocol” and “Service-Type”. You can delete both of these attributes by selecting them and clicking on “Remove”. They won’t be needed.
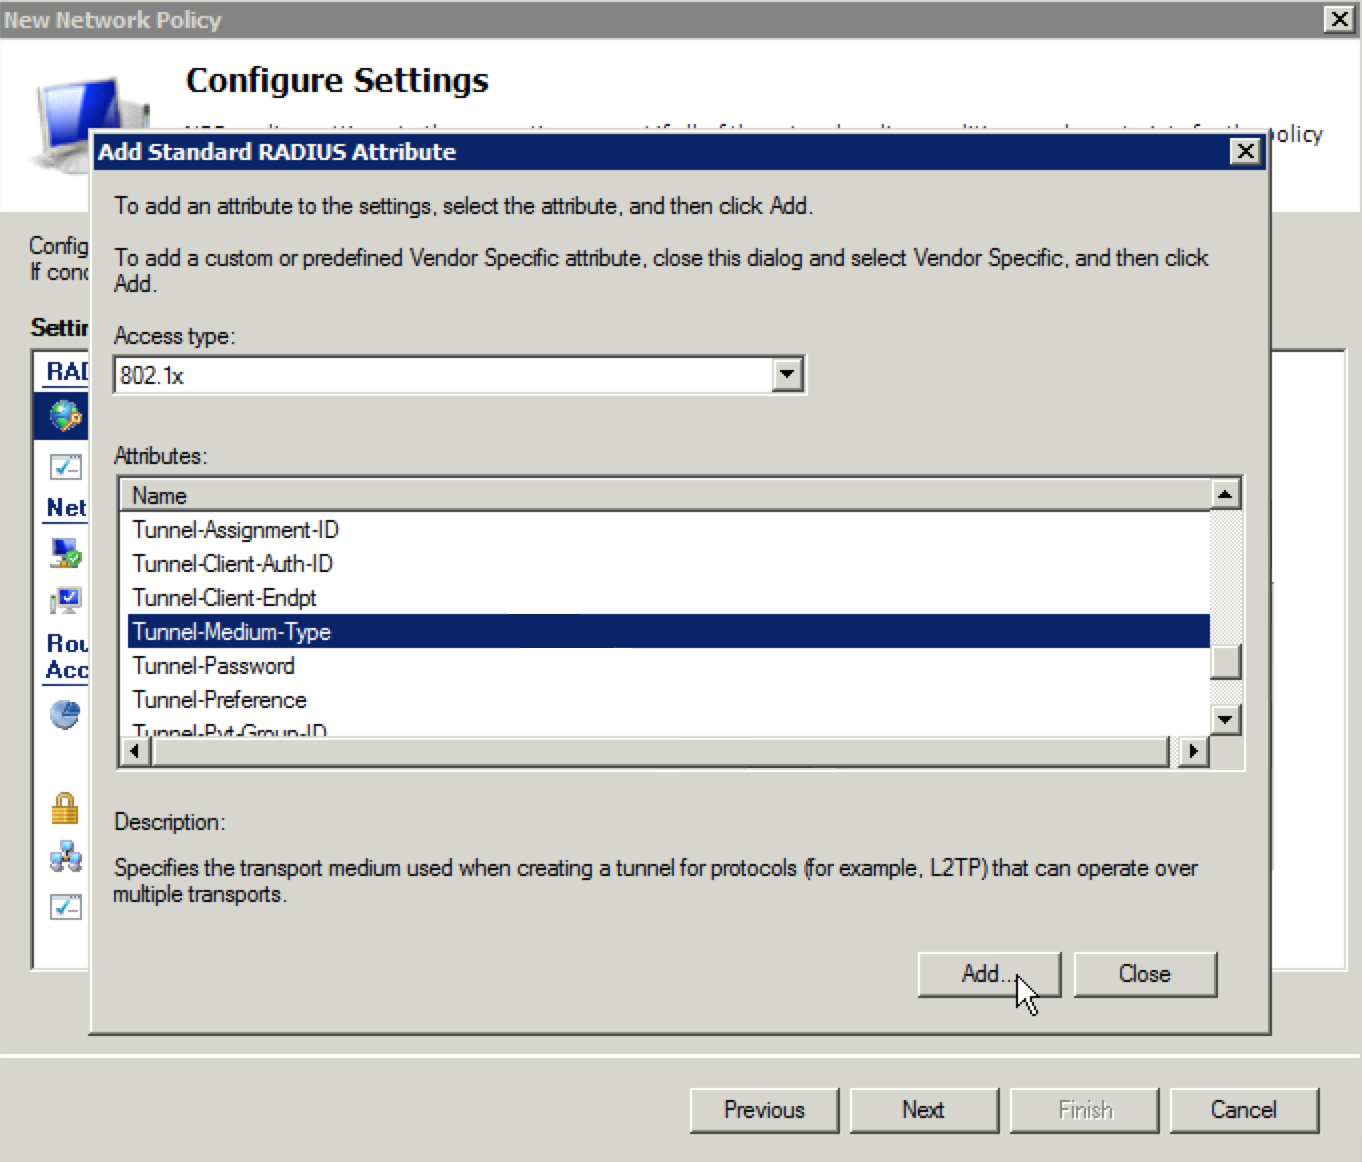
29. Now we are going to add the three attributes needed. Ensure “Standard” is selected under “RADIUS Attributes” and click the “Add” button. Select “802.1x” for the “Access type” and select “Tunnel-Medium-Type” under the “Attributes” section and click “Add”.
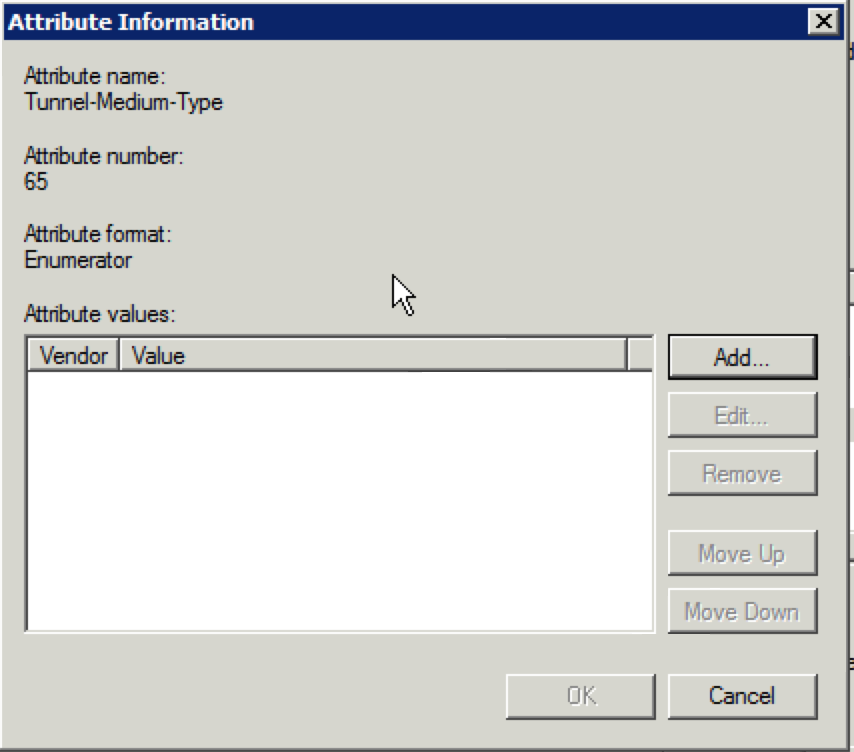
30. When the “Attribute Information” window appears, click “Add”.
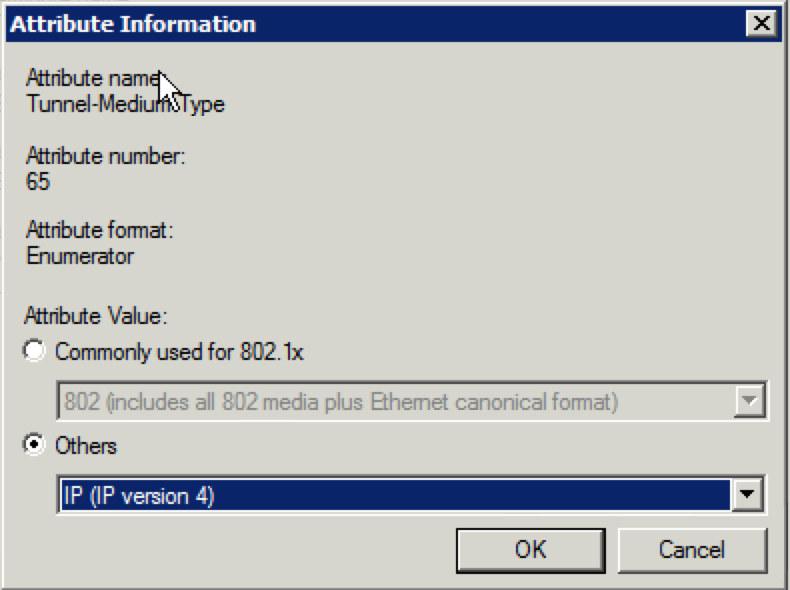
31. Select “Others” and then select “IP (IP version 4)” and click on “OK”.
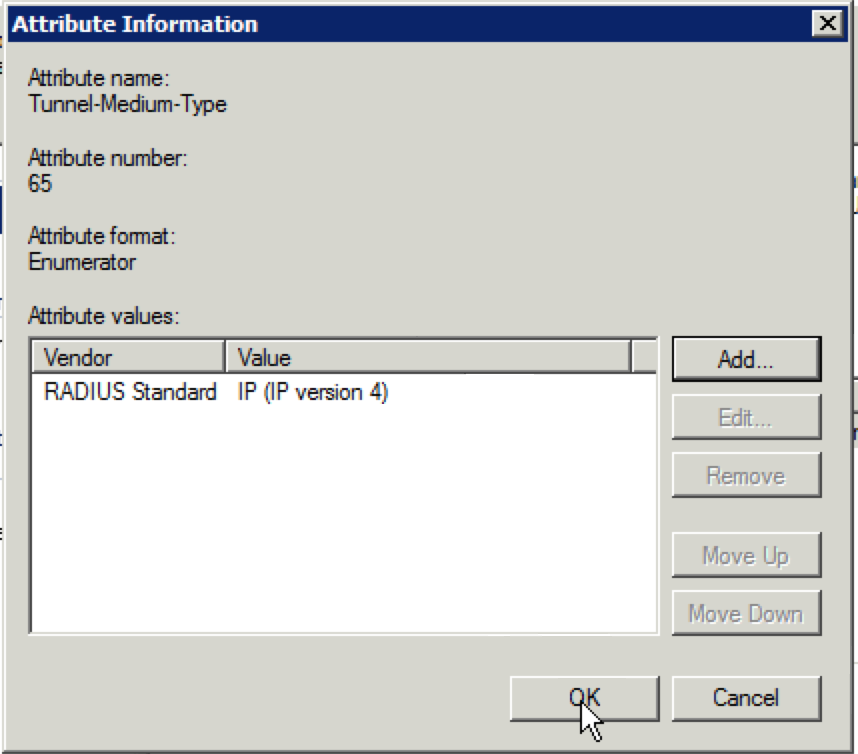
32. Click “OK” when the following “Attribute Information” screen appears:
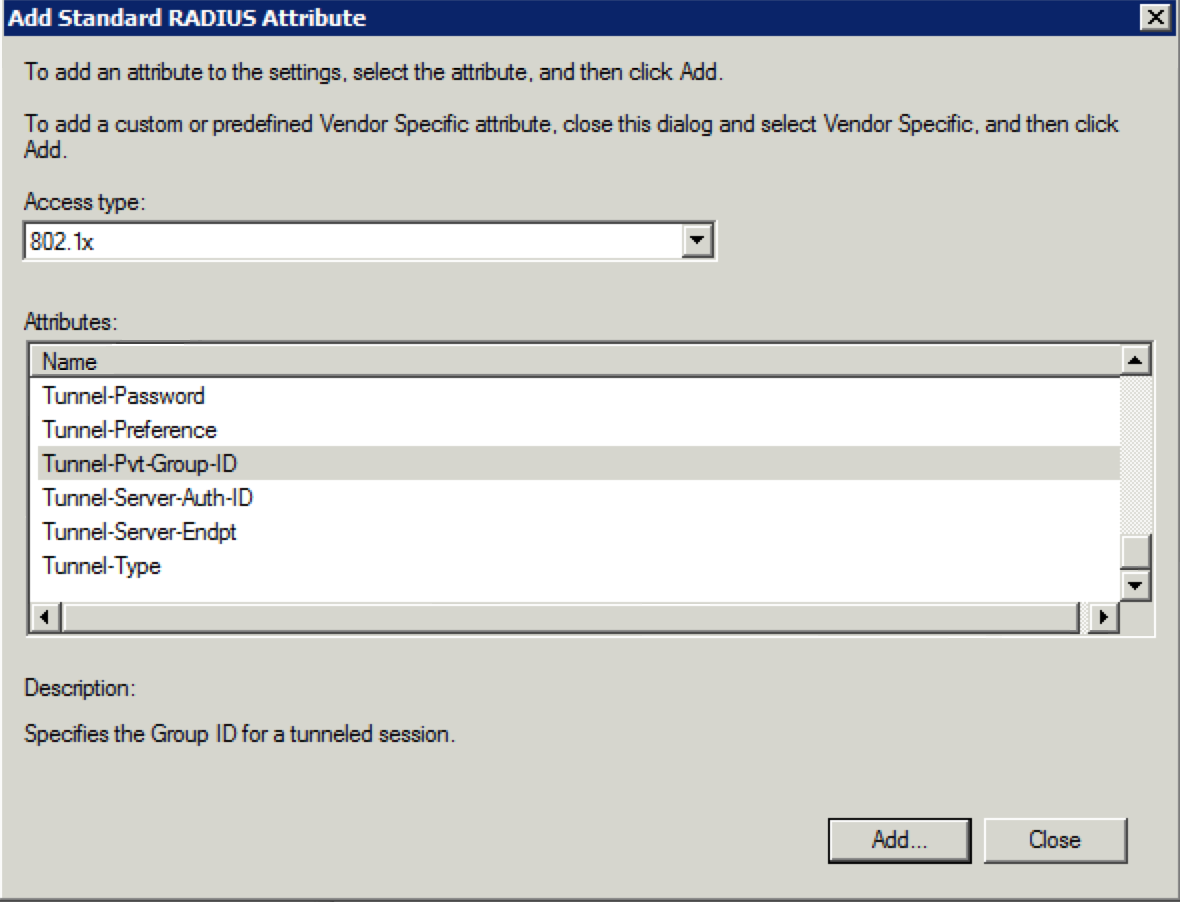
33. You should see the “Add Standard RADIUS Attribute screen now. Select “802.1x” for the “Access type” if it is not already selected and select “Tunnel-Pvt-Group-ID” under the “Attributes” section and click “Add”.
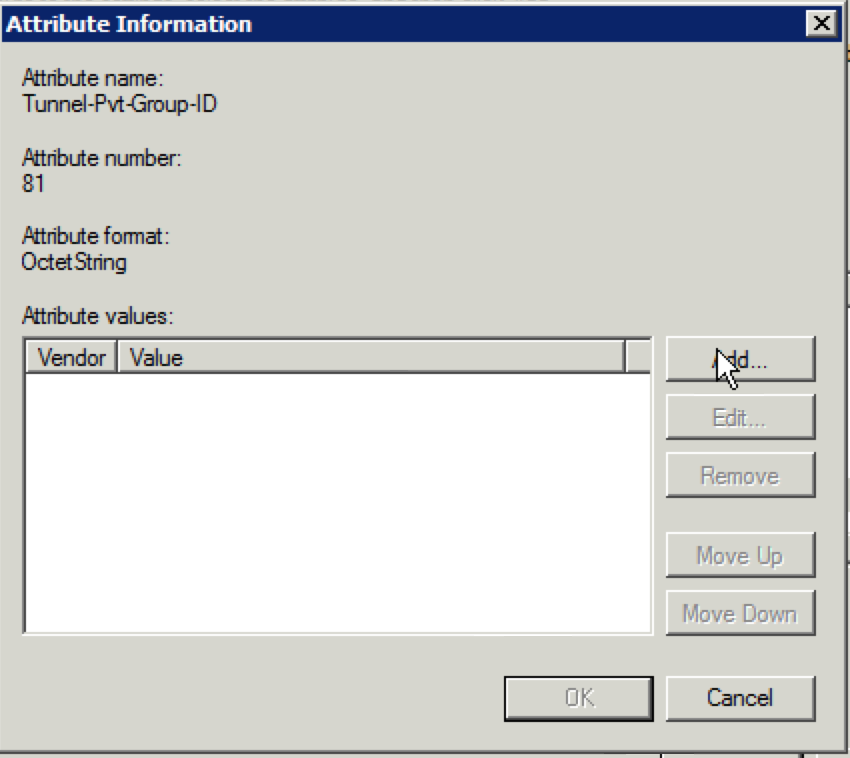
34. Click “Add” when the following window appears:
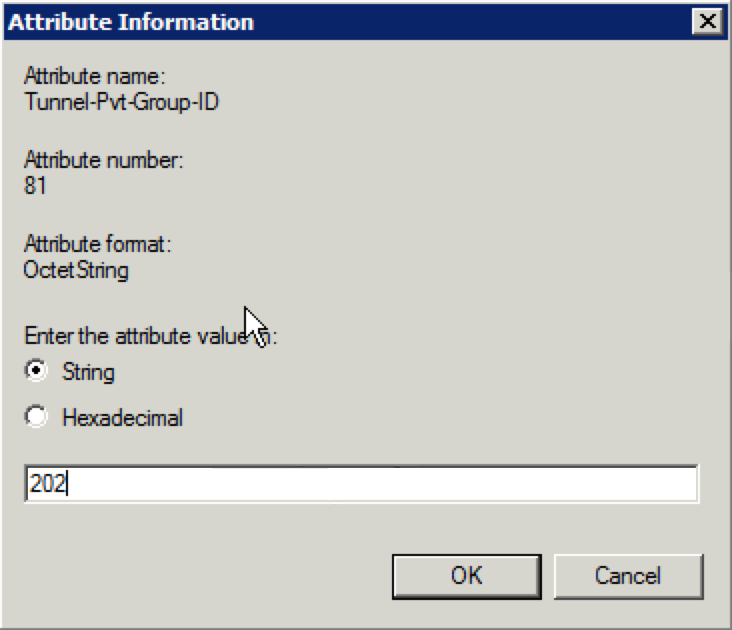
35. Since this policy is for the corporate users, we are going to enter “202” for the attribute value as a string. Type in the value and click on “OK”.
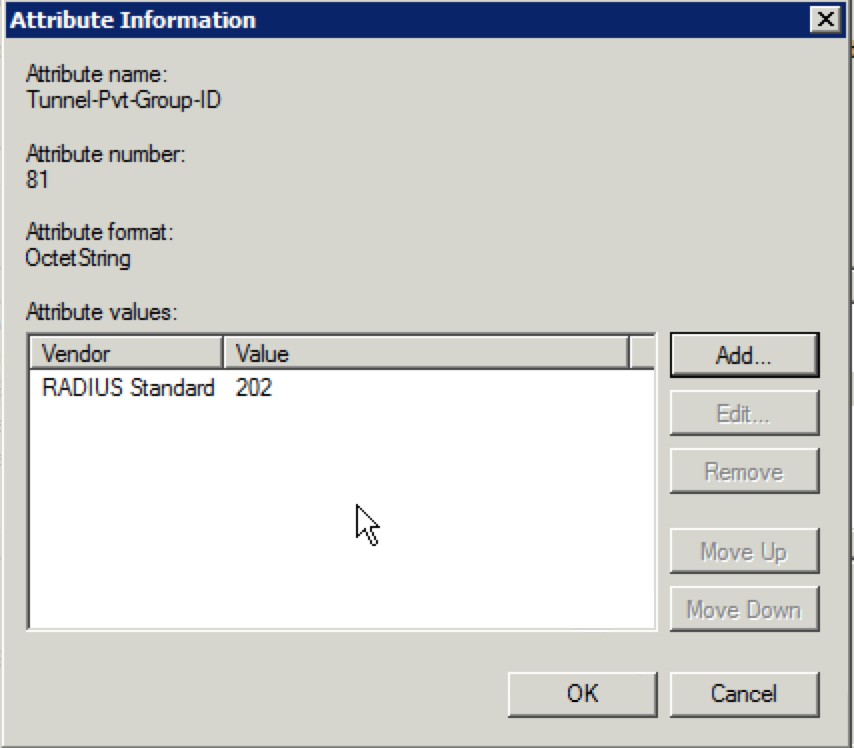
36. Now your screen should display the “RADIUS Standard” attribute with a value of “202”. Click “OK”.
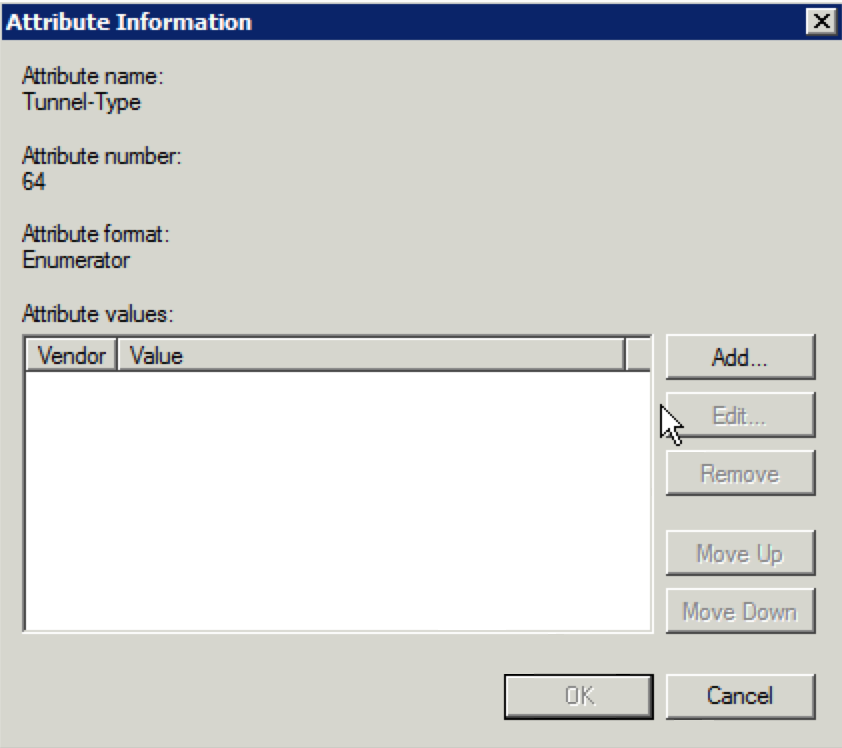
37. You should see the “Add Standard RADIUS Attribute screen once again. Select “802.1x” for the “Access type” if it is not already selected and select “Tunnel-Type” under the “Attributes” section and click “Add”. When the following screen appears, click “Add”:
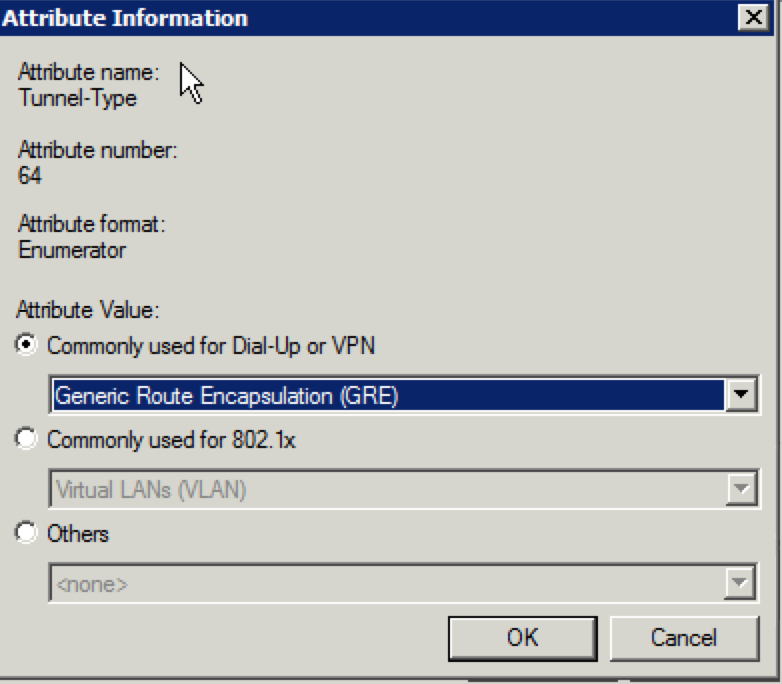
38. Select “Generic Route Encapsulation” under the “Commonly used for Dial-Up or VPN” section and click “OK”.
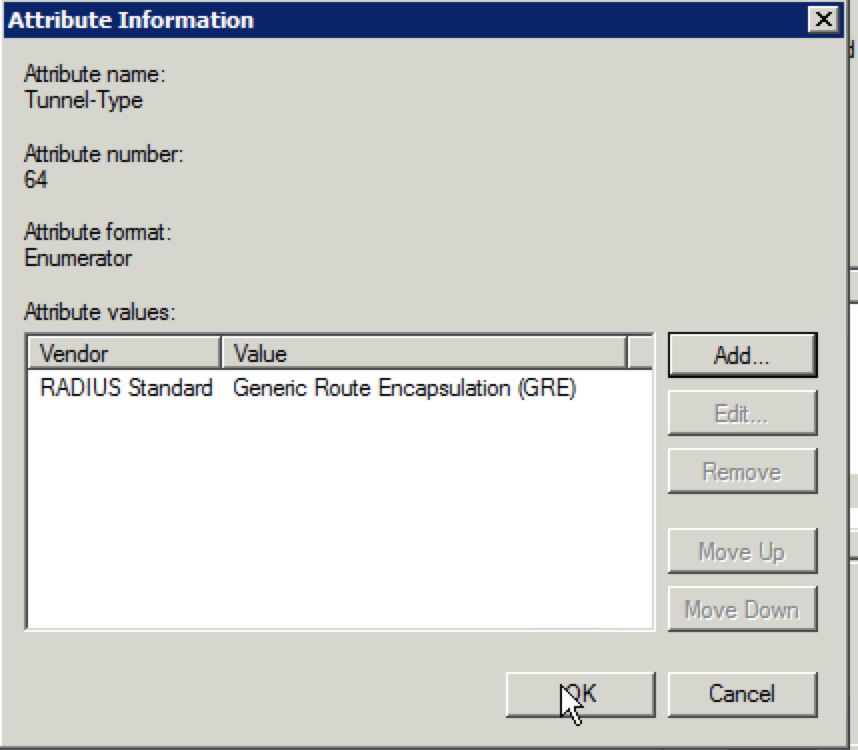
39. When the following screen appears, click “OK”:
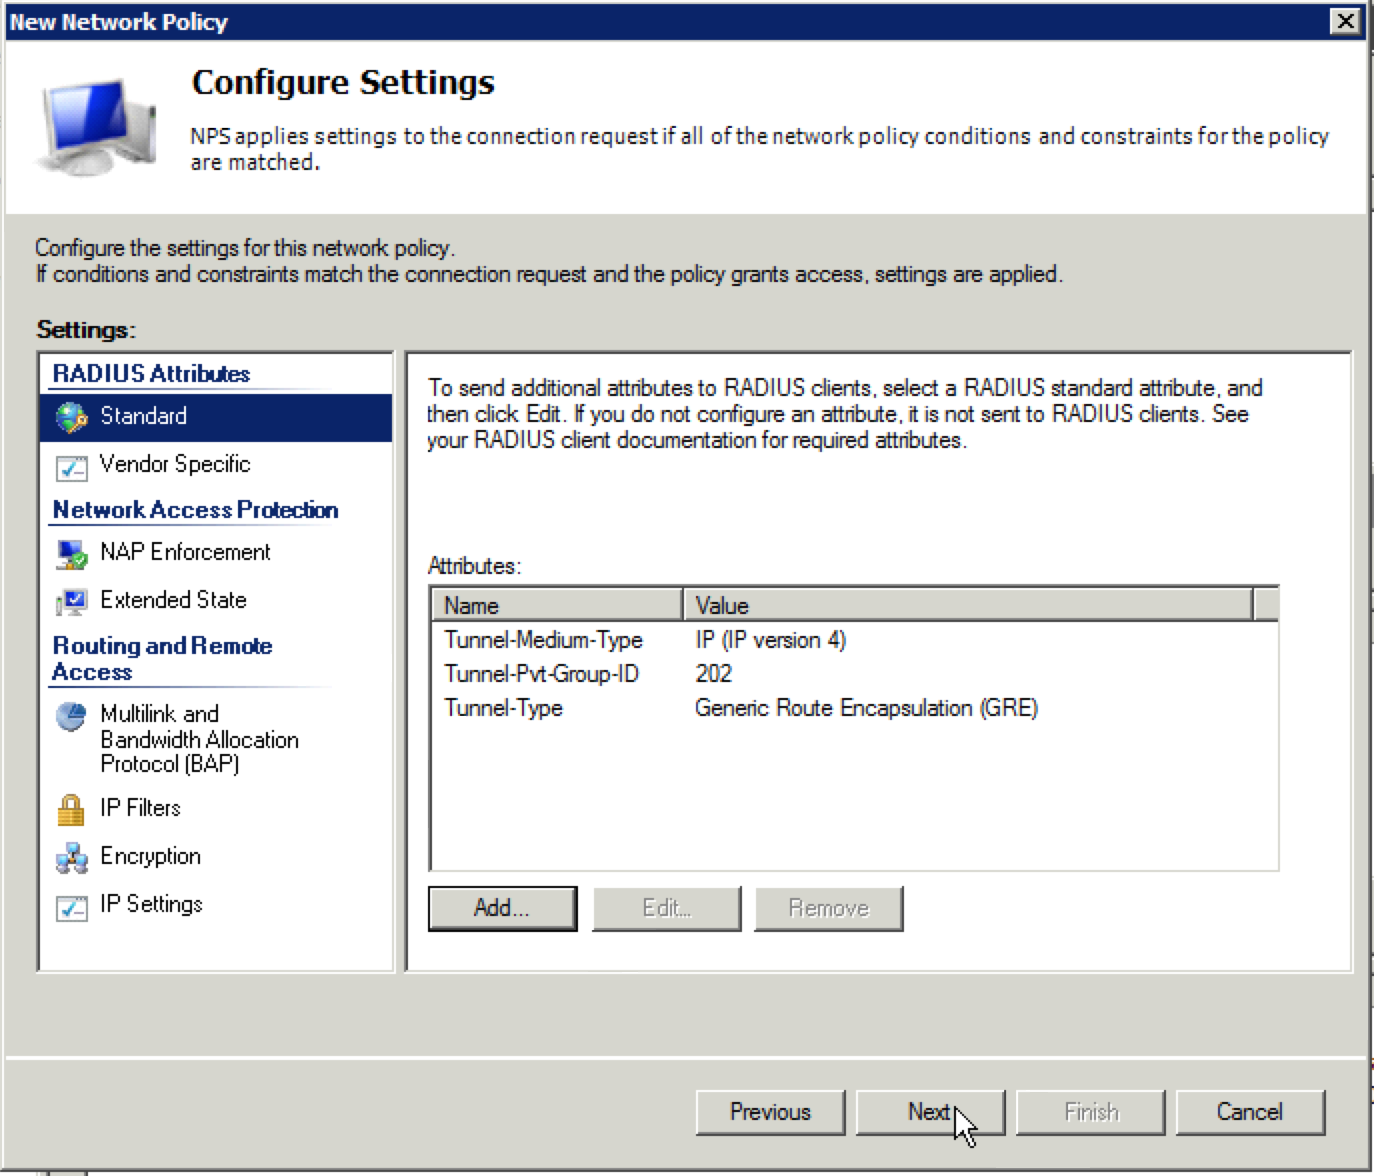
40. You should be looking at the “Configure Settings” screen with the three RADIUS attributes you configured. Click “Next”.
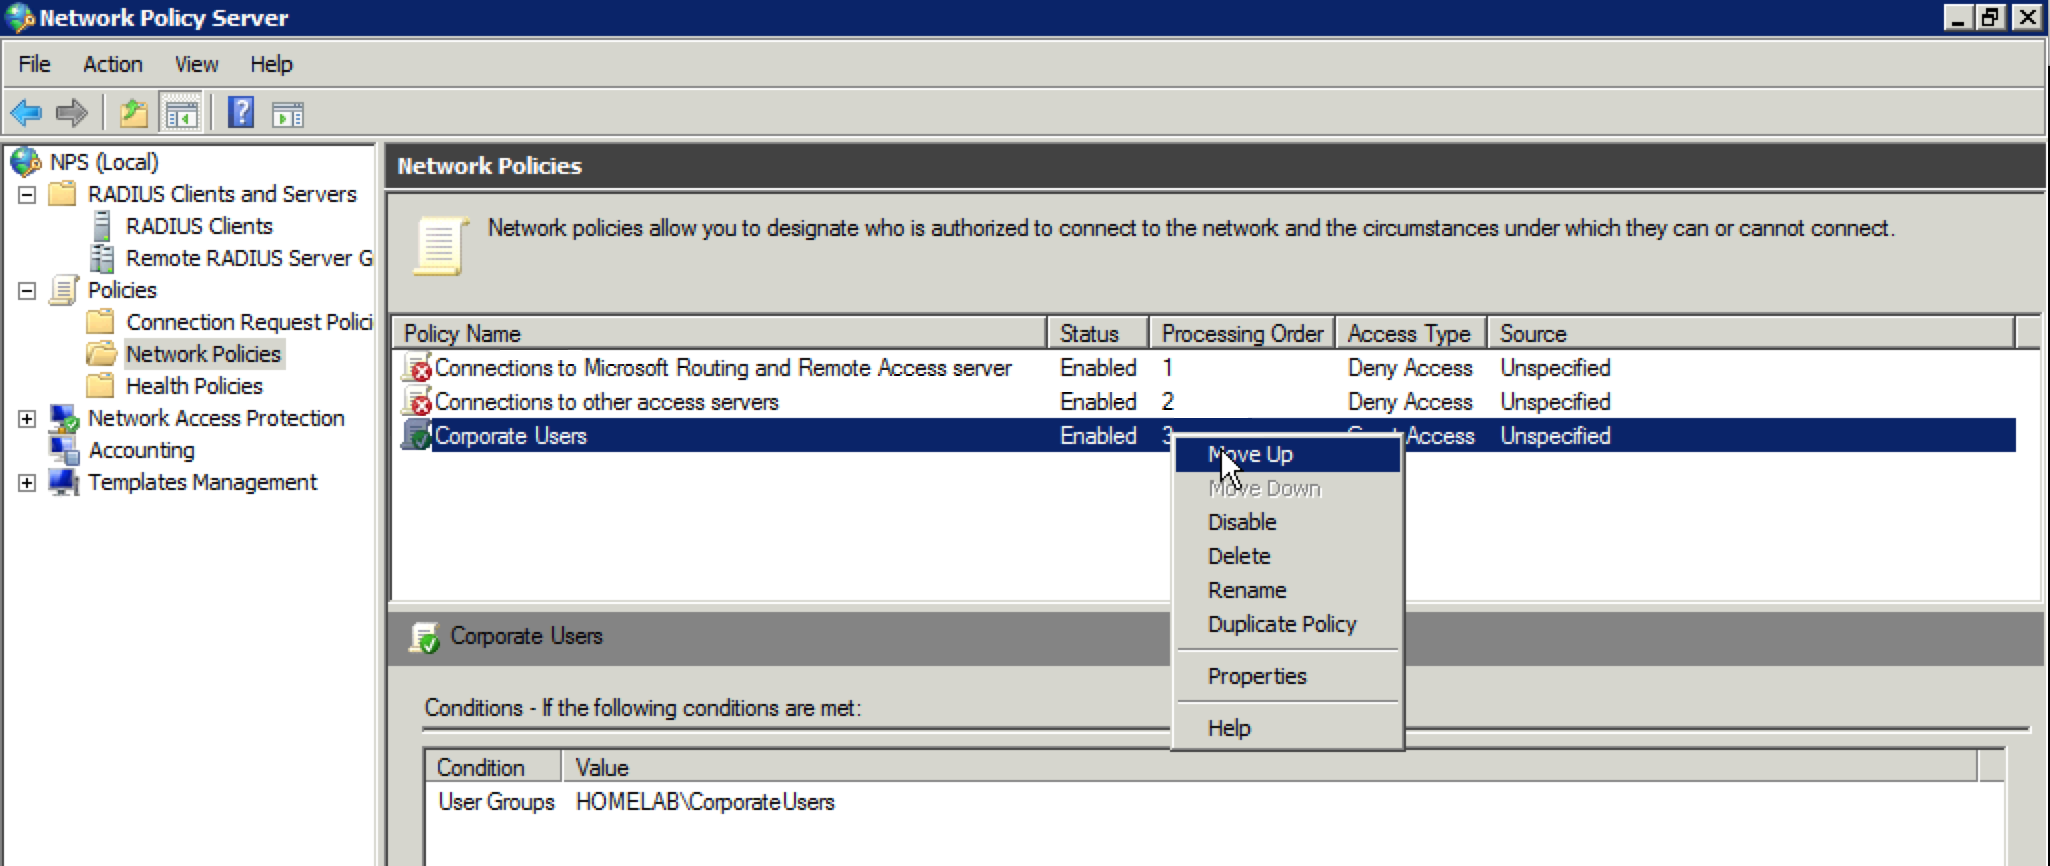
41. At the “Completing New Network Policy” screen, click “Finish”. You should now be taken back to the “Network Policies” screen in the main NPS window. The “Corporate Users” policy is at the bottom of the list. We want to move it to the top, so right click on the “Corporate Users” policy and select “Move Up”. Repeat until it is in the first position.
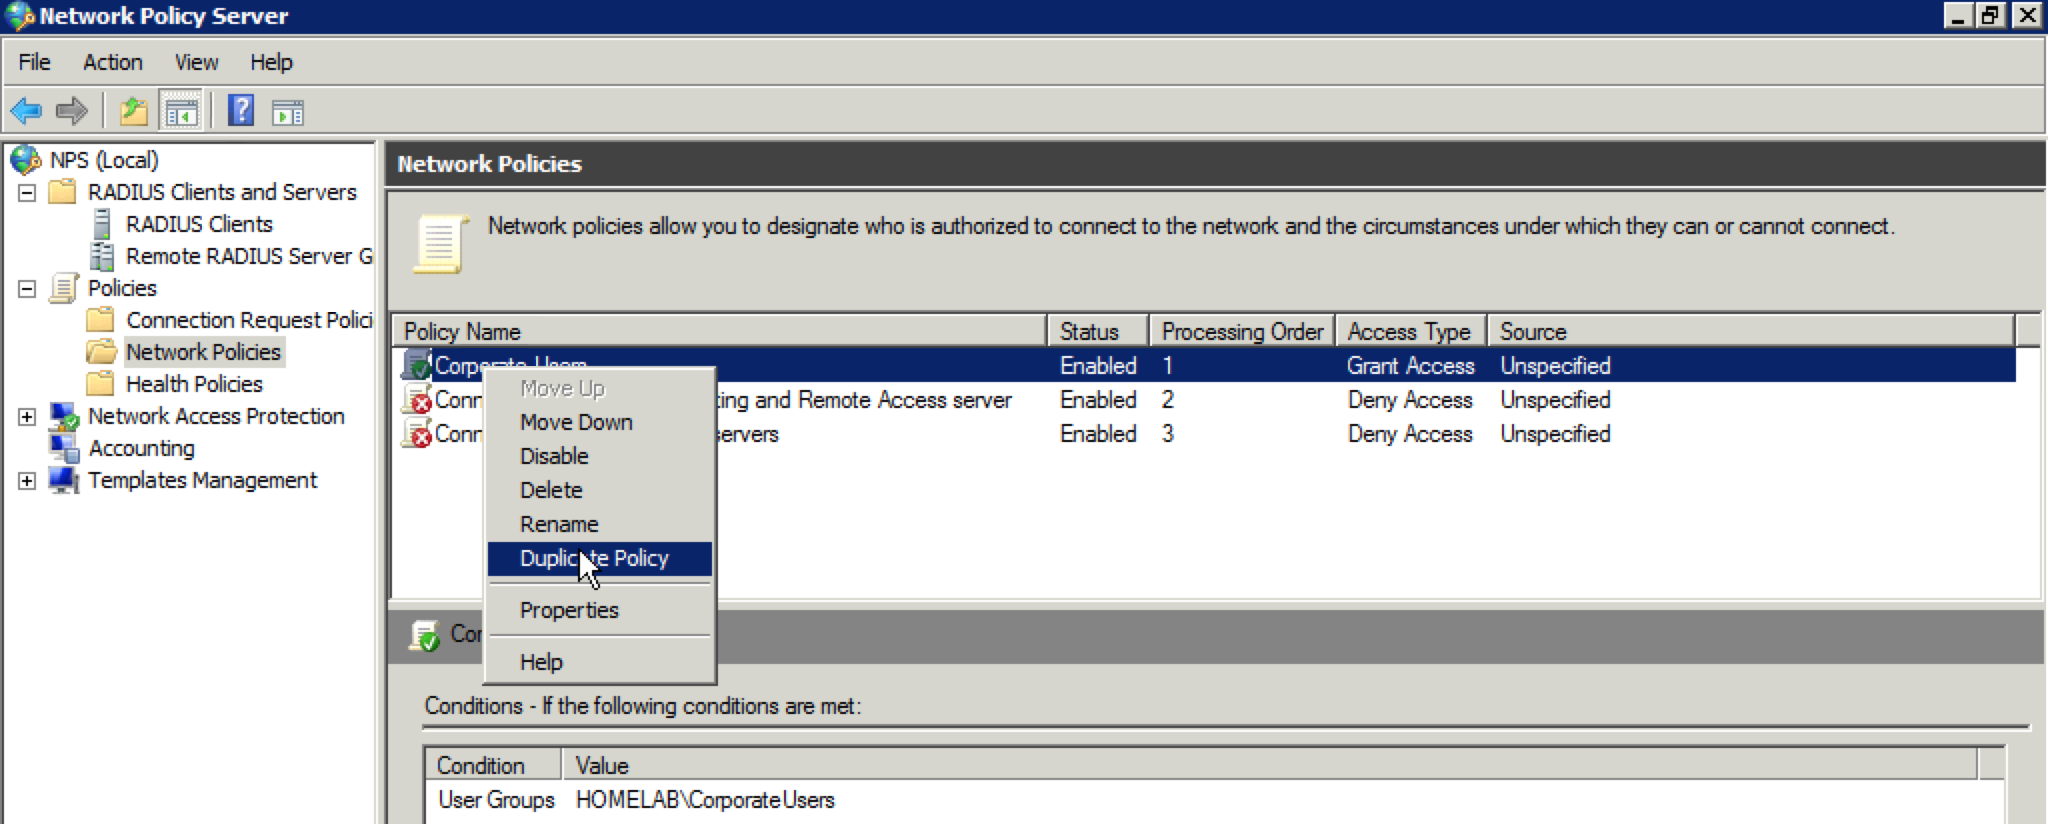
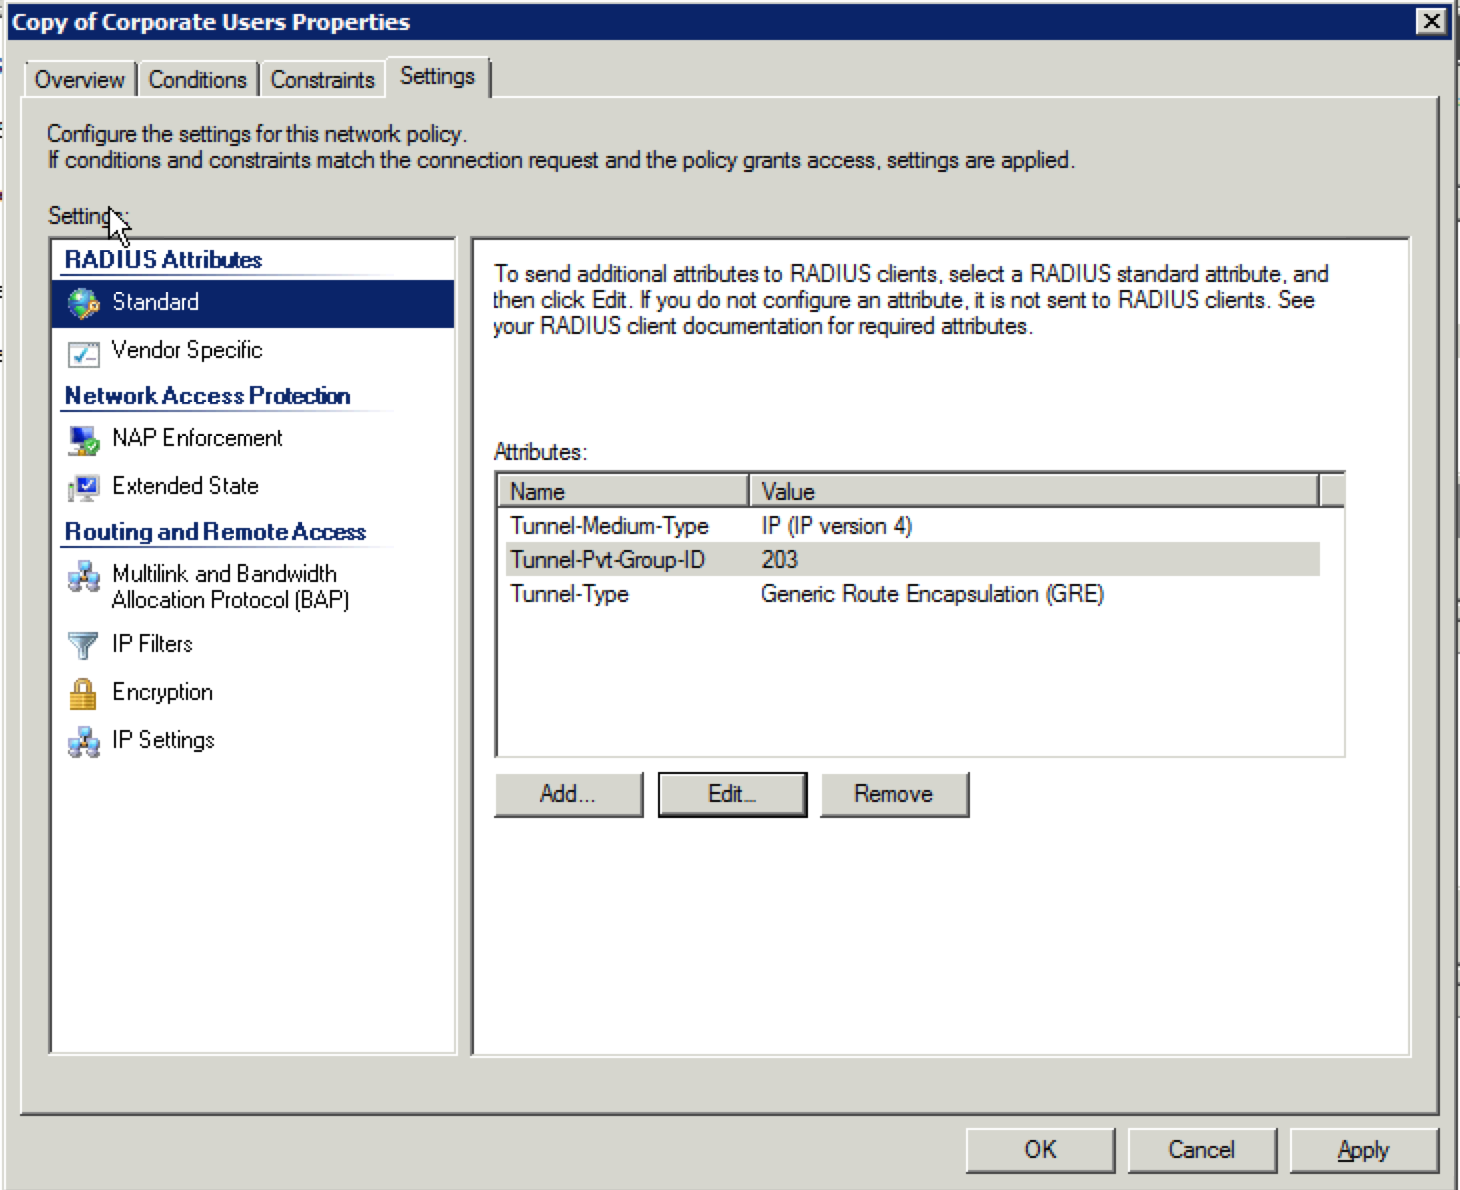
42. Next, we need to create our policy for the contractor users, but we will use a shortcut to save time. Right click on the “Corporate Users” policy and select “Duplicate Policy”.
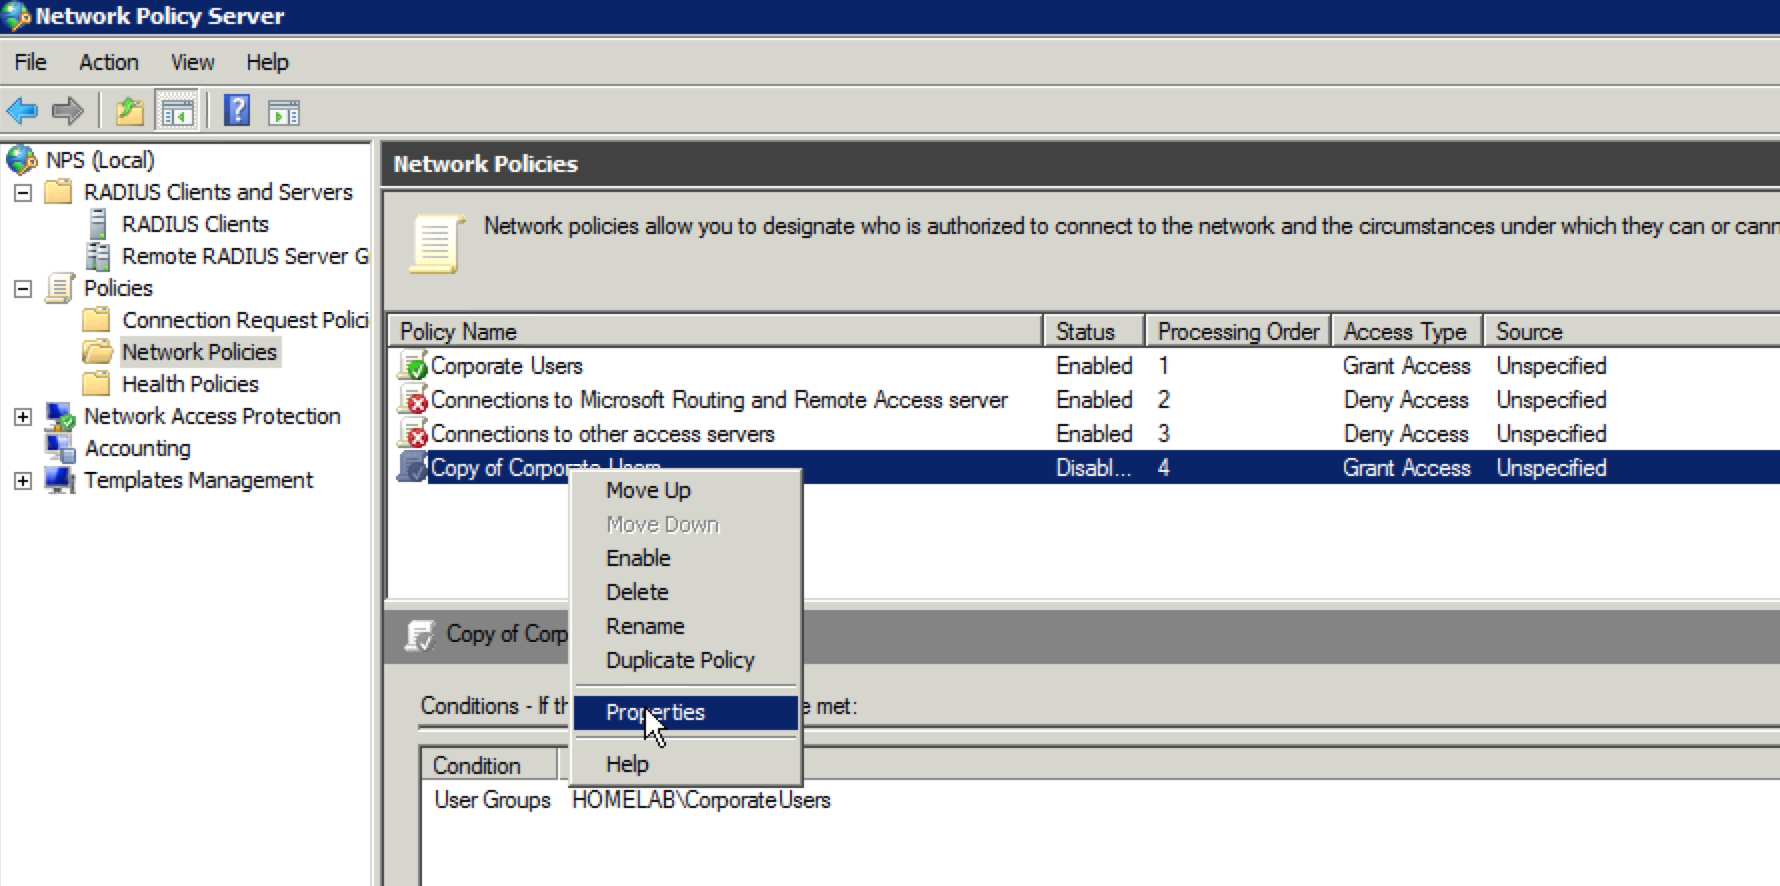
43. When the “Copy of Corporate Users” policy appears, right click on it and select “Properties”.
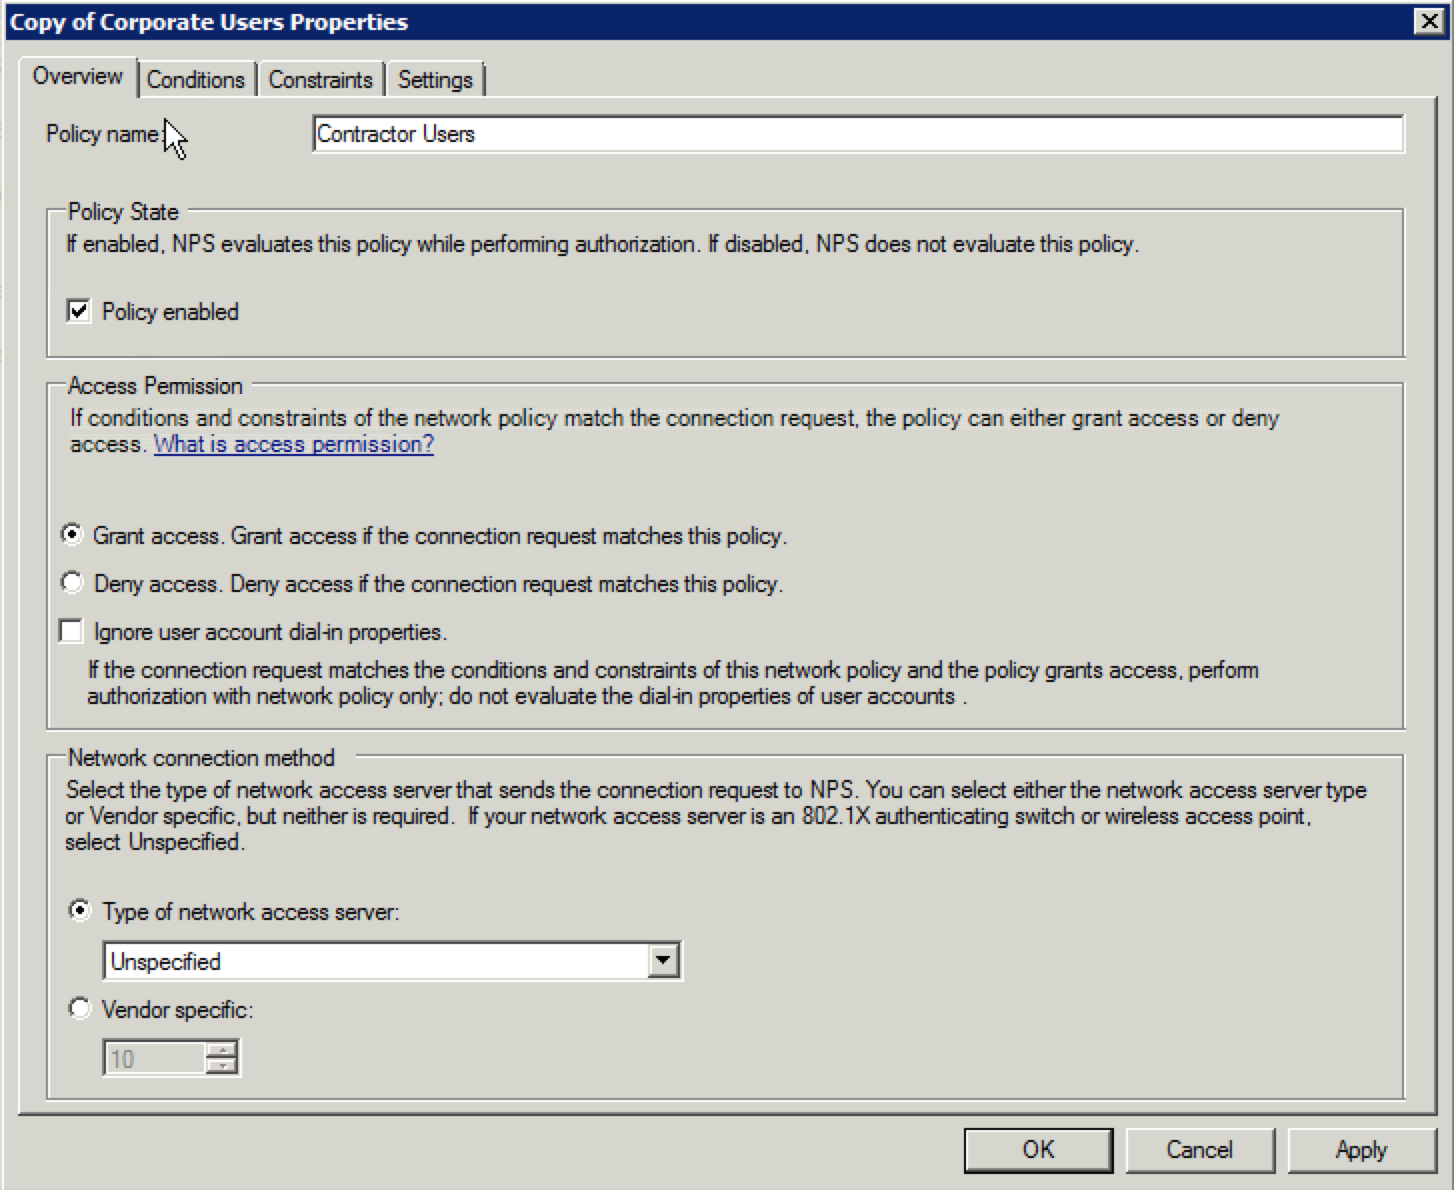
44. Change the name of the policy to whatever you want it to say. For this example, I will change it to “Contractor Users”. Then, click on the “Conditions” tab at the top.
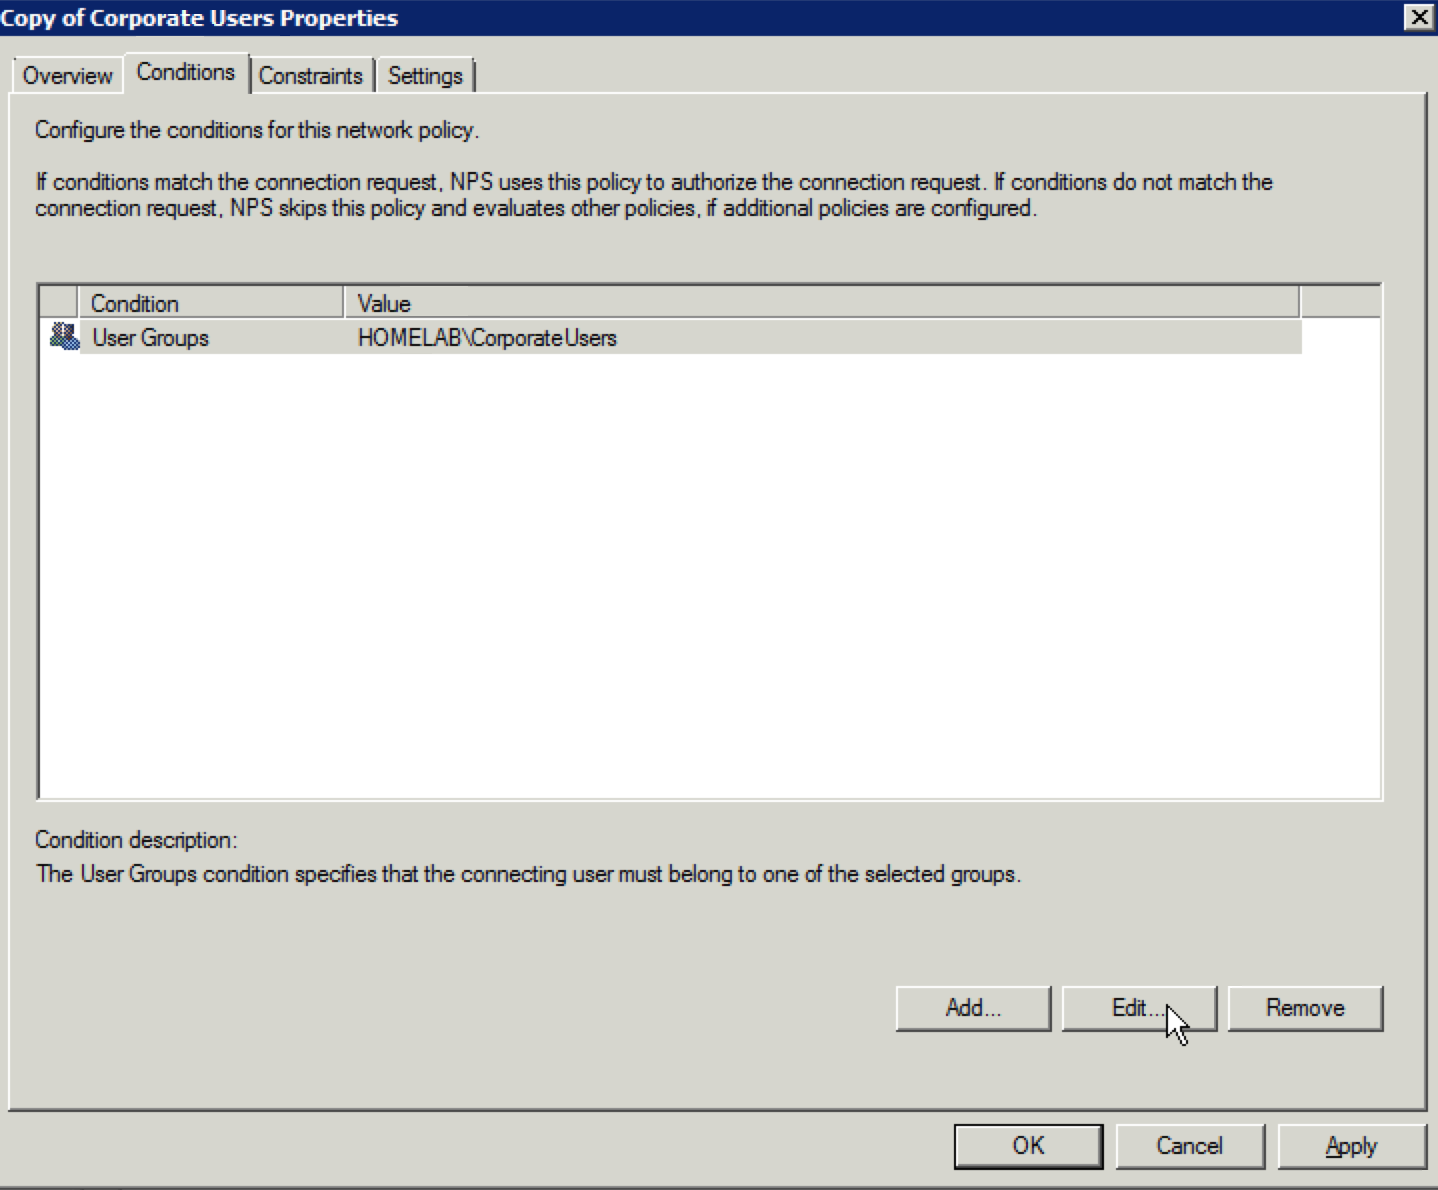
45. Select the “User Groups” condition and click on “Edit”.
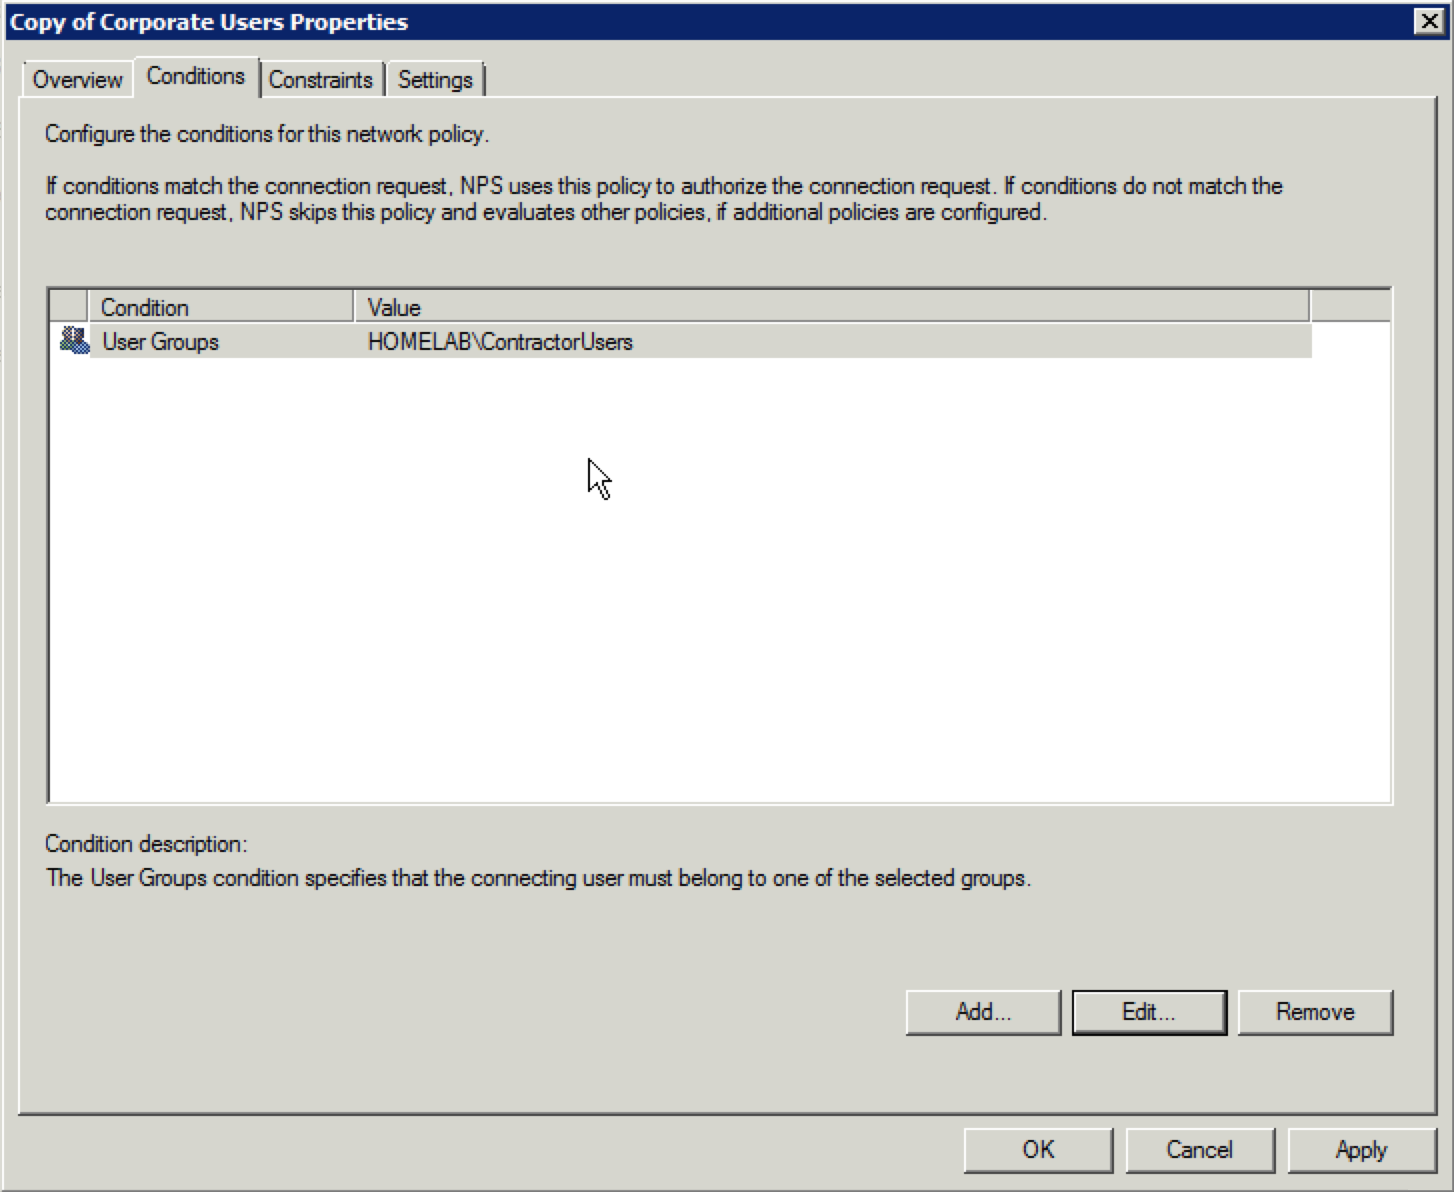
46. Change the user group to whatever it should be. In this example, the group is changed to “ContractorUsers”. Once the proper group is displayed, click on the “Settings” tab.
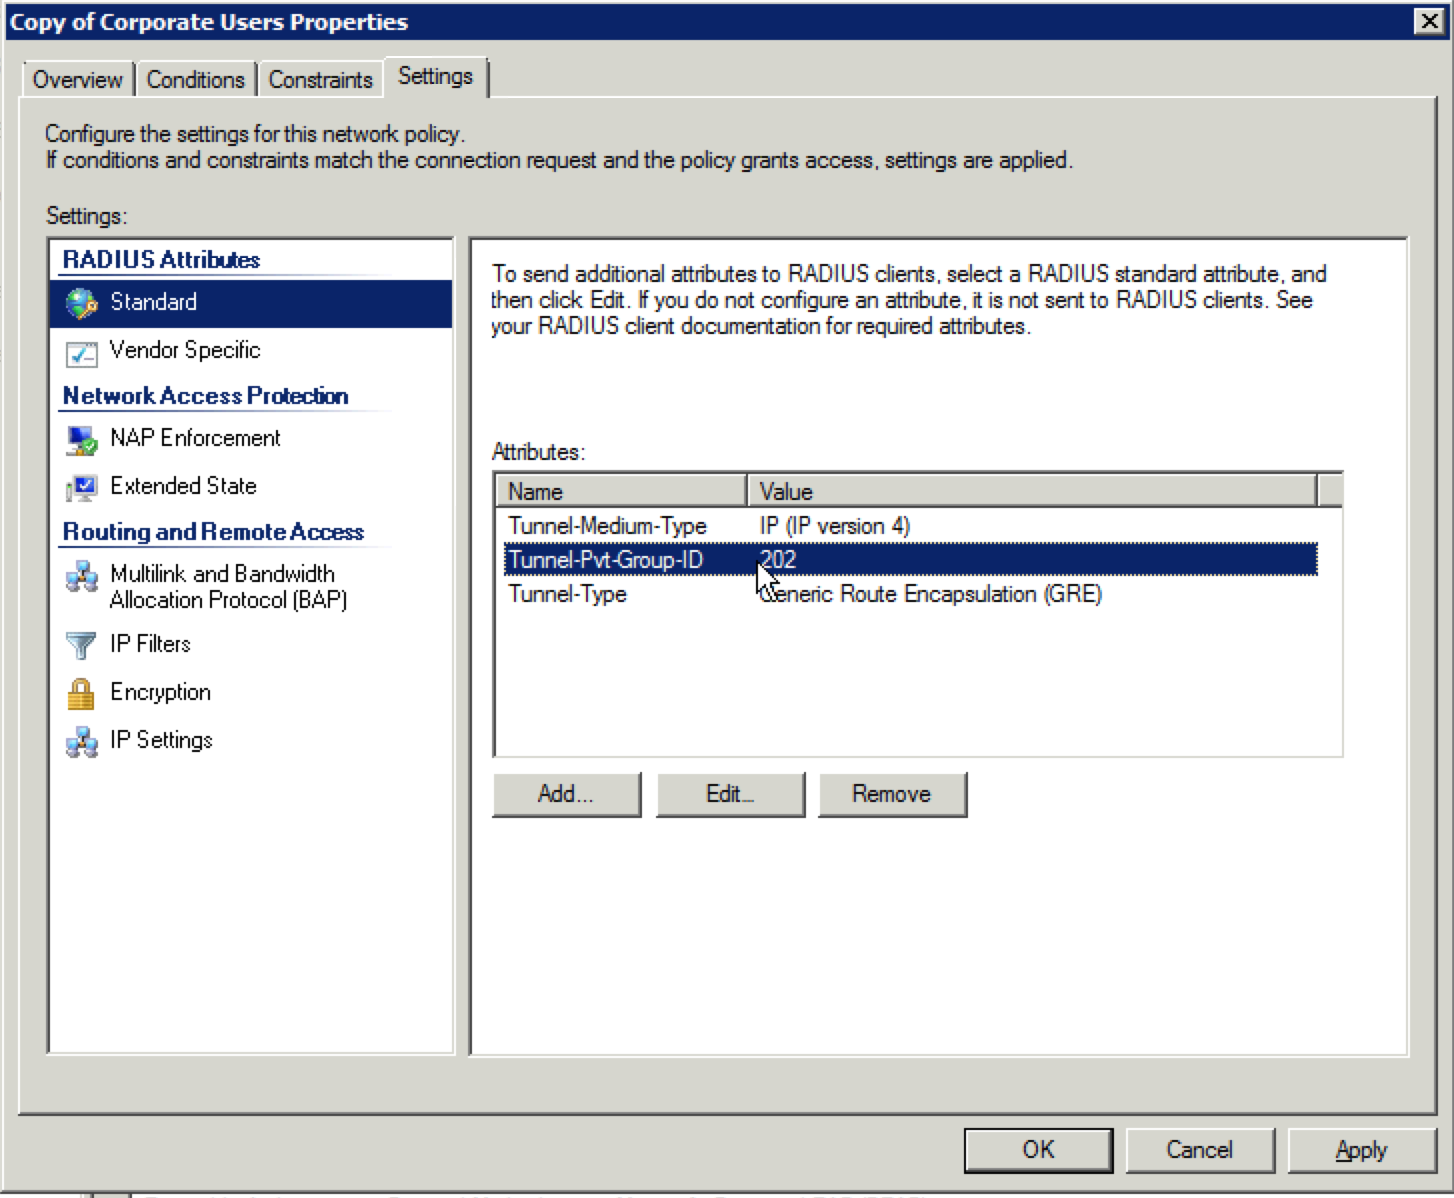
47. On the “Settings” tab, select the “Tunnel-Pvt-Group-ID” in the “Attributes” section and click on “Edit”.
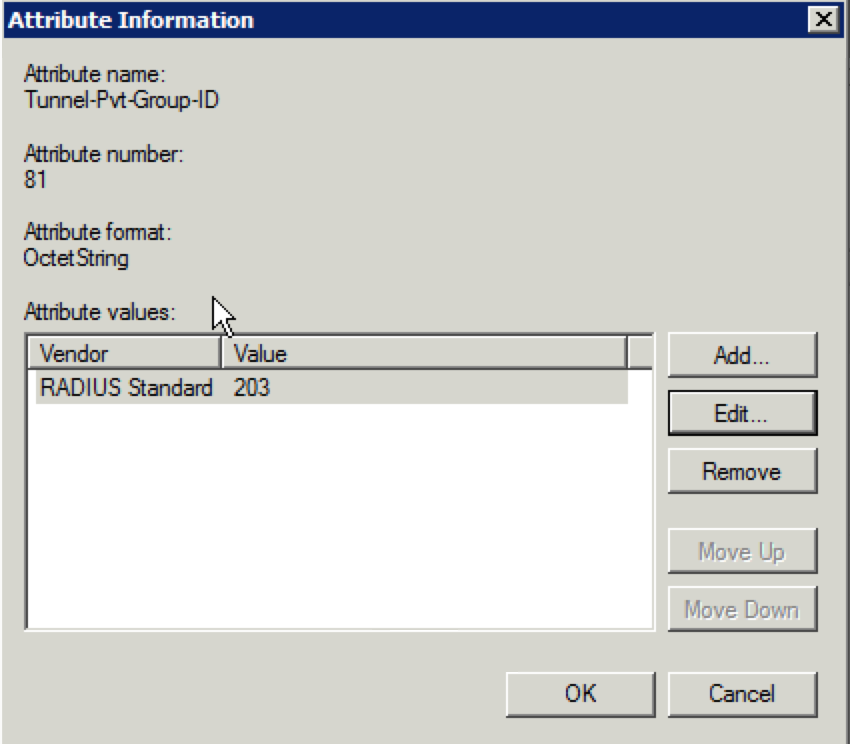
48. Edit the attribute by selecting it and clicking on “Edit”. Change it to whatever value is needed. In this example, it is changing from a value of “202” to “203”. Click on “OK” when the updated value is displayed.
49. Once that is done, you should be returned to the “Settings” screen. If everything looks right, click on “OK”.
50. You will be returned to the “Network Policies” screen in the main NPS window. Reorder the cloned policy and put it in the second position. It should look like this:
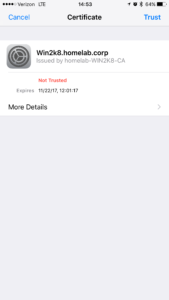
That’s all there is to it. You should be able to connect to the SSID and authenticate with Active Directory credentials. If you get a request to trust the certificate after typing in your username and password, don’t be too alarmed. Unless your certificate was issued by a certificate authority that your device trusts, that is going to happen. However, once you trust the certificate, that warning will go away. For example, here is what is displayed on my iPhone after successfully authenticating with a username and password for the first time:
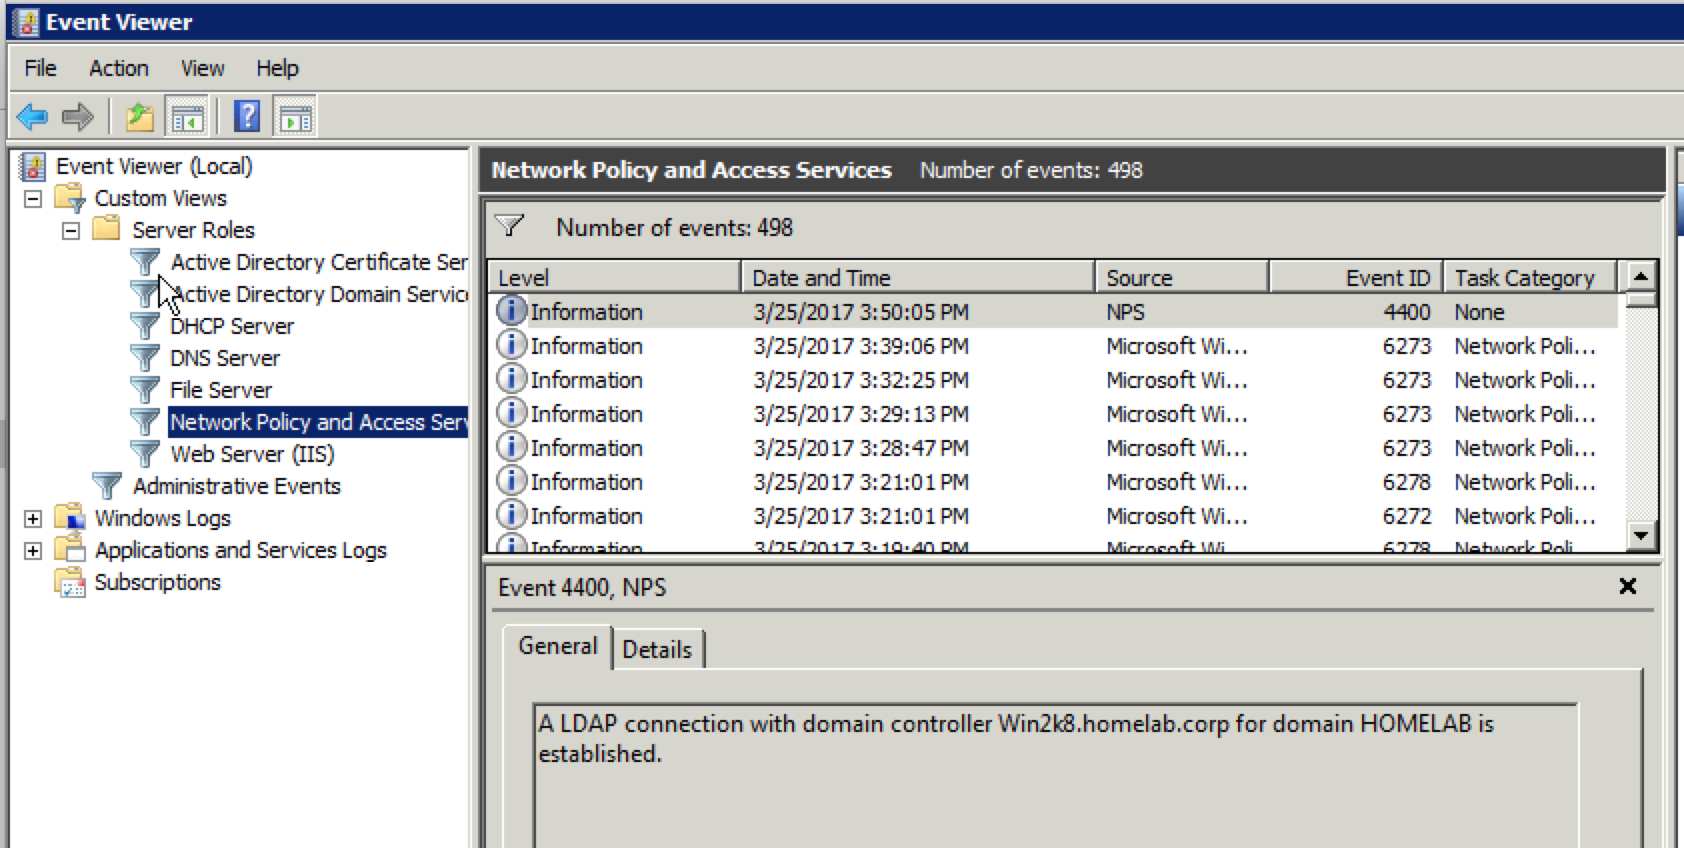
One final note with regards to troubleshooting. If you run into authentication issues, make sure to look at what is being reported in the NPS log. You can find it under the “Custom Views/Server Roles” within Event Viewer.
If you see any sort of access denied message, it is most likely an NPS configuration issue. If you don’t see any entry after authenticating(good or bad), it is probably an Aerohive configuration issue. Additionally, if you do see access granted issues, but the client still will not connect, make sure to check for MAC filtering or other firewall policies on the Aerohive side. They tend to show up as “incorrect username or password” errors on the device, even though that was not the problem. Ask me how I know. 🙂
Conclusion
Hopefully this will help with configuration of Aerohive APs and NPS. I need to reiterate that I am not an expert when it comes to Microsoft NPS. If you run into problems, feel free to leave a comment or ping me on Twitter(@matthewnorwood). I’ll try to help out if at all possible.


